
Follow this great bee slime recipe with your students this spring. This slime recipe is so easy and fun that the kids will be buzzing about it for days! It’s an excellent addition to your ultimate collection of types of slime.
Related: How to Make Slime
Just mention the word slime and you’ll see the children’s faces light up. That excitement is one of the many benefits of making slime with preschoolers. But, rest assured, making slime has so many other benefits and learning opportunities hidden within all of that fun!
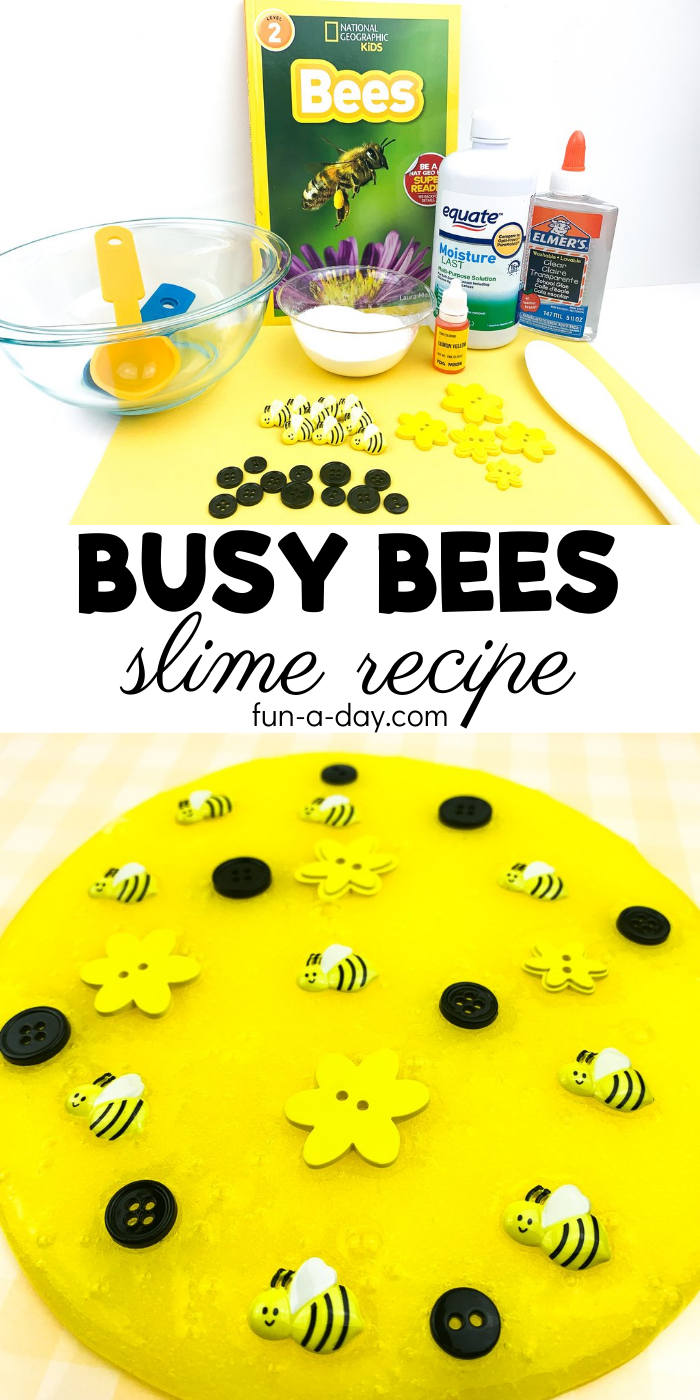
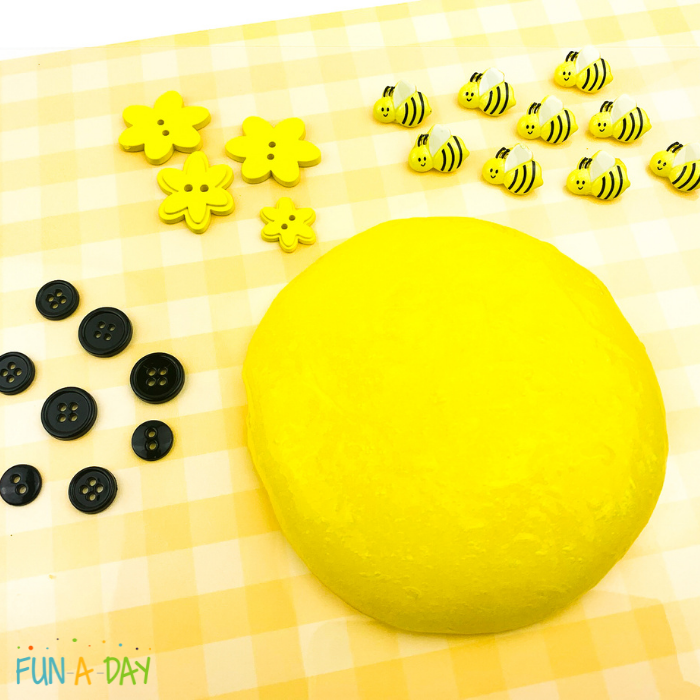
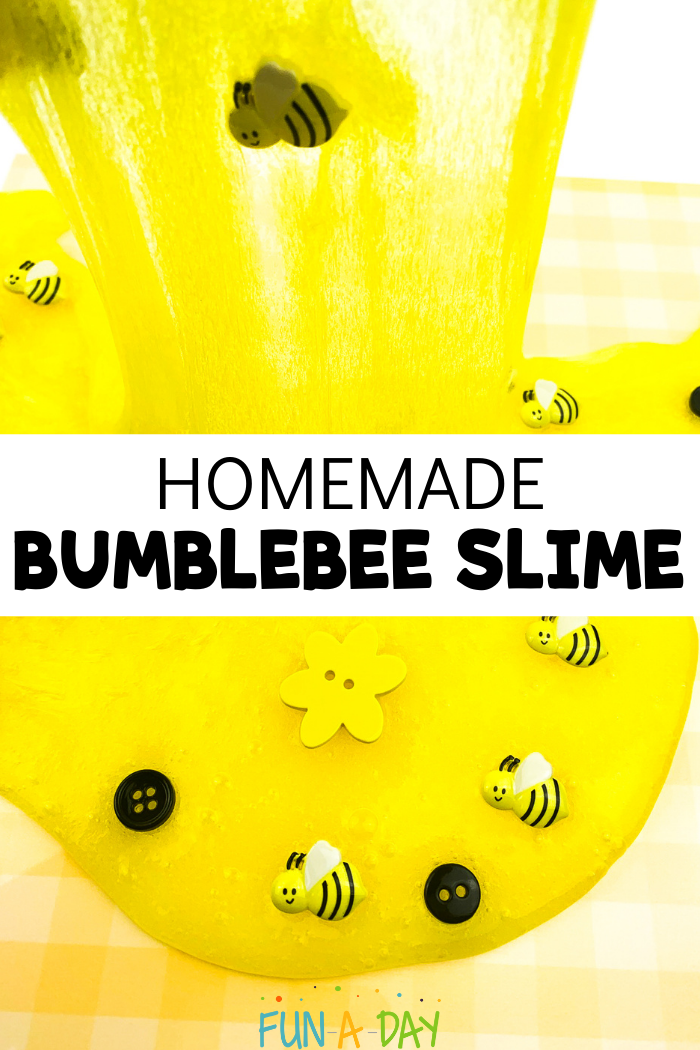
Now, this slime recipe is super simple and doesn’t take long at all. But, with the right materials, the students will get to interact with the slime multiple times in a variety of ways. We are including yellow food coloring, small plastic bumblebees, and black buttons for this particular recipe. An added bonus? The bee slime will fit in nicely with a variety of preschool themes like flowers, spring, insects, the color yellow, or just a simple bee theme! Either way, this slime is sure to make a buzz in any preschool classroom.
Bee Slime
As a preschool teacher, I’m sure you already know that most of the children who pass through our classrooms really thrive when they’re able to stay busy and expend all of their pent-up energy. And they frequently seek to explore the world through their senses. I just know that your busy bee little preschoolers are going to obsess over the truly immersive sensory experience of making bee slime!
Related: Spring Process Art Activities for Preschoolers
Slime Safety First
Making slime really is a science experiment. And, as such, there are a few safety guidelines to follow. First, just like every Fun-A-Day activity, this science experiment requires adult supervision at all times. I would suggest thoroughly washing hands before and after the activity. Next, watch for skin irritations. I’ve never seen a reaction from any of our slime recipes, but it’s best to practice due diligence. And finally, neither the slime nor any of the ingredients or materials used to make it should be ingested or put in the mouth.
Bee Slime Materials
I don’t know about you, but I work best when I have all of the materials lined up and ready to go before getting started with any activity. So let’s begin by gathering the ingredients for the bee slime.
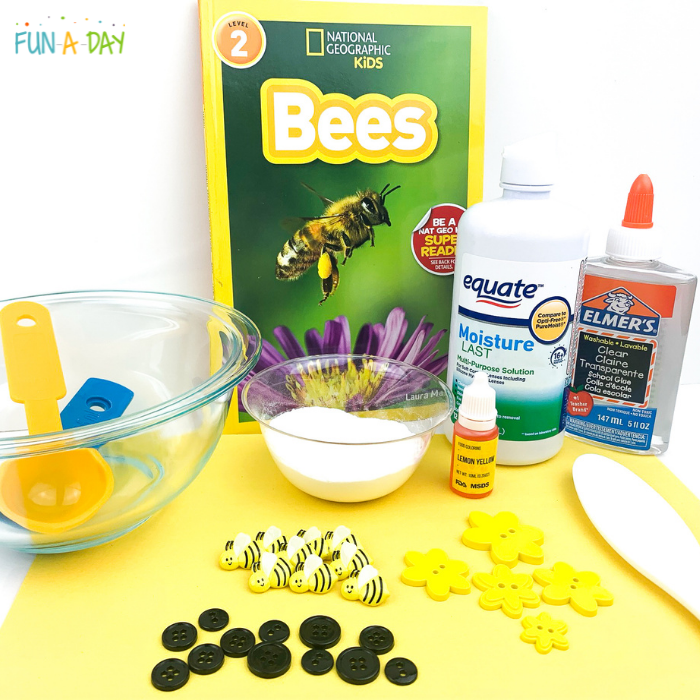
Here are the materials you will need to make the bee slime:
- 1 (5 oz.) Bottle of Elmer’s Clear Glue
- ½ Tbsp. Baking soda
- 1 Tbsp. Contact solution
- 10-15 Drops of yellow food coloring
- Bee buttons
- Flower buttons
- Black buttons
- Mixing bowl
- Stirring spoon
- Plastic mat for play time
- Book: National Geographic Kids “Bees”
Many of the ingredients for the slime itself are things that you may already have in the classroom or kitchen. And you may even be able to find some bee-themed manipulatives (we just used buttons). Maybe you have bee erasers or toys on-hand. Throw those in the mix instead! Sometimes, the most creative outcomes are achieved when you use whatever materials you’ve got on hand.
Here are some other material ideas:
How to Make the Homemade Bee Slime
Before we begin making the bee slime, I think it’s important that the children have some background knowledge about bees. Books can help with that! Read a non-fiction bee book during circle time, and be sure to leave some time for your students’ questions afterwards.
Armed with all of the materials and, perhaps, some newfound knowledge about bees, it’s time to get started. Making slime is surprisingly easy by following a few simple steps. Let’s begin.
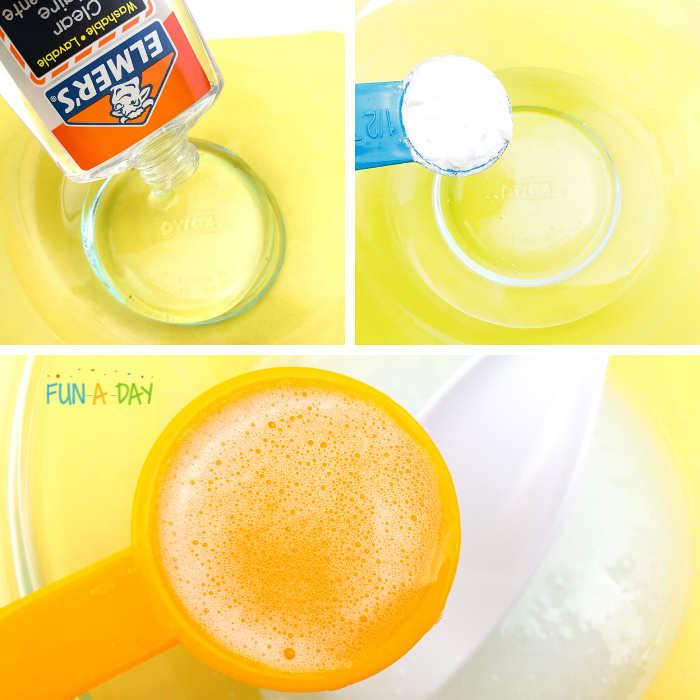
First, pour the entire bottle of glue into the mixing bowl. If you’re like me and have a large container of glue, just measure out 5 ounces and add that to the mixing bowl.
Next, add the ½ tbsp. of baking soda. Stir this mixture until well combined.
Then, pour in the tablespoon of contact solution and stir until the mixture becomes stretchy.

Now, the next step is where the magic happens – so be sure not to skip it. Knead! Knead the mixture for a full 2 to 3 minutes until it reaches your preferred slimy consistency. If it continues to be sticky, try adding an additional ½ tbsp. of contact solution.
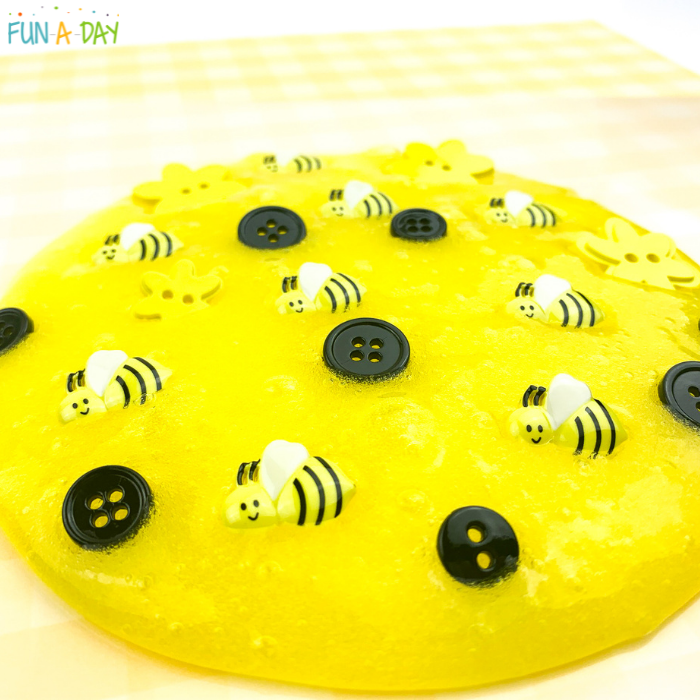
At this stage, the concoction should look and feel like slime. And now it’s time to turn the translucent slime into bee slime by adding yellow food coloring. Mix in 5 or 6 drops of food coloring until the slime turns yellow. You might have to add a few more drops, depending on your color preference. Now it’s ready for the kids to play with!
Playing with the Bumblebee Slime
Now that the yellow slime is ready, place it on a work surface. This can be a plastic mat, a tray, or directly on an easy-to-clean table. Make sure the bee buttons, black buttons, and flower buttons are close by.
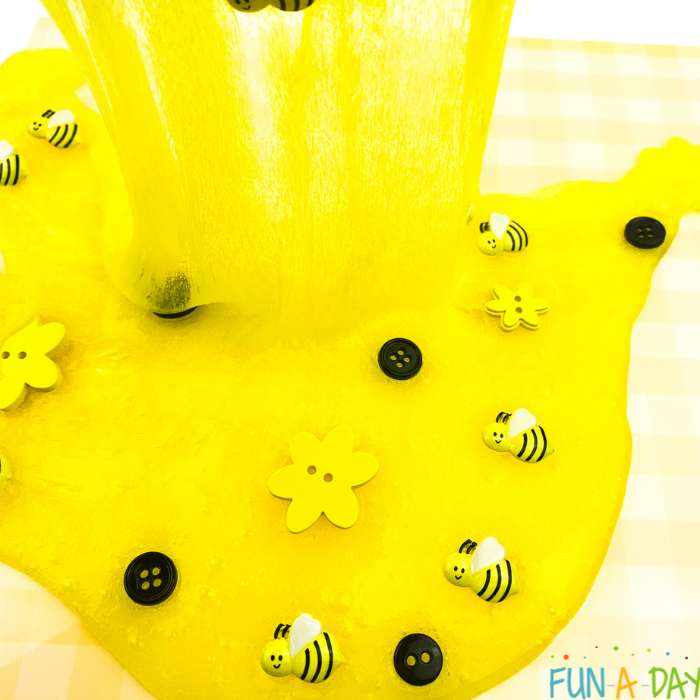
This is where the real fun begins! Let the children explore the slime and the buttons. It won’t be long until the buttons make their way into the slime. And if the children want to explore the materials separately, that’s okay too!
Kids will interact with the bee slime in a variety of ways! Some will focus on stretching it as far as it can go. Some children might try a science experiment by testing the limits of the slime, stretching it until it breaks apart. Others will form the slime into various shapes and watch it melt back to its original form.
Related: Bee Sensory Bottle
Other children will be more interested in using the manipulatives you’ve included in the activity. They might pretend that the bees are busy making honey. Alternatively, they may decide to count, hide, sort, or make patterns with the buttons in the slime.
Regardless of how the children interact with the slime, they will certainly get their daily dose of sensory input and learn a lot along the way!
How will your students use the bee slime? Please let us know in the comments below!
The Science of Slime
Slime recipes check the boxes for both science and math activities for preschoolers. As with every recipe, the kids will get to practice math concepts as they make the slime. They will be introduced to various measuring tools and get to practice using them correctly. They can also practice adding, counting, or any number of other math concepts.
The science component comes in when the children get to observe and identify the properties of various materials. They can hypothesize what will happen with the addition of each ingredient, what the slime will look and feel like, and how much slime will be made. Then, they will run the experiment by making the slime. Finally, students will observe and identify the properties of the slime and compare that with their original hypotheses. I am sure many of your students will fall in love with the magic that is slime, and subsequently grow a fondness for science itself! That’s a major plus in my book!
Done-For-You Preschool Resources
Between managing a classroom full of energetic young children and the hours of lesson planning, teaching preschool can be extremely time-consuming. Fortunately, there are options to help lighten that load. That’s where Preschool Teacher 101 comes in! We have a wide variety of themed preschool resources available for teachers like you.
Click on the images below to learn more about some of our incredible spring-themed resources!
If you like these products, head over to our website to join the waiting list for The Pack from Preschool 101!
The post Bee Slime Recipe to Make with Kids appeared first on Fun-A-Day!.