If you typically send out personalized Christmas cards during the most festive time of the year, or if you have just decided to start this tradition, you have come to the right place. The first thing you have to do is decide on the Christmas card design.

There are many fabulous ideas out there, especially when it comes to buying Christmas cards from your local shop. However, it can quickly become expensive to purchase dozens and dozens of cards for your family, friends, and co-workers. Instead, you should consider making your own Christmas cards. Besides being a fun activity for the entire family, it’s also more meaningful.
We put together a list of numerous Christmas card ideas that you should explore to find the one that works best for you. From watercolor and paper to felt and rhinestones, there are so many beautiful ideas out there.
Best Christmas Card Ideas to Try in 2021
Here are the top Christmas card ideas that you should try out this year:
1. Easy Christmas Card Ideas
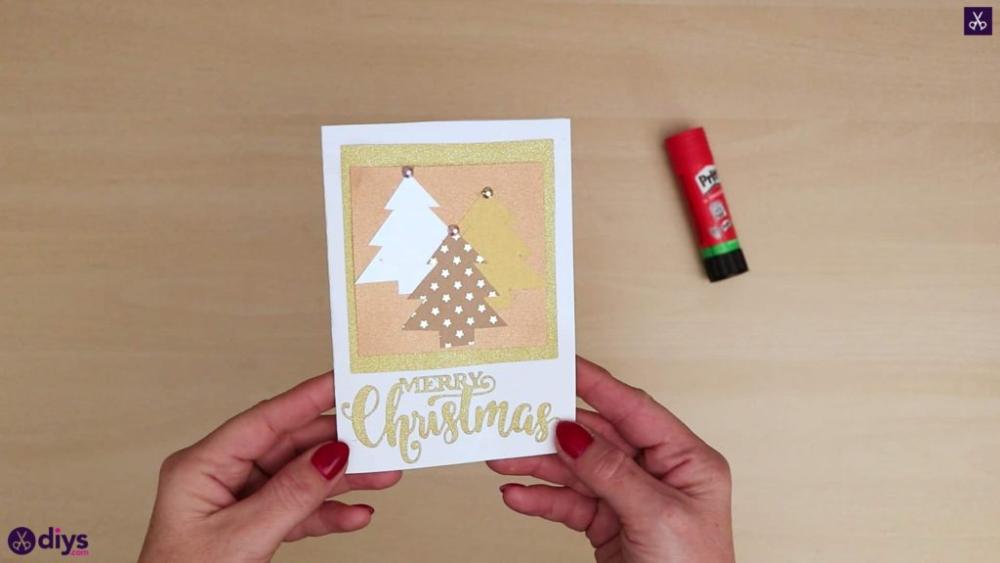
You can quickly create a Christmas card with a tree by layering different colors of paper. It’s simple and totally inexpensive. The best part about it is that you can develop your own design according to your preferences since there’s no such thing as a typical Christmas tree.
For this Christmas card idea, you need Christmas stickers, three types of decor paper (gold, bronze, patterned), a glue stick, white cardstock, scissors, and rhinestones.
Start by folding the white cardstock into a card. You can then add a bronze layer, draw a Christmas tree and cut three tree shapes from gold, white and patterned paper, as well as cut a piece of the gold paper and set it as the background on the card cover.
Next, you can add the greeting message like Merry Christmas, glue the bronze to the gold background, attach the trees, and make the finishing touches by adding the rhinestones.
Feel free to explore the complete instructions on our website! There’s also a video tutorial put at your disposal.
2. Threaded Ribbon DIY Christmas Cards
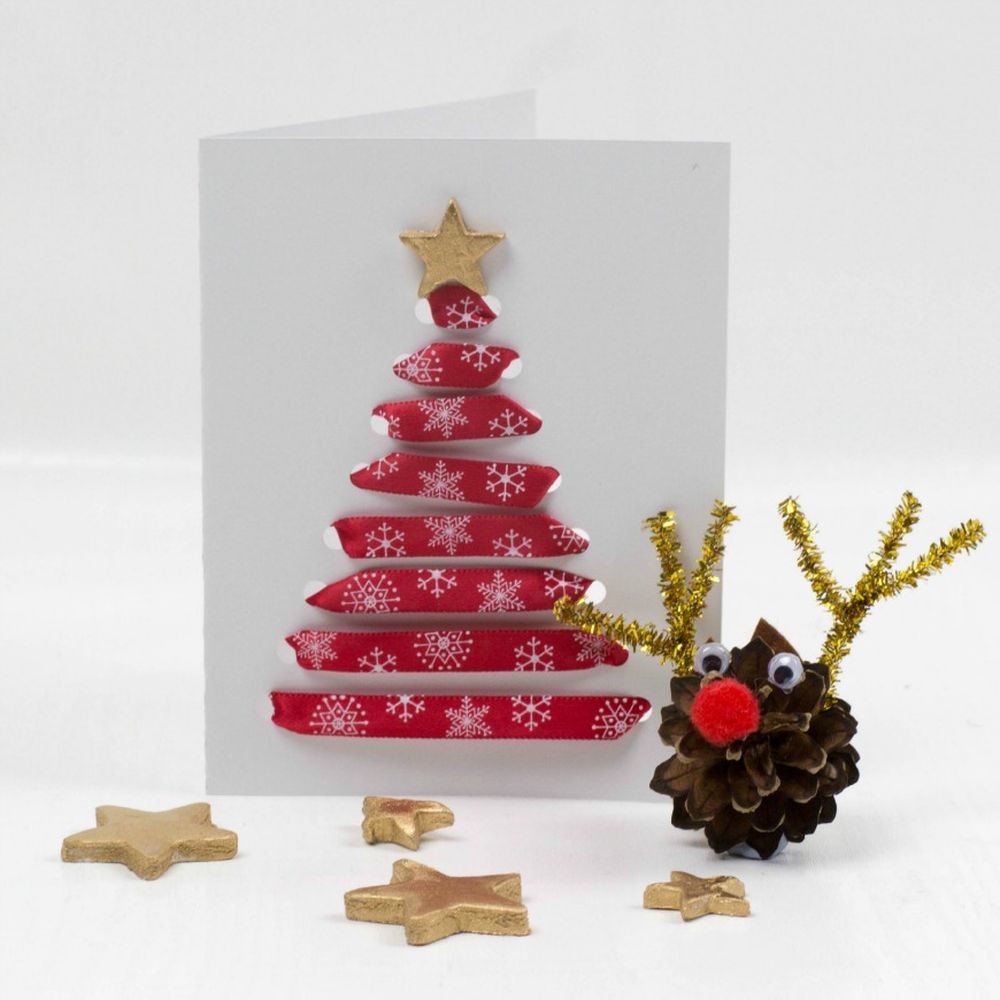
Here is an elegant idea for a DIY Christmas card that we think you will love! It’s simple, approachable, and cheap – a threaded ribbon Christmas tree. It would make an excellent card to send out to your extended family during the most festive time of the year.
As far as materials are concerned, you need scissors, cornflour dough stars, a ribbon, a craft hammer, glue dots, a hollow punch set, foam glitter stars, and a white card.
The idea is elementary: punch the holes on the white card to create the shape of a Christmas tree. Then you can begin threading by adding the ribbon through the holes horizontally. It’s as easy as sewing! Don’t forget to add the cornflour dough star as the tree topper!
To check out the complete tutorial, be sure to visit Mum in the Mad House!
3. Popsicle and Pipe Cleaner Trees – Homemade Christmas Cards
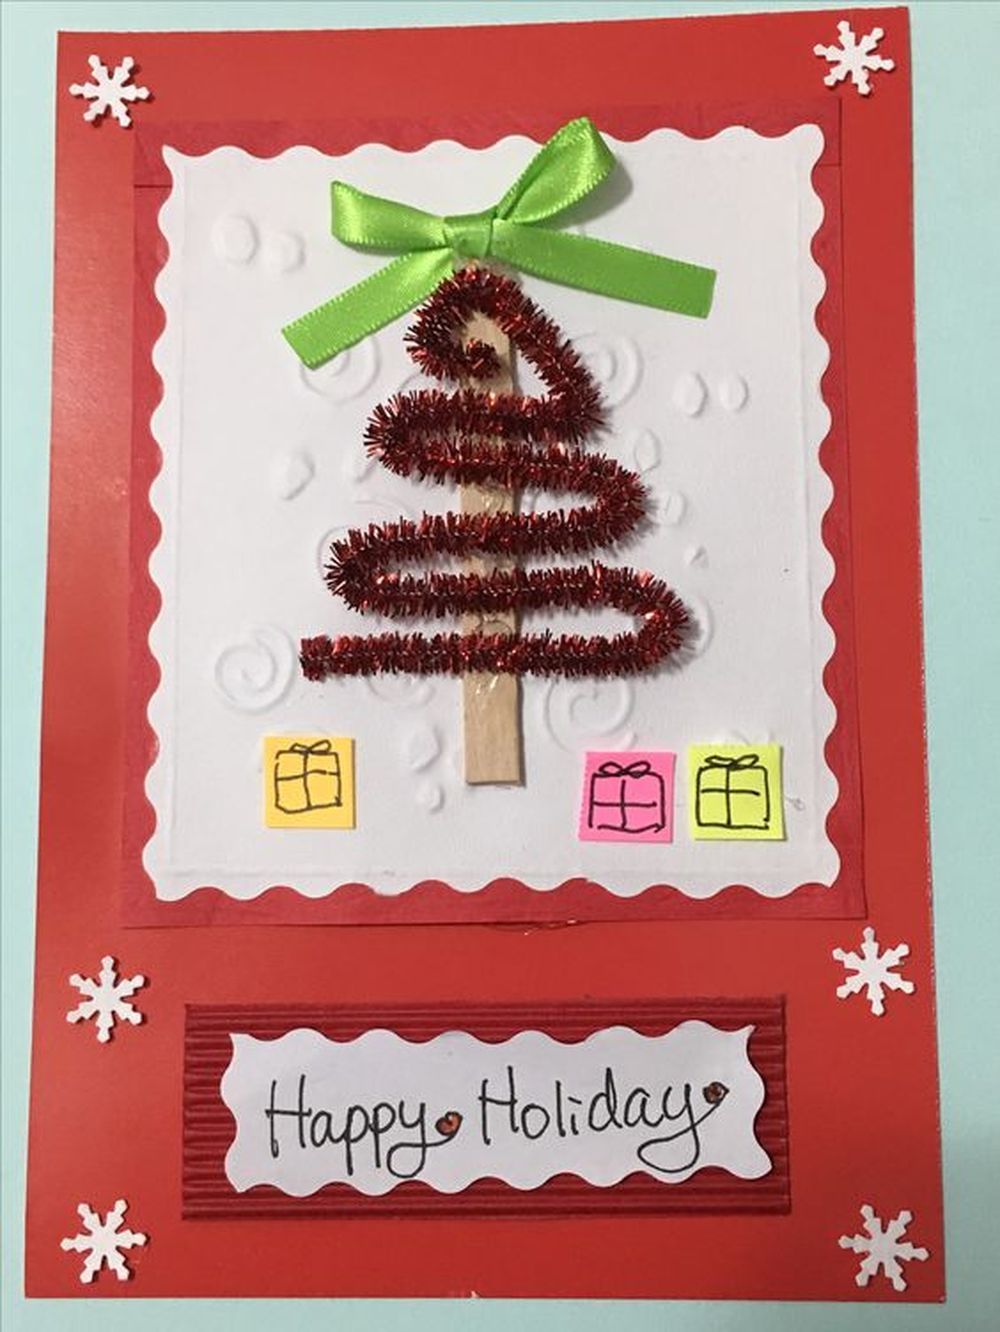
If you’re looking for straightforward and inexpensive homemade Christmas card ideas, these popsicle and green pipe cleaner cards are the way to go this year! You can make them in bulk, and they work well for individuals or families.
You need wire cutters, cardboard (you can use cereal boxes), popsicles (the white ones), metal washers (one per card), green pipe cleaners (three per tree), a hot glue gun with glue sticks, gold glitter or scrapbook tape, a red marker, skinny ribbon (one yard per tree) and scissors.
Start by cutting your popsicle in half vertically with a serrated knife. Then you should create the branches by bending the top three-fourths of each stick into a V shape. Once you’ve made the branches, you can cut your wire washers in half to create the base for the tree.
Next up, use the hot glue gun to attach the sticks at their bases by overlapping them. Before gluing, make sure to line up the tops of all the broken popsicle halves.
You should then add green pipe cleaners by bending them around any gaps between branches and adding a dab of glue every so often until it’s fully covered. Make sure that you don’t cover up where you will be attaching your cardboard trees!
The trees will have a front and back, so do this on both sides before moving forward. Cut slits in both ends of two different popsicles of the same length, and slide them over your cardboard trees to create a cylinder. Take the remaining two popsicles and cut them so that you have one long slot. Slide those onto your cardboard as well.
Take your ribbon and measure out enough to hang from the front of one popsicle tree to the other, plus an extra two inches at each end. Once it’s cut, tie a knot around one end before using a dab of hot glue on the backside to attach it in place on both trees. You can then use a red marker to write Merry Christmas or another positive message on them!
For more inspiration, check out this Pinterest post, courtesy of Paper Origami & Crafts!
4. Santa Hat Christmas Card Designs
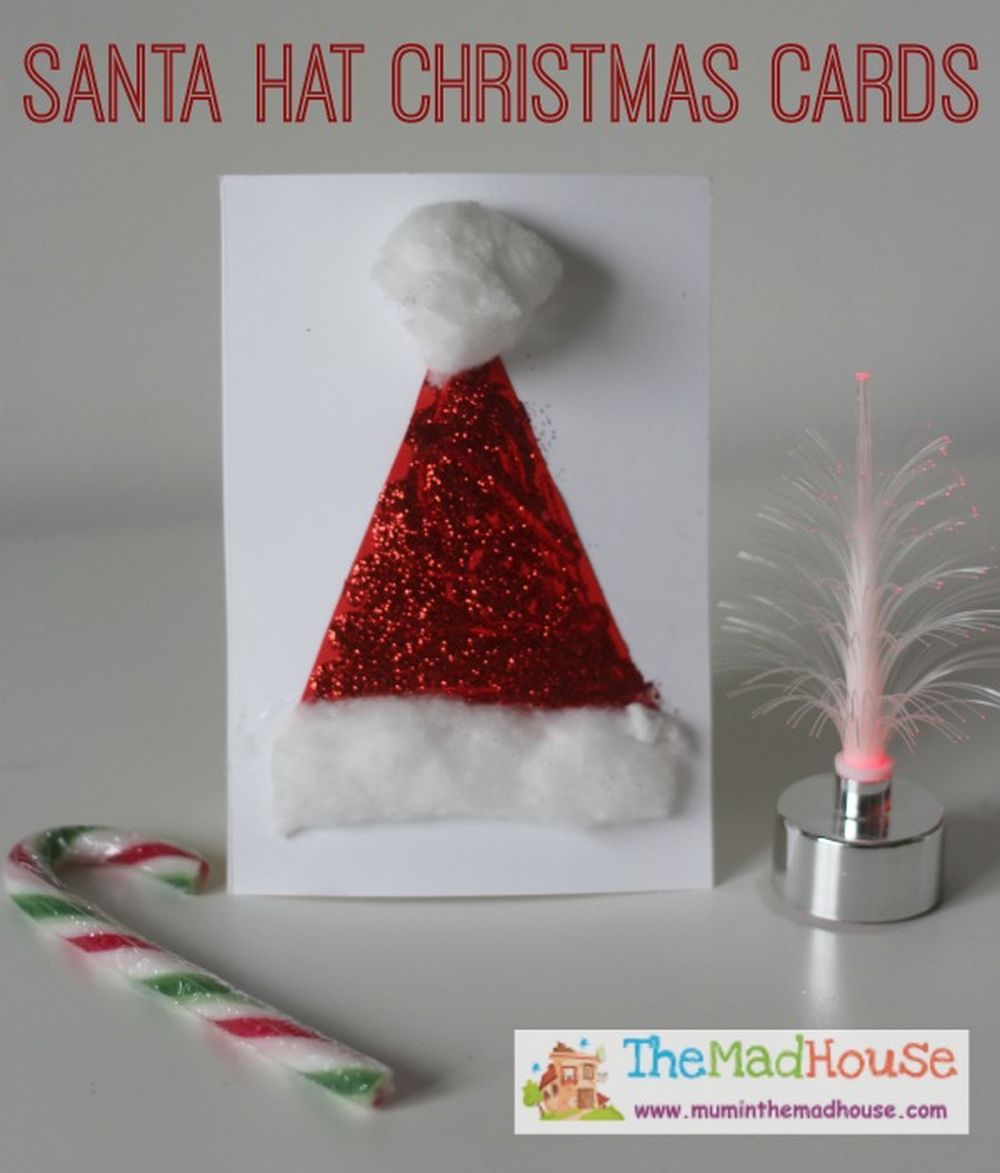
You can’t go wrong with Santa Claus’ hat when it comes to homemade Christmas card designs! It’s glittery, stylish, and guaranteed to make a statement!
Start by taking your card stock and cutting out the shapes of hats, mouths, eyes, noses, and scarves made from fabric. You then fold them into their appropriate positions before gluing each feature to its corresponding shape.
To attach hats to the front of the card, first cut a slit at the top edge of each one. Then run an 8-inch piece of ribbon along both edges through these slits so that there is enough on either side to tie it in place on the of your cards. Cut two notches beneath the hat to allow it to fit against the card without covering up your message.
The nose will serve as a stand for your decorative buttons, so add a dab of glue to one end and stick them on. Attach the scarf by running a line of hot glue along its entire length before folding it under itself and adding ribbon loops through each edge to hold it in place until it dries.
Alternatively, if you prefer a more straightforward approach to make a Santa hat for a Christmas card, we suggest looking over the Mum in the Mad House tutorial. It involves red paper, blank cards, cotton wool balls, glue sticks, tacky glue, and red eco glitter.
5. Paper Snowman Christmas Card Making
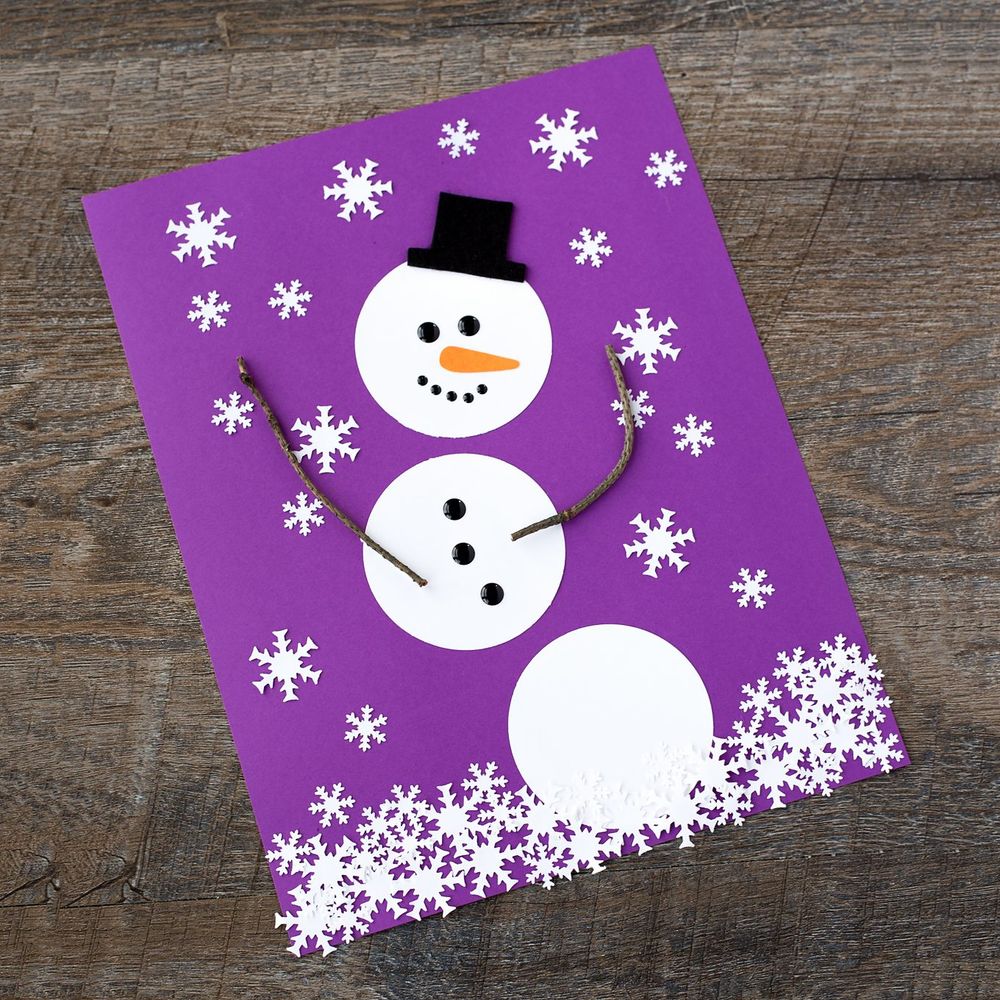
Building a snowman is a classic holiday activity, so you can use this idea and run with it when it comes to Christmas card making. Specifically, you can turn a paper snowman into the focal point of your Christmas cards to get everyone in the Christmas spirit!
For this craft, you need a snowman template. You can either draw it on your own or find an image online that you like to download and print. Start by printing out three copies of each template. Cut them out before tracing onto red construction paper and cutting them out again to bisect the shapes vertically.
Next up, fold over two opposite edges of one piece, aligning it with the center crease you just made. Take another slice and do the same thing while attaching both pieces along the folded flaps. Repeat this step once more until all four components are connected to make a snowball. Now you can unfold it and set it aside for later use!
Starting from the bottom up, pop a cotton ball onto the larger end of your snowball before stacking two smaller ones on top. You can add facial features such as buttons or circles cut out from construction paper before attaching one to the front and back using a dab of hot glue.
For more inspiration, check out an alternative tutorial created by Fireflies and Mudpies!
6. 3D Paper Tree – Handmade Christmas Cards
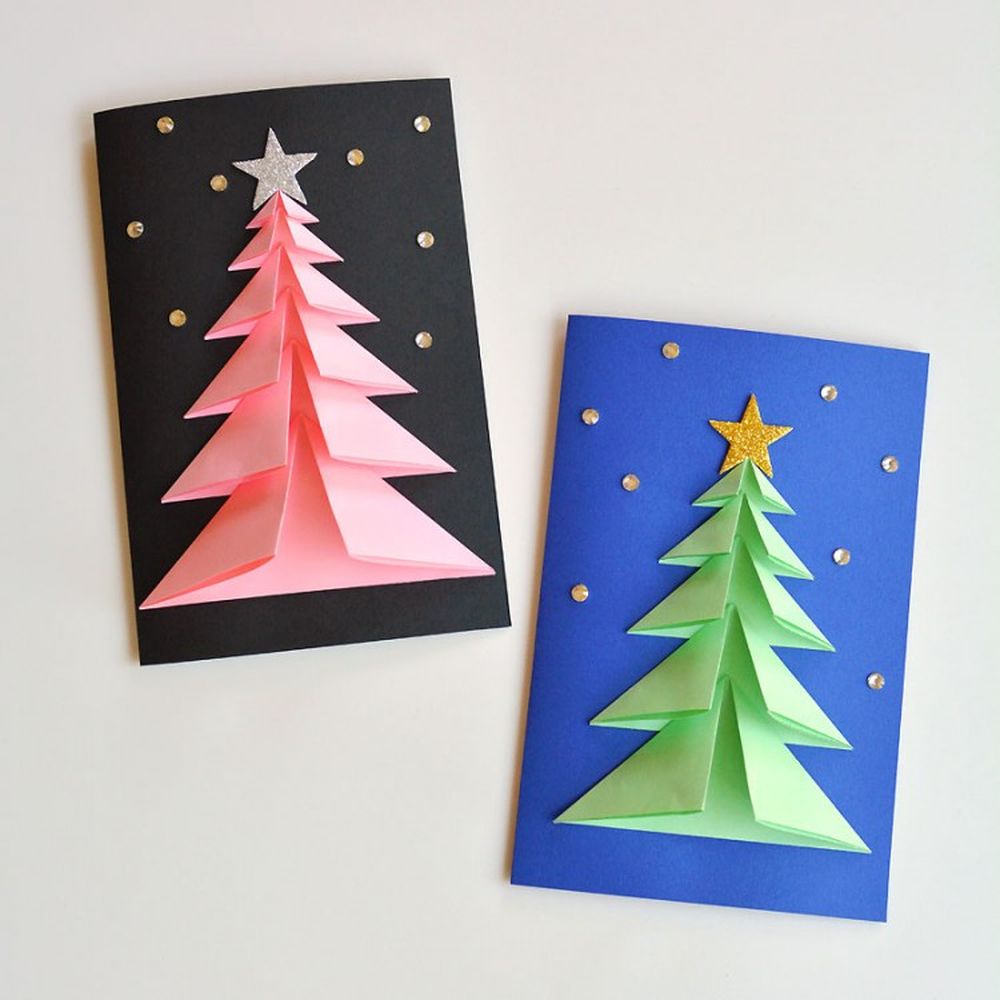
Here is another idea for a handmade Christmas card that involves paper trees. However, this one has a unique twist that makes it stand out from the rest: it’s 3D!
Start by taking your white paper and tracing a star shape at its center. Cut through the traced edge to split it into two identical pieces before cutting four slits on each of them to create tabs you can fold down. After folding each tab downward, bring together all eight pieces to form the middle part of your 3D tree.
Now take six more pieces of paper and do exactly as described above except for triangular shapes instead of stars. Once folded down, attach them around the perimeter of your original eight triangles, so they create a dome shape. This is the base of your 3D paper tree!
The next step is to stack three pieces of colored construction paper so that they look like a pyramid. You can bend down all four tabs on its top side, then adhere them together to form an octagonal shape with eight sides. Twist this piece so it looks like a candy cane before attaching it to the middle of your 3D paper tree!
You can also check out the instructions provided by One Little Project.
7. Pop-Up Rudolph Card – Christmas Card Ideas for Kids
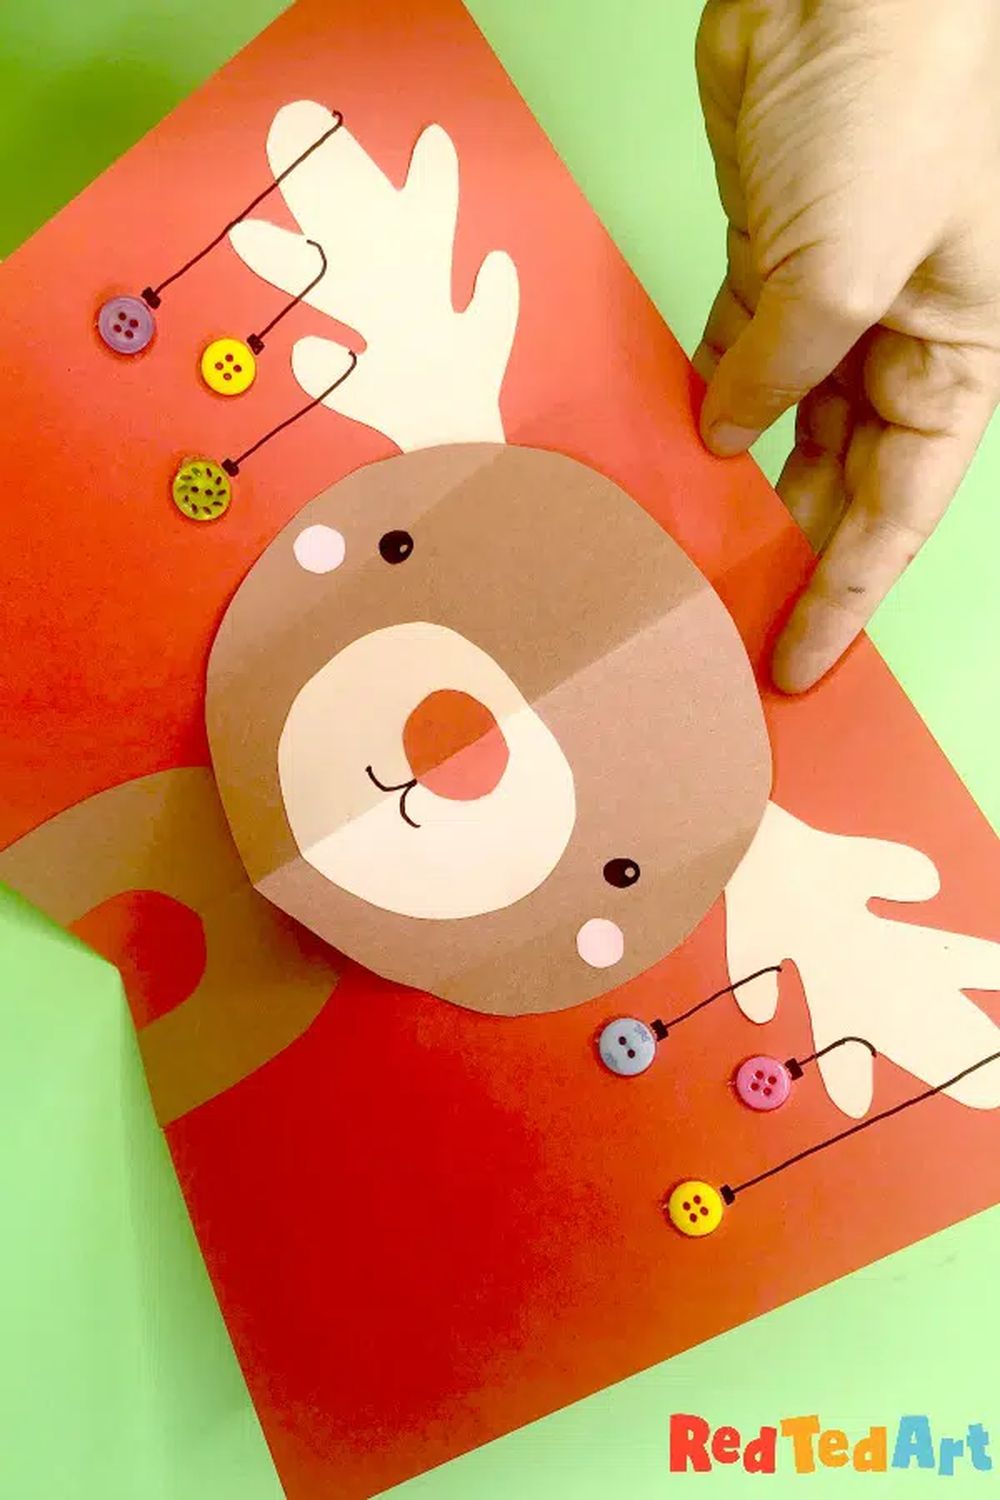
This pop-up Rudolph card is a fun and easy Christmas card idea for kids. It’s basically a pop-up book, and your little one can make it on his own at home with a bit of help from you.
Start by printing out the template sheet on dark green or black paper instead of white. You will also need to print three copies of each piece since you will be assembling the pop-up reindeer from a total of nine pieces of paper. Cut them before making the fold lines and trace each cut edge with a pencil to ensure they come together tightly when assembled.
For this last part, we recommend that an adult intervenes since hot glue guns get extremely hot. To attach these triangular pieces together, start by folding down the front and back flaps of one piece before applying a thin layer of hot glue to the middle surface.
Repeat this step for two more pieces, then attach four into a square shape while adding the remaining triangle to the opposite side. Bend all five tabs outward before attaching them to your 3D pop-up reindeer.
For more ideas on making a pop-up Rudolph card, be sure to visit Red Ted Art!
8. Popsicle Stick Snowmen – Cute Christmas Cards
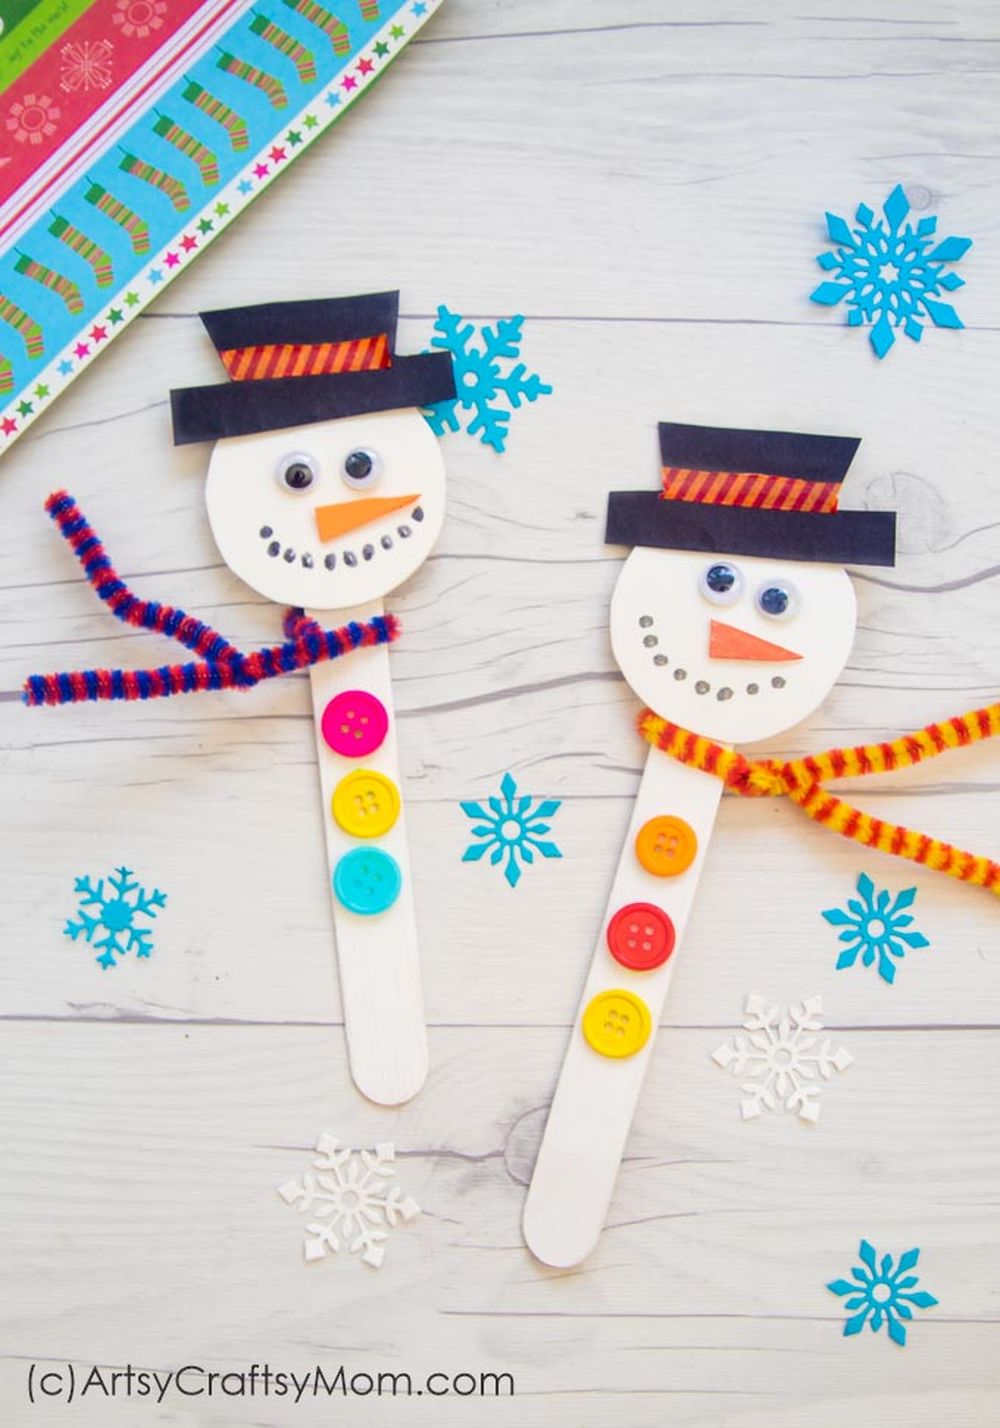
This popsicle stick snowman craft is a cute Christmas card idea for kids. It can be done using recycled materials, so it’s eco-friendly too!
First, take six popsicle sticks and glue them together to form the base of your snowman. For the next step, gather all three pieces of your popsicle stick snowman, including its body, hat, and head with buttons.
Now cut fabric or felt circles for eyes before gluing everything into place. You can decorate this part further by cutting off strips from black construction paper before turning them into arms.
Just like how you would attach something with Elmer’s glue or hot glue, apply a thin layer of both on each point where the parts meet before attaching them together.
For more ideas on making a popsicle stick snowman, hop over to Artsy Craftsy Mom!
9. Pop-Up Tree – Funny Christmas Card Ideas
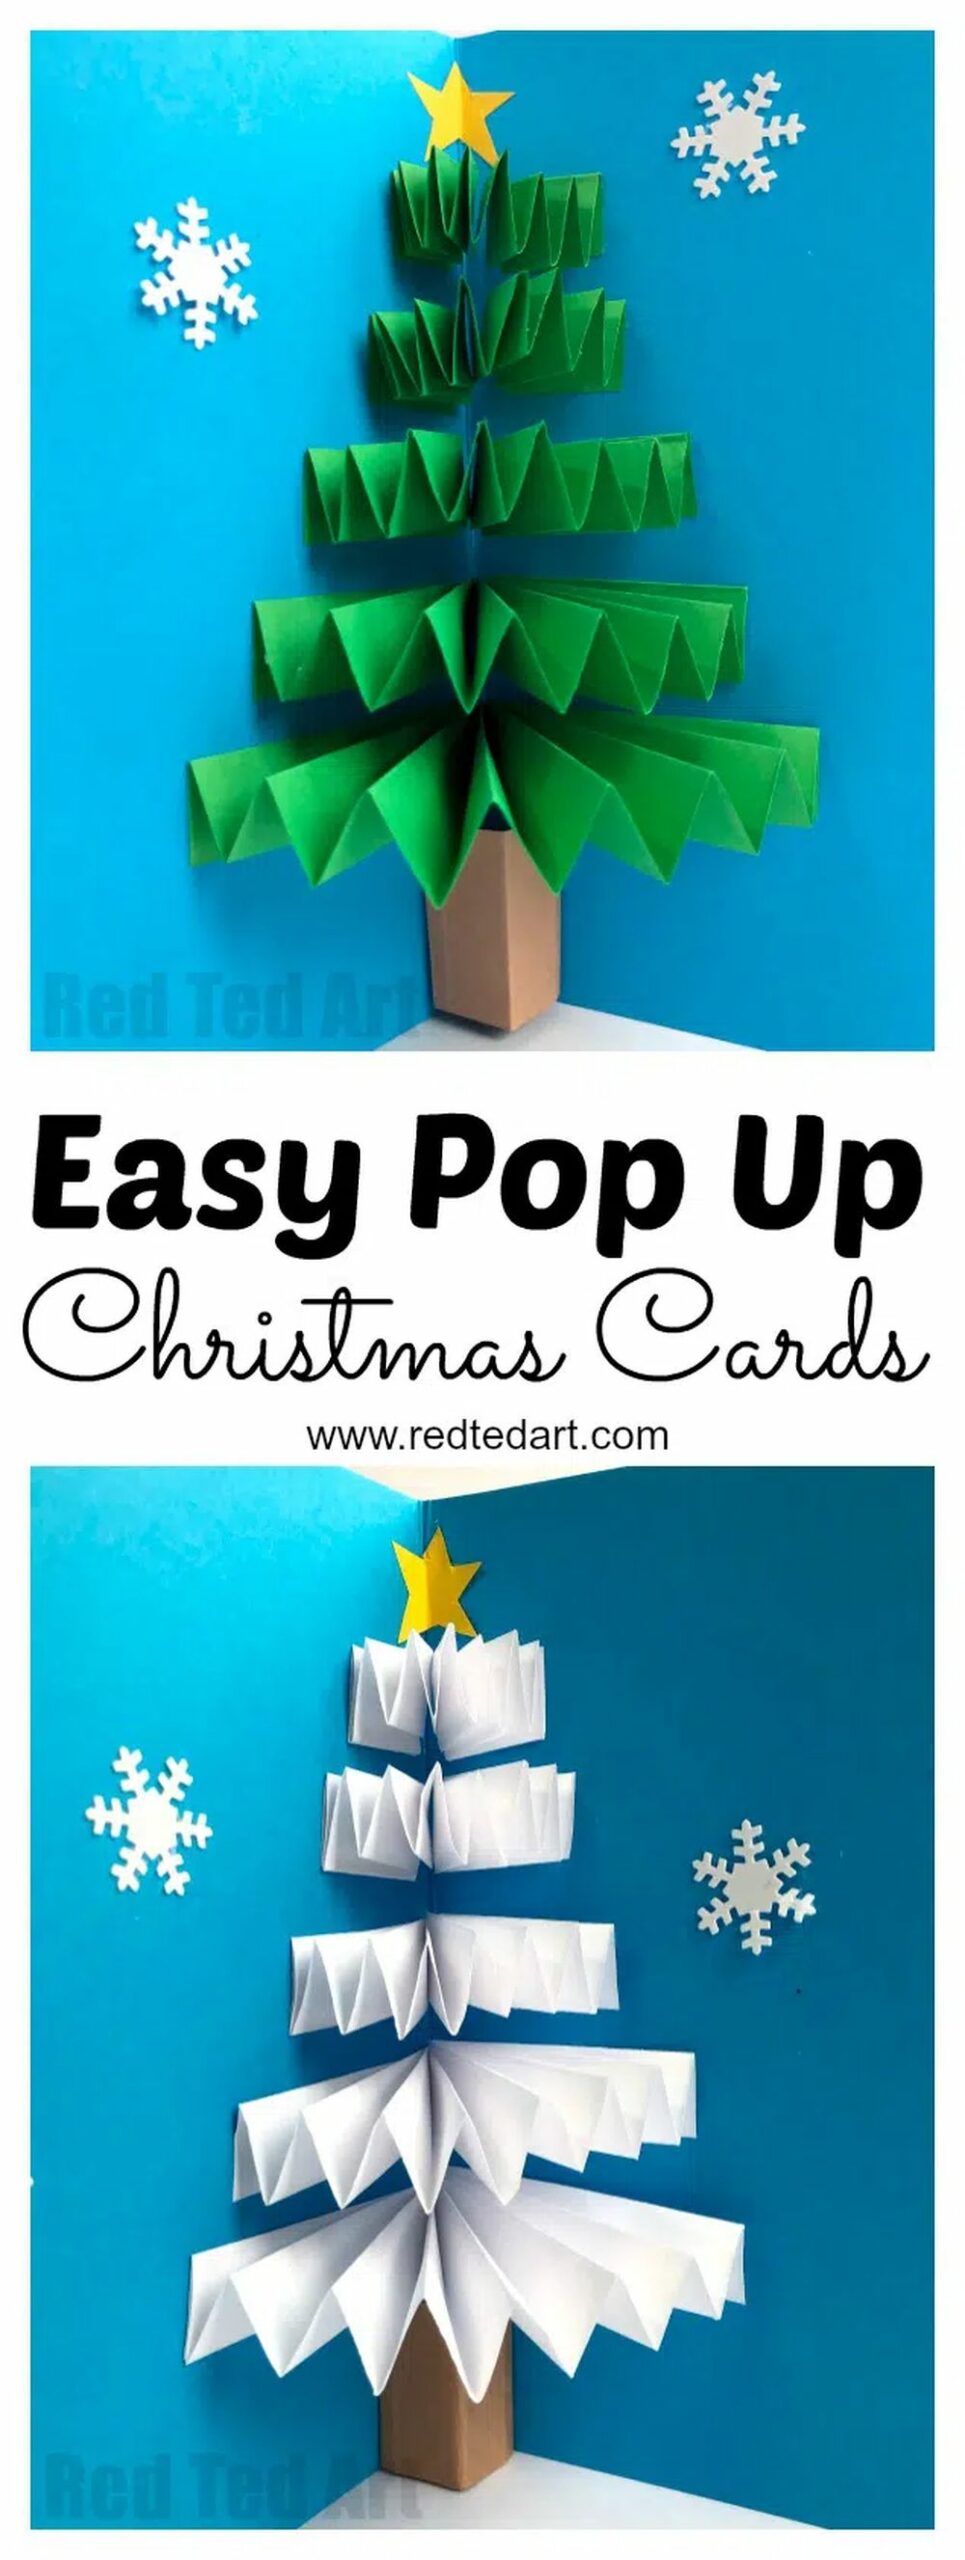
This pop-up tree is a cool and funny card idea for Christmas. Besides, you can effortlessly make it from the ground up, as well as have your kids join in for fun.
To make this simple 3D card, all you need are three pieces of paper to use as your base. Trace your hand on a sheet of paper before cutting through the middle finger and pointer finger to split it into two identical pieces of paper. You will also need to trace one half onto another piece of paper to have three total traced hands in total.
Take your green construction paper and glue one hand shape at its center before folding down its five tabs. Cut slits across each one to fold the tabs downward, then attach all six pieces to complete your 3D pop-up tree.
For more ideas on making a pop-up Christmas tree, be sure to check out Red Ted Art!
10. Moose with Hanging Ornaments – Christmas Card Ideas Drawing
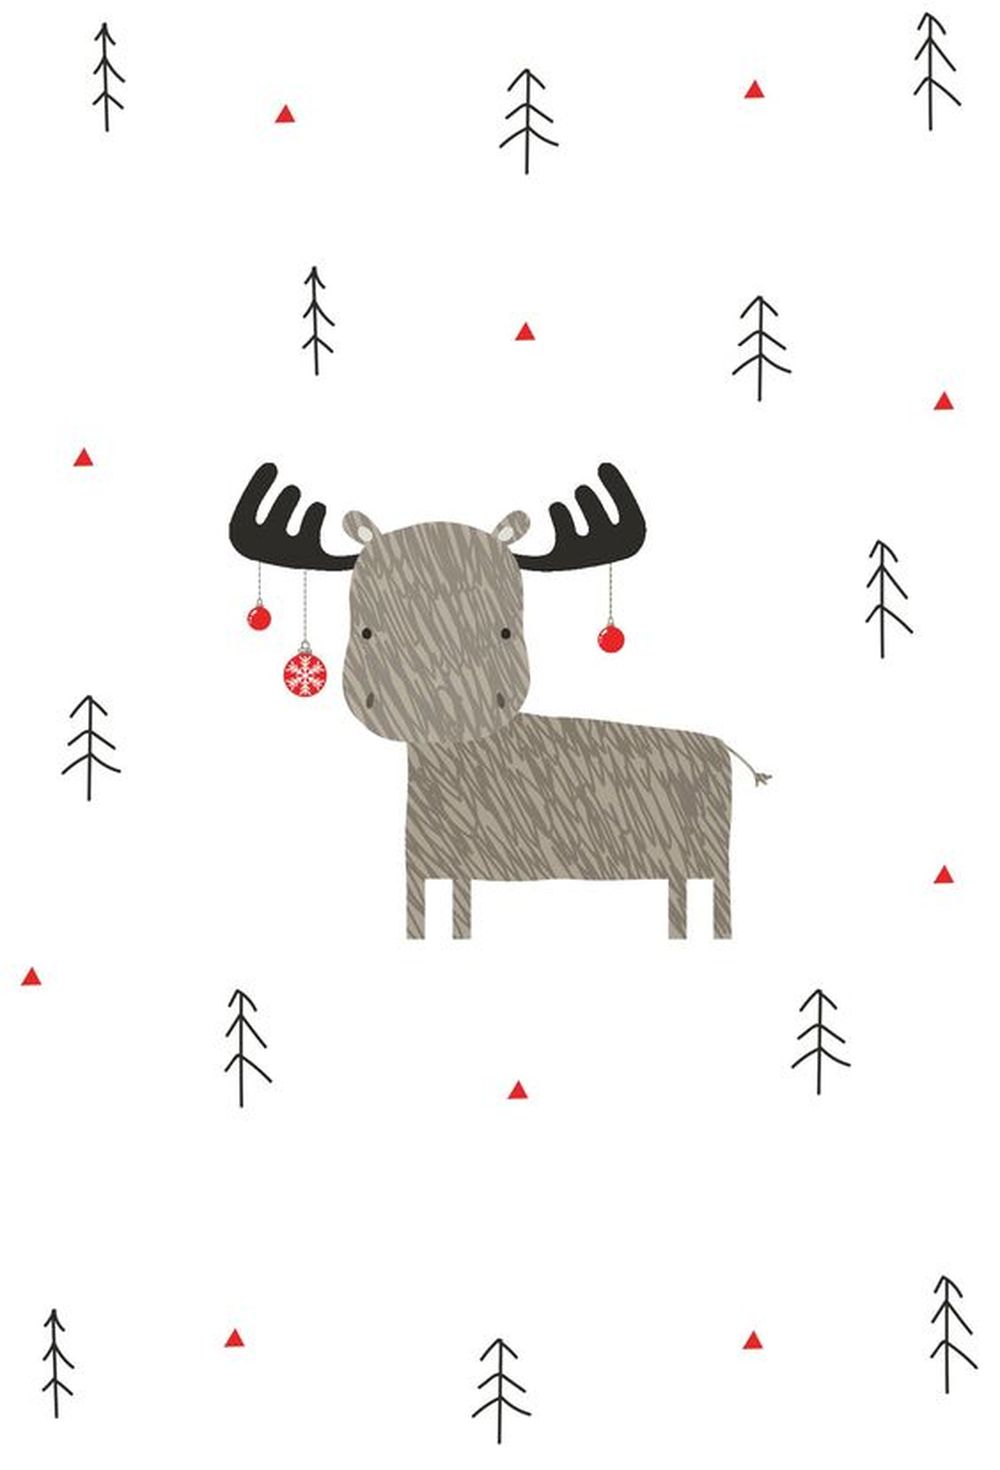
If you’re looking for a Christmas card idea that involves drawing, you can’t pass up on this adorable moose with hanging ornaments! It’s ideal for kids!
First, draw the shape of a large oval on your paper before adding two smaller ovals inside it. Now trace your pinky finger to create the first line of the antlers, then continue this motion across for three more horns.
For the rest of its body, sketch another pair of curved lines close together before you outline them with two long rectangles. Use these shapes to form four legs as well as the tail at the bottom part.
Start your moose drawing by outlining one half of its face starting from its muzzle through both eyes and ending at its ear. Do not forget to make the front of the muzzle pointy to show the start of its antlers.
Next, you will draw two ovals inside this shape for the eyes before adding teardrop shapes on either side of them. Finish up your moose drawing by adding simple ears and nostrils just below each eye, as well as three lines coming out from behind one ear.
If you want a more straightforward drawing of a moose with hanging ornaments, take a look at this Pinterest post, courtesy of Cardmore!
11. The Entire Family Closed Their Eyes – Christmas Card Photo Ideas

A lot of people like to send out a family photo as a Christmas card. But that doesn’t mean you should stick to the same old boring picture with everyone smiling and dressed in a red sweater with reindeer or Christmas trees.
If you’re looking for a more creative Christmas card photo idea, add a simple twist: have everyone in the picture close their eyes – intentionally! It’s one thing for one family member to “accidentally” close their eyes, but it’s something completely different when everyone does it. The idea is guaranteed to make your extended family, friends, and co-workers laugh.
Here’s a beautiful example we found on Pinterest, thanks to My Organized Chaos!
12. Paper Tree with Buttons – Homemade Christmas Card Ideas
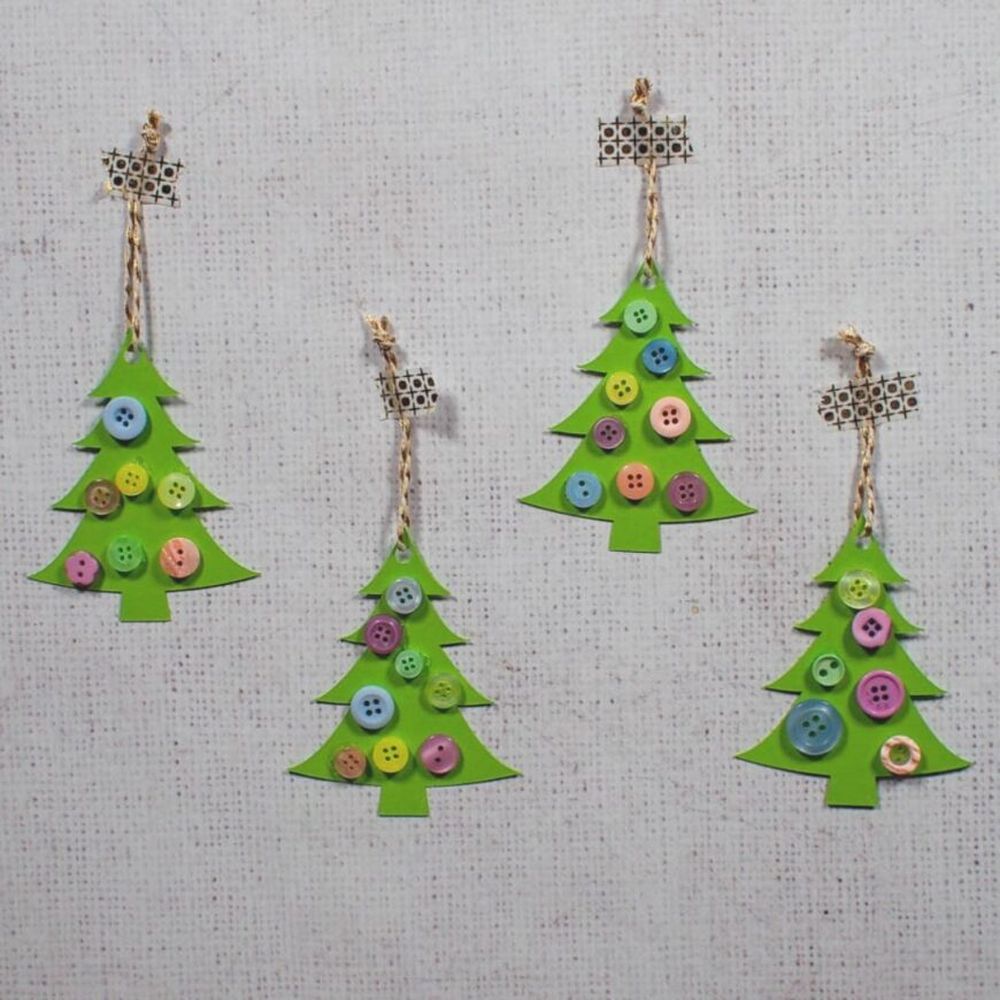
Create this adorable paper tree with buttons for your Christmas card, and you will be able to take it apart and use it as hanging ornaments on your Christmas tree! The best part is that you can reuse any old buttons you have lying around in your house.
To begin this project, you will need buttons, glue dots, a single-hole punch, green cardstock, white cardstock, gold and white bakers twine, and scissors. As for the tree, you can draw one on a piece of paper and then use it as a template.
But it won’t work if the tree is not symmetrical. So, if you don’t trust your drawing skills, you can simply find a tree silhouette online, download it, print it, and use it as the template.
Start by folding the white cardstock to create the card. Then, you can use the tree template to cut tree shapes out of the green cardstock before adding the twine and buttons. It doesn’t get any simpler than that!
For more details, feel free to explore the tutorial we found on Mum in the Mad House! It’s for tree decorations, but it can be easily repurposed into a Christmas card.
13. An Ornament Made from Rhinestones – Make Your Own Christmas Cards
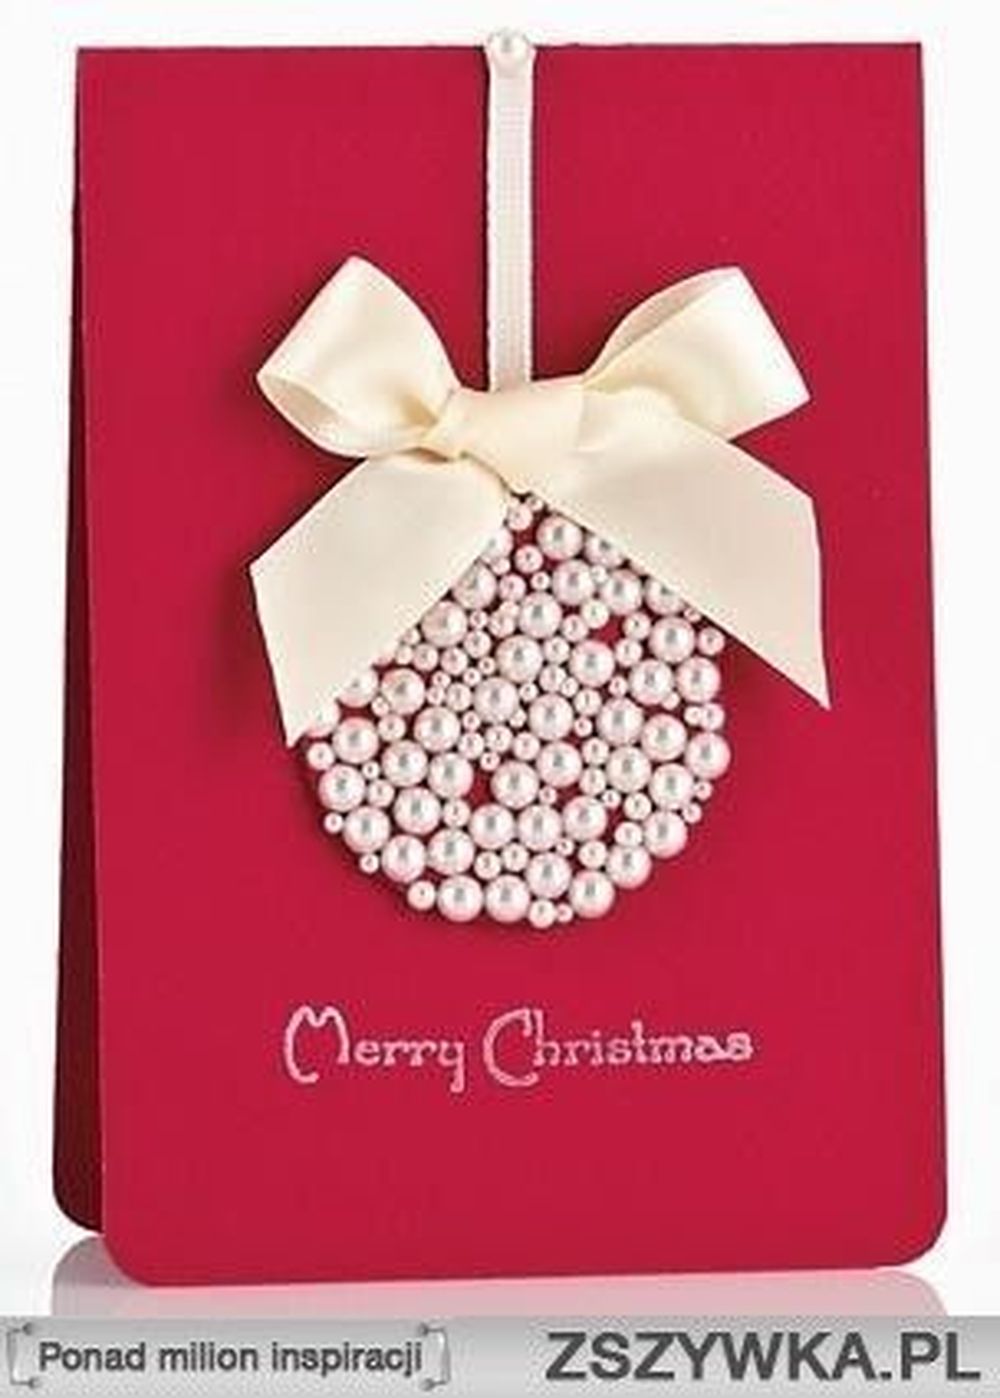
If you’re looking to make your own Christmas cards this year, this one is for you: a card with a hanging globe made out of rhinestones. It’s not only simple to make but also inexpensive!
First, cut your white paper to the size you want your finished Christmas card to be. Choose your rhinestone ornament and glue it in the center of the paper. Be careful not to get any glue on the front of the globe because it will be visible and sticky.
You can use Elmer’s School Glue or Liquid Paper Glue since they are both great for gluing decorations on cards. But keep in mind that they will show through some paint colors.
Next, use a thin piece of white ribbon to make the globe look like it’s hanging from the top of the card cover. You can decorate it by adding a single rhinestone to the top of the ribbon. Now, use a wider piece of white ribbon to create a bow. Feel free to also write a greeting message on the bottom, like Merry Christmas!
For more inspiration, check out this awesome post we found on Pinterest, courtesy of We Heart It!
14. Snowy Village – Cute Christmas Card Ideas
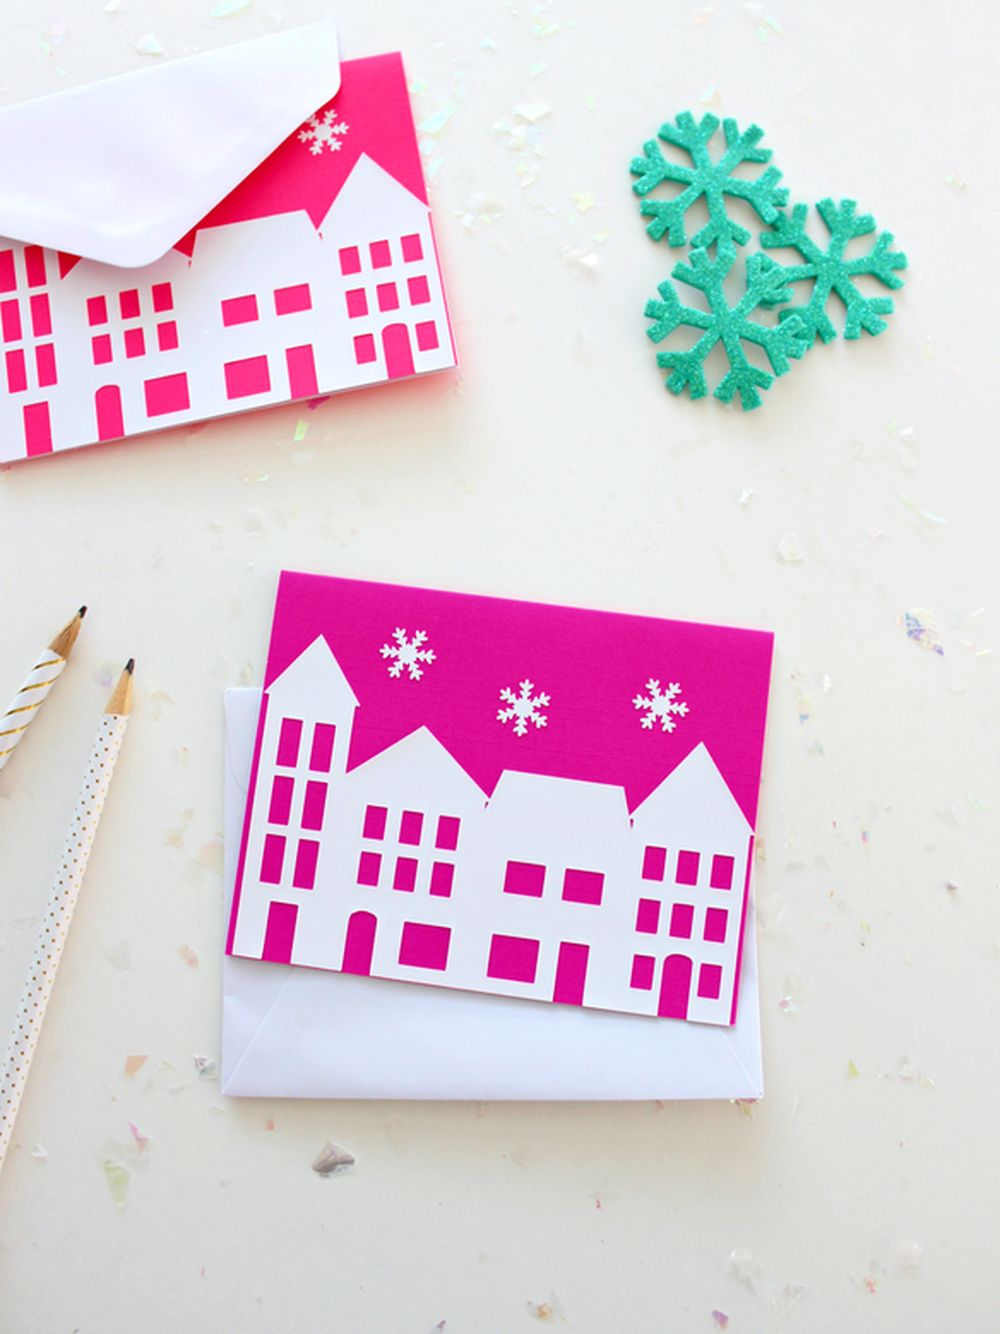
A charming and cute Christmas card idea portrays a snowy village. It’s a more intricate project than others on this list since it requires a cutting machine to create a polished look.
But we’re sure you can manage with a pencil, a ruler, and a pair of scissors, too. The idea is to create the silhouette of village houses on white paper, which you can then attach to colored cardstock. Before doing so, make sure to fold the cardstock into the Christmas card so that you can measure it and figure out the size of the ensemble of village houses.
Similarly, draw snowflakes on the white paper before cutting and attaching them to the card. As you can see, the project is relatively easy. But it can take a while to cut everything perfectly, so take your time.
Besides, there are many different ways to design your snowy town with cottages and buildings, so feel free to experiment and find out what works best for you.
If you have a cutting machine, though, we suggest taking the more straightforward route by discovering the complete instructions on White House crafts.
15. Paper Quilling Tree – Beautiful Christmas Cards
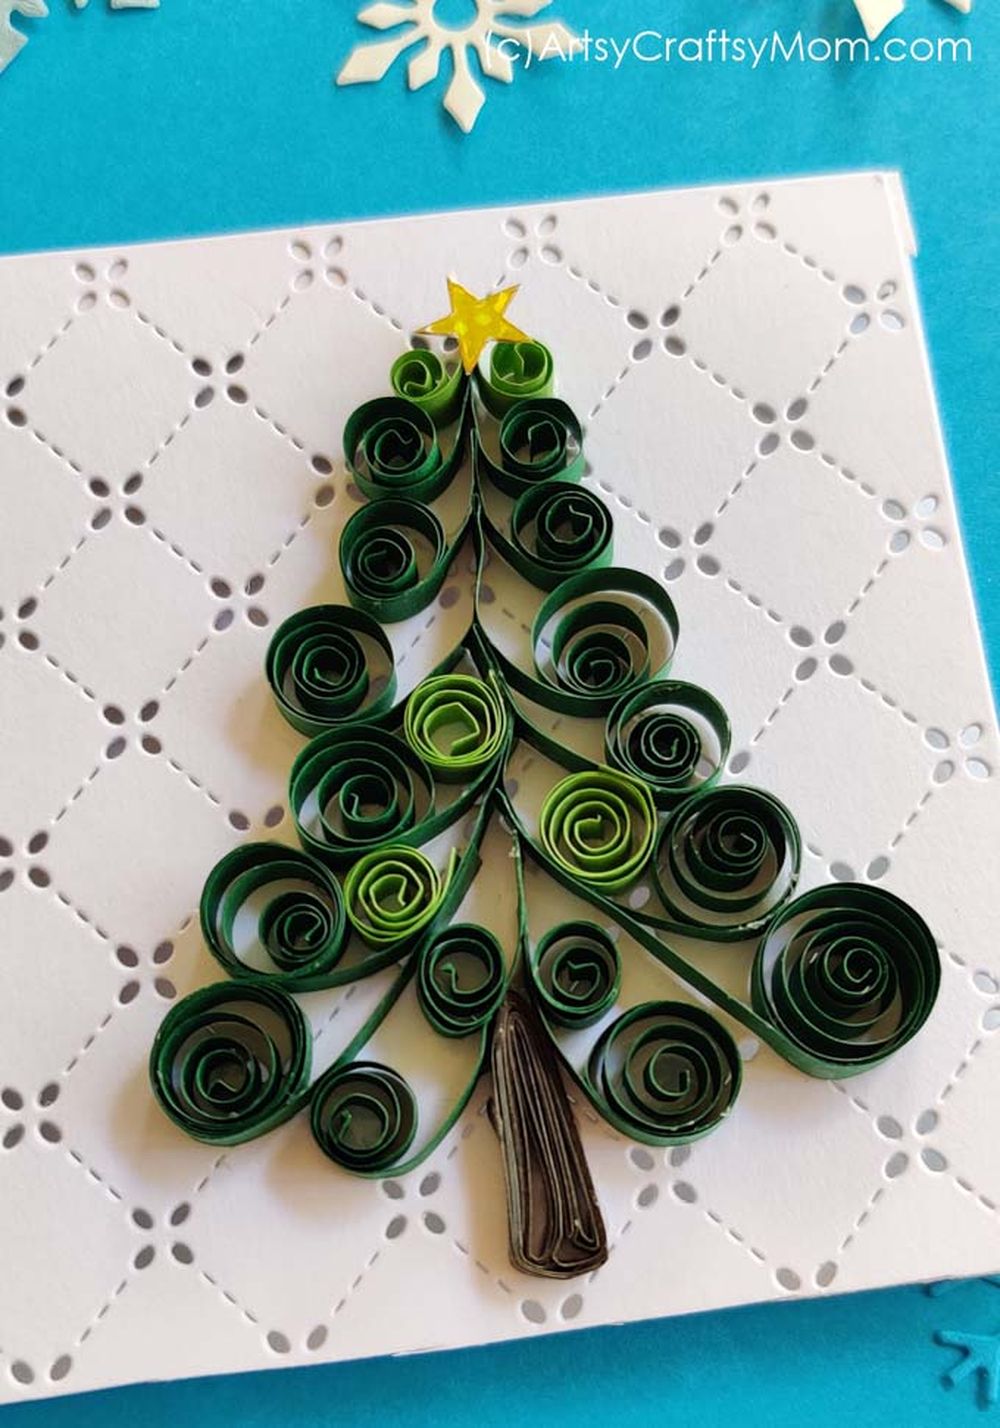
A paper quilling tree is a beautiful Christmas card idea that will definitely stand out! Besides, you don’t need expert quilling skills to pull off this project, not as long as you follow the tutorial prepared by Artsy Craftsy Mom.
To get started, you need scissors, card stock, quilling paper strips, craft glue, and a slotted quilling tool. The idea is to make basic v-scrolls out of green paper strips, which represent each part of the Christmas tree. You then glue the strips to the cardstock and add a tree trunk made from brown paper strips.
It doesn’t get any easier than that! And you don’t have to worry about making the tree perfectly symmetrical since it will be impossible. As long as you put in your best effort, the results will be worth it! You can also write a greeting message on the bottom, like Happy Holidays.
16. Yarn-Laced Tree Handmade Christmas Card Ideas
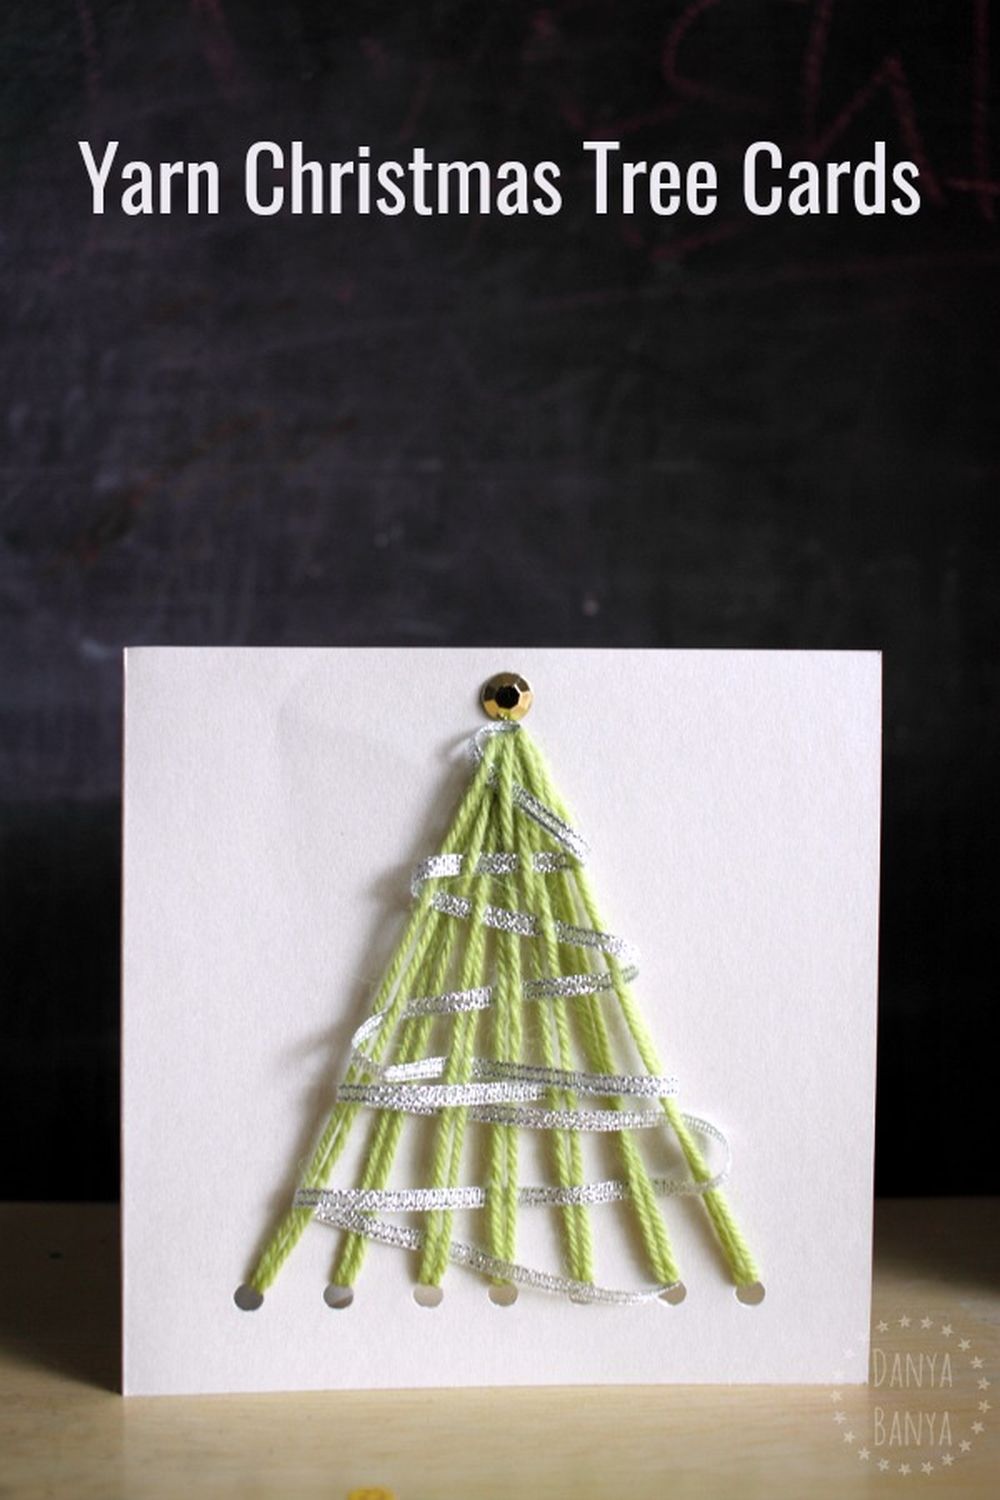
For a more whimsical handmade Christmas card idea, use yarn to create a tree. It’s easier than it sounds since this craft is basically a 3D version of paper quilling.
All you need is cardstock, green paint, scissors, glue, yarn in two different colors (you can also choose black), and pencils for drawing the branches on the tree before cutting them out.
First, cut your cardboard pieces. You will need three triangles for the tree’s shape and two circles for its trunk. Draw branches on another piece of cardboard using a pencil before carefully cutting them out.
You can make the tree taller or shorter by adding or removing strips of cardboard on each branch. Just keep in mind that if you use too many, the tree will lose its shape.
After painting the tree green, draw white lines to make it look like the pine trees outside your house. Then, you are all set! You can also add a greeting message on the back of each cardboard piece before gluing them together.
For a simpler version of the yarn-laced Christmas tree, we suggest checking out the tutorial created by Danya Banya!
17. 3D Paper Globe – Christmas Card Ornaments
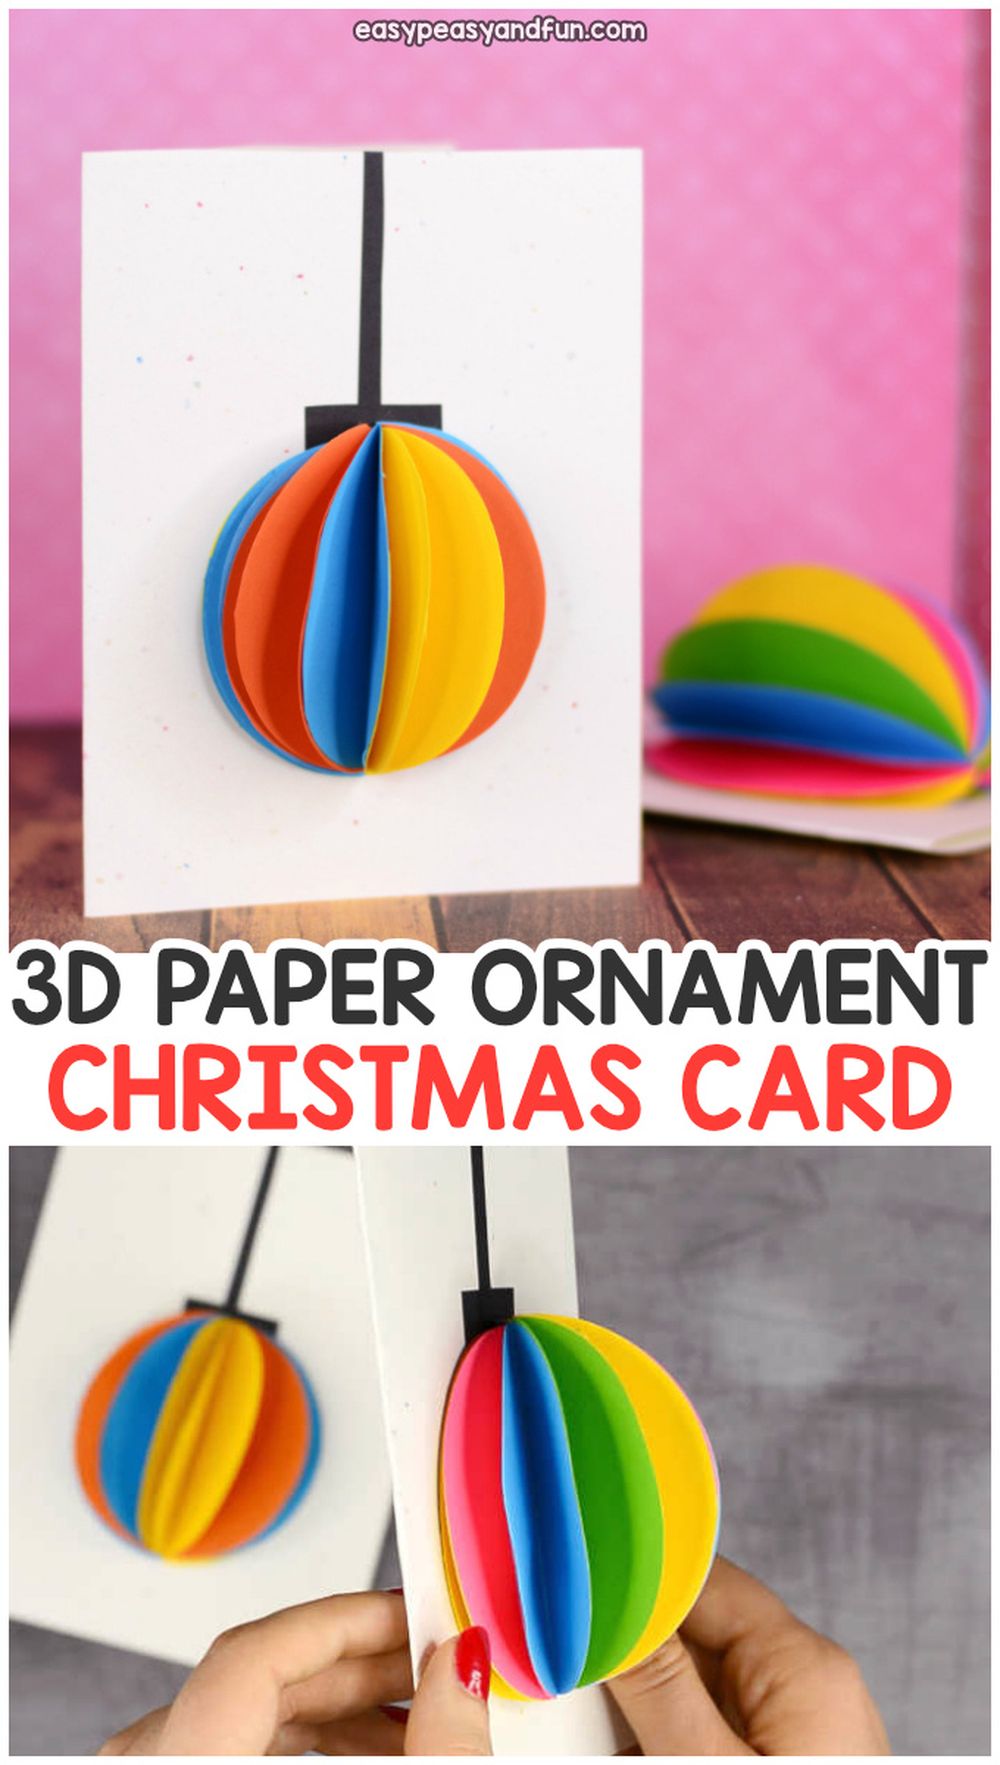
Who doesn’t love Christmas cards with an original design? If you are looking for such a card, try making this 3D Christmas card with a colorful ornament!
All you need is some white cardstock and paper in your favorite colors. You can also use nail polish to make the paper look shiny and more colorful. Furthermore, we suggest using a glittery shade of green and blue paint, too!
Start by creating circles out of all paper colors, making sure they have the same size. Choose a circle as the base of the colorful globe and glue it to a white card. Then, take all remaining circles, fold them in half, and glue them on top of each other and the base circle from the middle. You’re all set!
For complete instructions, don’t hesitate to explore the full tutorial found on Easy Peasy and Fun!
18. Pop-Up Gnomes – DIY Christmas Card Ideas
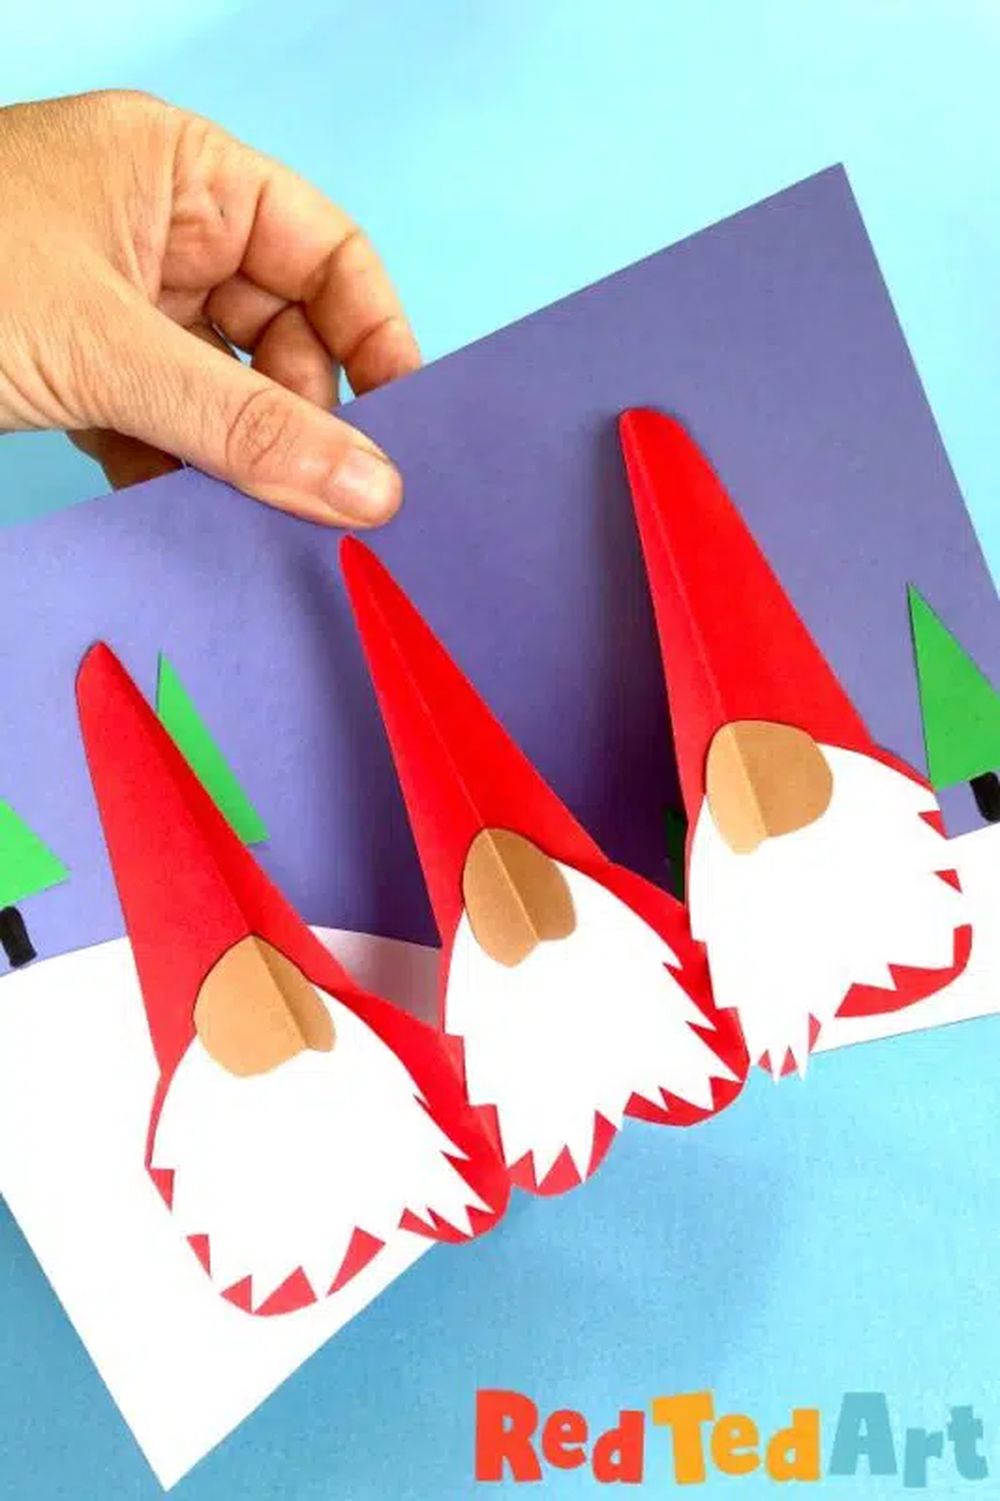
This DIY Christmas card idea is perfect for families with kids! What can be more fun than making your own pop-up three-dimensional card with gnomes?
To get started, you need cardstock for the base and decorations, scissors, pencils, markers, glue sticks for mounting the gnomes and felt. If you want to make a game out of it, go ahead and let your children create their own Christmas story using their imagination!
First of all, divide the cardstock into two equal parts. Using a pencil or marker, draw parallel lines on each part so that they don’t overlap when glued together. The next step is to fold each half over into thirds, just like you would fold paper to make an accordion).
Then take three pieces of felt cut slightly smaller than one side of the card and glue them on top of each other vertically. Make sure you leave a hole at the bottom big enough to fit your hand inside.
Finally, let your kids paint or color the gnomes using markers. After everything is dry, it’s time to place the gnomes along with their accessories inside and create a new world full of wonder and joy.
For further guidance, check out the step-by-step tutorial provided by Red Ted Art! It also includes a video guide.
19. Reindeer – Christmas Card Ideas for Kids
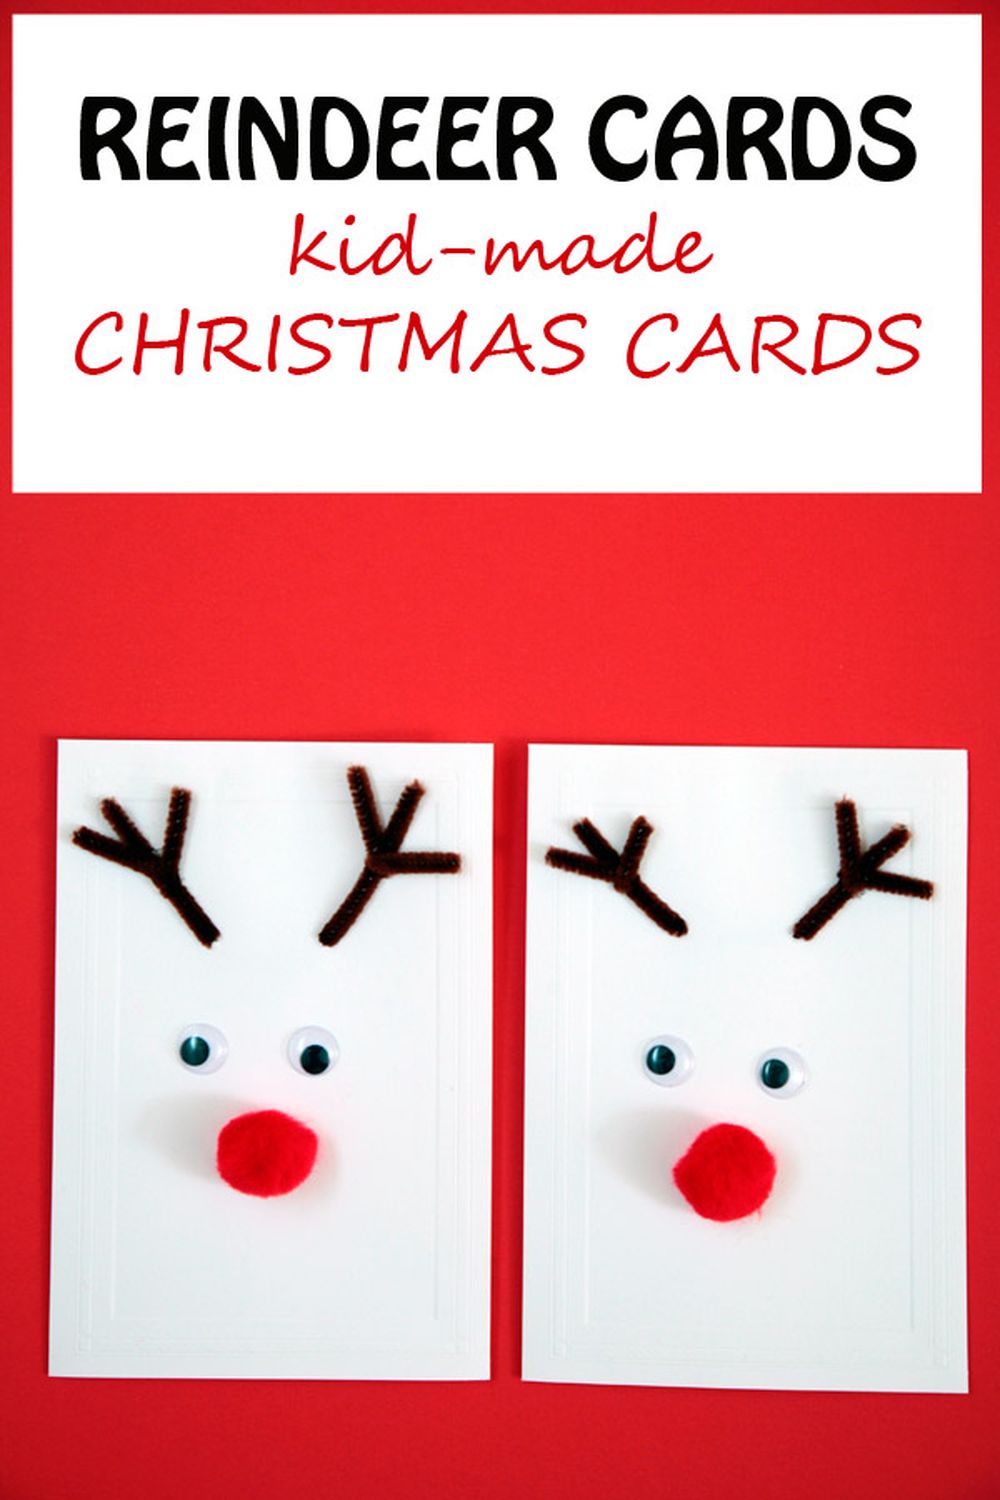
If you want your kids to experience unforgettable moments created by original Christmas cards, we suggest using this simple and original reindeer Christmas card idea!
First, make a plain white card out of cardstock. Then, get two googly eyes and glue them to the front cover – these will be the eyes of the reindeer. Next, you can make the ears from pipe cleaners, just as shown in the photo. To top it off, you can make the red nose out of a pom-pom. And that’s it!
Of course, there are several variations to this design, depending on what materials you have on hand. When it comes to the nose, you can draw it, paint it, apply a red sticker or dot marker.
You can also use stickers instead of googly eyes or draw them. The antlers can also be made with the help of a brown marker or pencil. Or, if you don’t have pipe cleaners for the antlers, you can use brown yarn instead.
For more information, check out the tutorial prepared by Non-Toy Gifts!
20. Penguin – Christmas Card Ideas
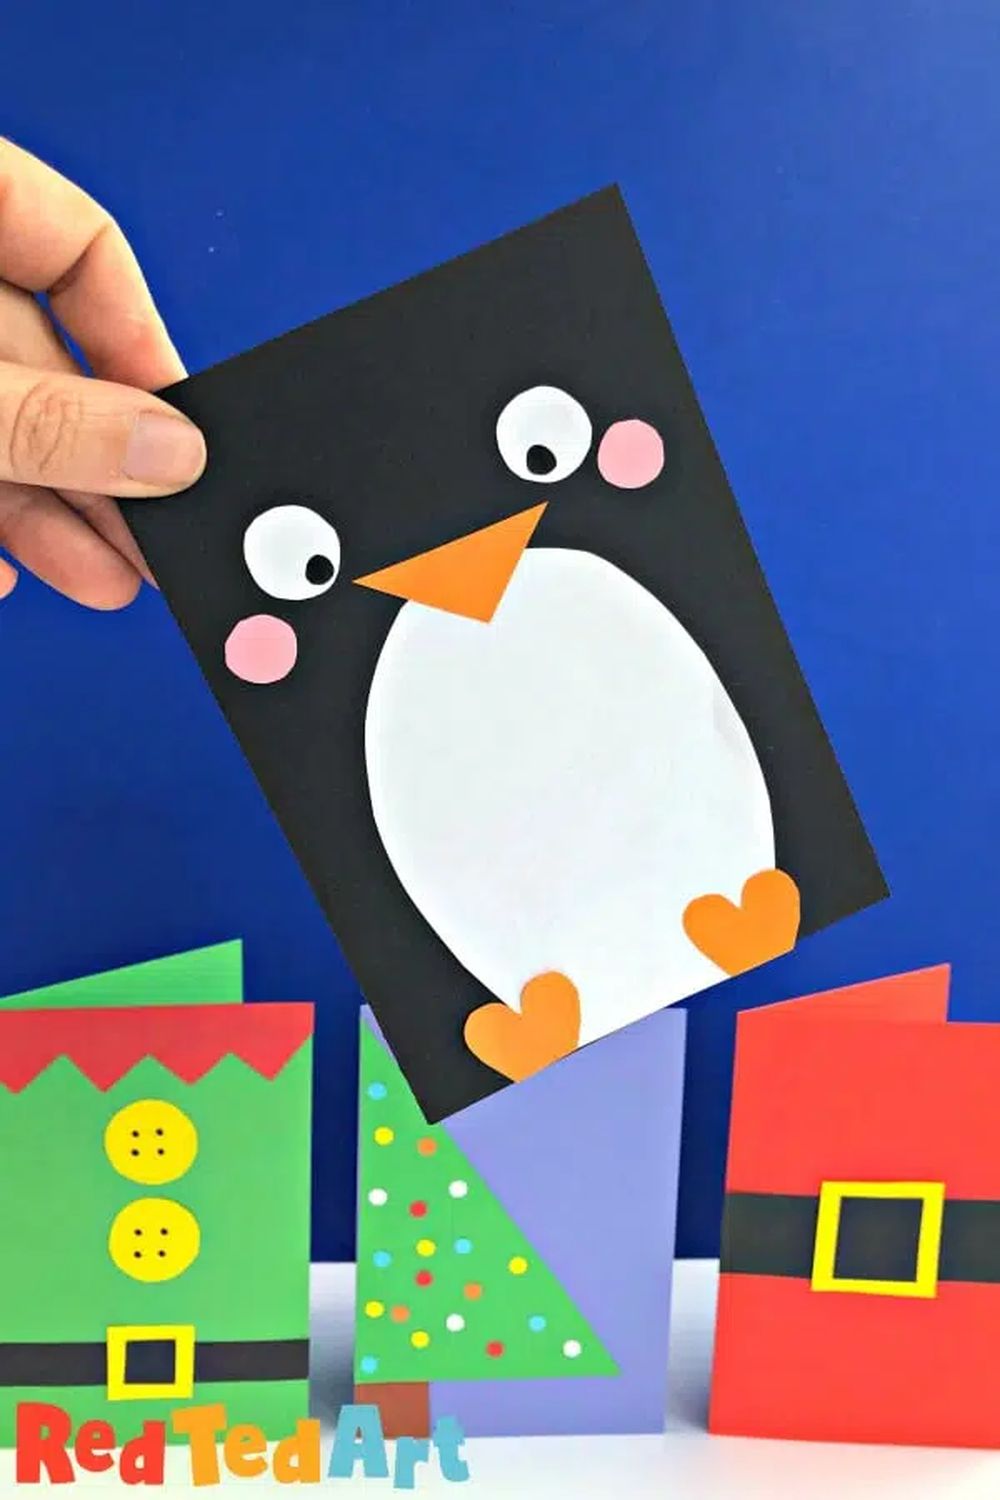
This penguin Christmas card idea is perfect for kids who are ready to try something new! Plus, it’s simple to make.
To get started, you need black cardstock for the base, white paper or cardstock, and googly eyes. You can also use colored paper or construction paper instead of plain white. All other materials will be used for decorating – you can draw with markers or pencils.
First of all, fold the black cardstock in half and cut two pieces on both sides of it – these will serve as flaps. Fold each flap inside so they aren’t visible. After everything is ready, glue the eyes to the front side of the base and place your penguin there!
If you want to make the penguin’s features out of paper alone, check out the thorough instructions available on Red Ted Art!
21. Colorful Washi Tape Trees – DIY Christmas Cards
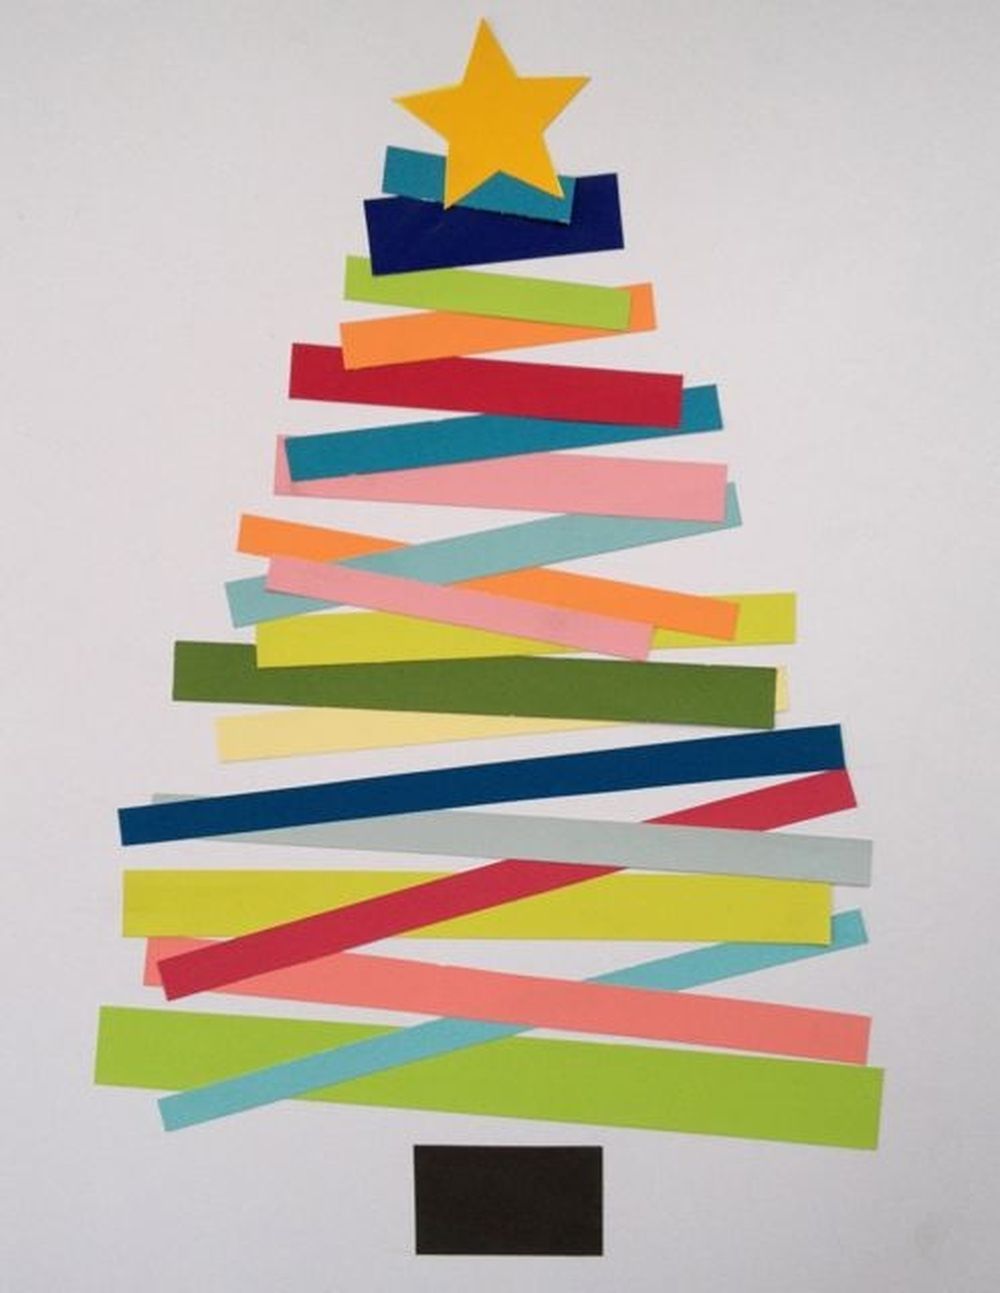
If you want to quickly whip up a colorful Christmas card using a single ingredient and create something extraordinary, we suggest checking out this bright washi tape idea! It’s so easy and fun that you can also have your kids join in.
To get started, take a piece of white cardboard and cut it into two equal parts to make the card. Now you can cut multiple sizes from various colors of washi tape, attach them to the front cover, and mix them diagonally.
The process for making this design seems random and carefree, but the tree actually turns out great! Besides, there’s no way to mess up this design, so feel free to explore multiple options! Don’t forget to add a star-shaped yellow washi tape as the tree topper, along with a small, rectangular piece of black tape as the trunk.
For more inspiration, check out Rudy and the Dodo!
22. Gem Ornaments – Homemade Christmas Cards
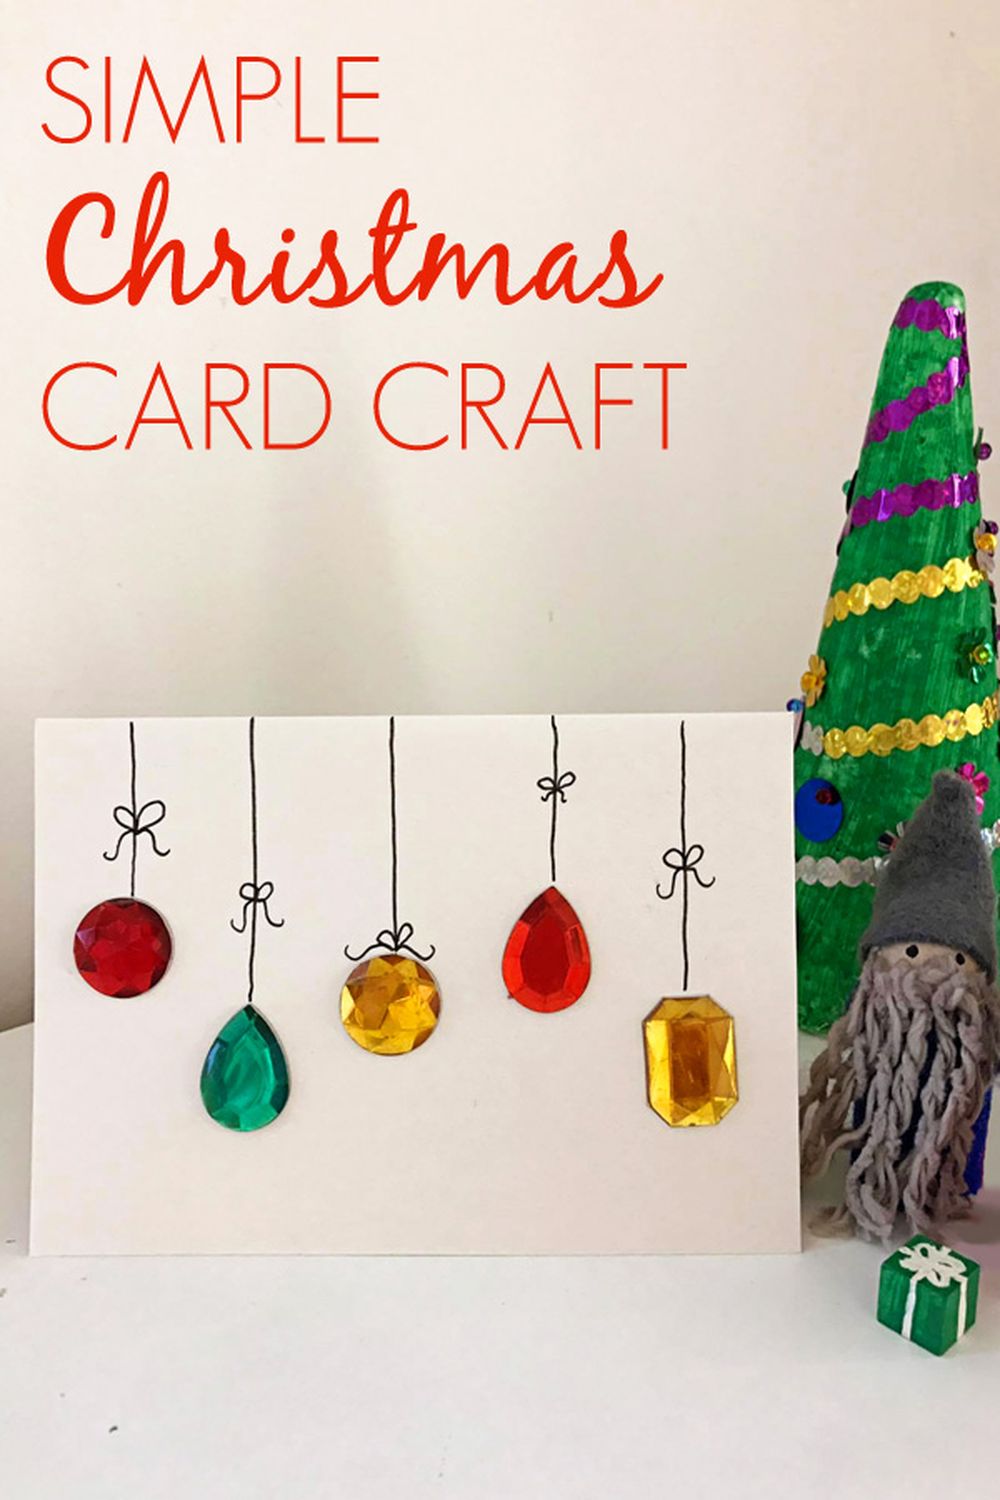
Gem ornaments are sparkly and stylish, so why not integrate them into your homemade Christmas cards? We found the perfect recipe for you, which is elementary and will take the least of your time.
Before getting started, gather your supplies: white PVA craft glue, cardstock (folded in half), large gemstones, giant sequins or buttons in Christmas colors, and a permanent, fine-line marker. To make the design more beautiful, try to find gems of different colors and sizes.
Begin by sorting the gems on the front cover of the card. After you find the correct positions, add glue to firmly attach them to the cardstock. Now, using your marker, draw a string from each gem to the top of the card to make it look like they’re hanging.
To convince viewers those are strings, you can also draw brows on some of the lines. But not include all of them since the design will become cluttered. And that’s about it! If you want, you can also write a greeting below the hanging ornaments.
We found this excellent idea on Childhood 101, so be sure to check it out!
23. Reindeer Fingerprints – Christmas Card Designs
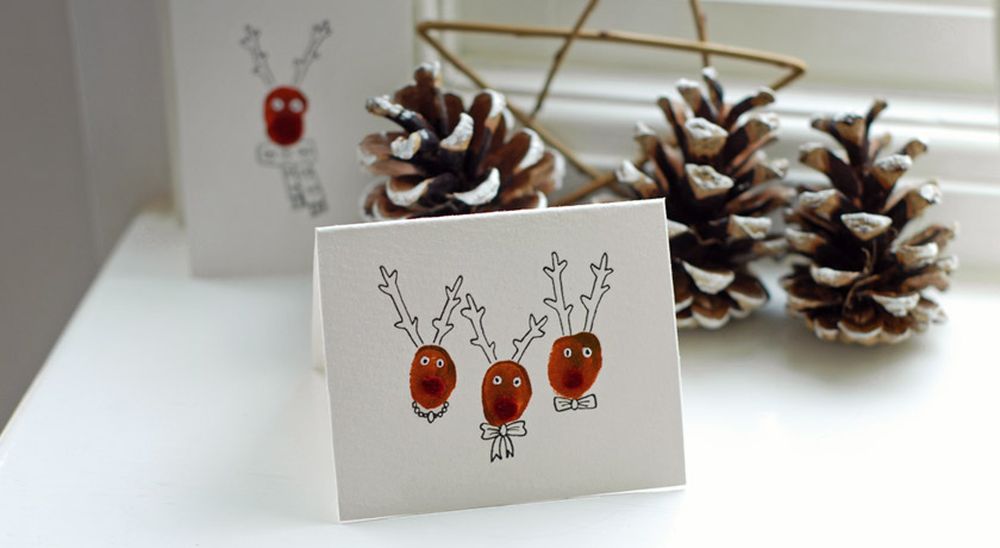
Tired of spending too much time on your Christmas card designs? Perhaps you should try this simple idea of a quick and effortless reindeer fingerprint design that can be completed in five minutes or less.
To create it, start by gathering some supplies: brown paint, glue, white paint or a white gel pen, red felt, a black fine-line marker, and cardstock folded in half.
Begin by dipping your thumb in the brown paint and placing it on the card cover to create the reindeer’s face. A better idea is to have your entire family join in so that everyone will have a copy of your fingerprints. Besides, it’s more meaningful that way.
Next, cut a small circular piece out of the red felt to create the reindeer’s nose and glue it to the face. Then you can draw the eyes, antlers and various accessories like a scarf. There are endless possibilities when it comes to accessories. If multiple family members join in, have each one express their personality – a pair of black sunglasses, tiny hearts, candy canes, jewelry, neckties, bows, and so on.
If you love this idea, explore the full tutorial at Gemma Garner!
24. Colorful Hanging Ornaments – Christmas Card Making
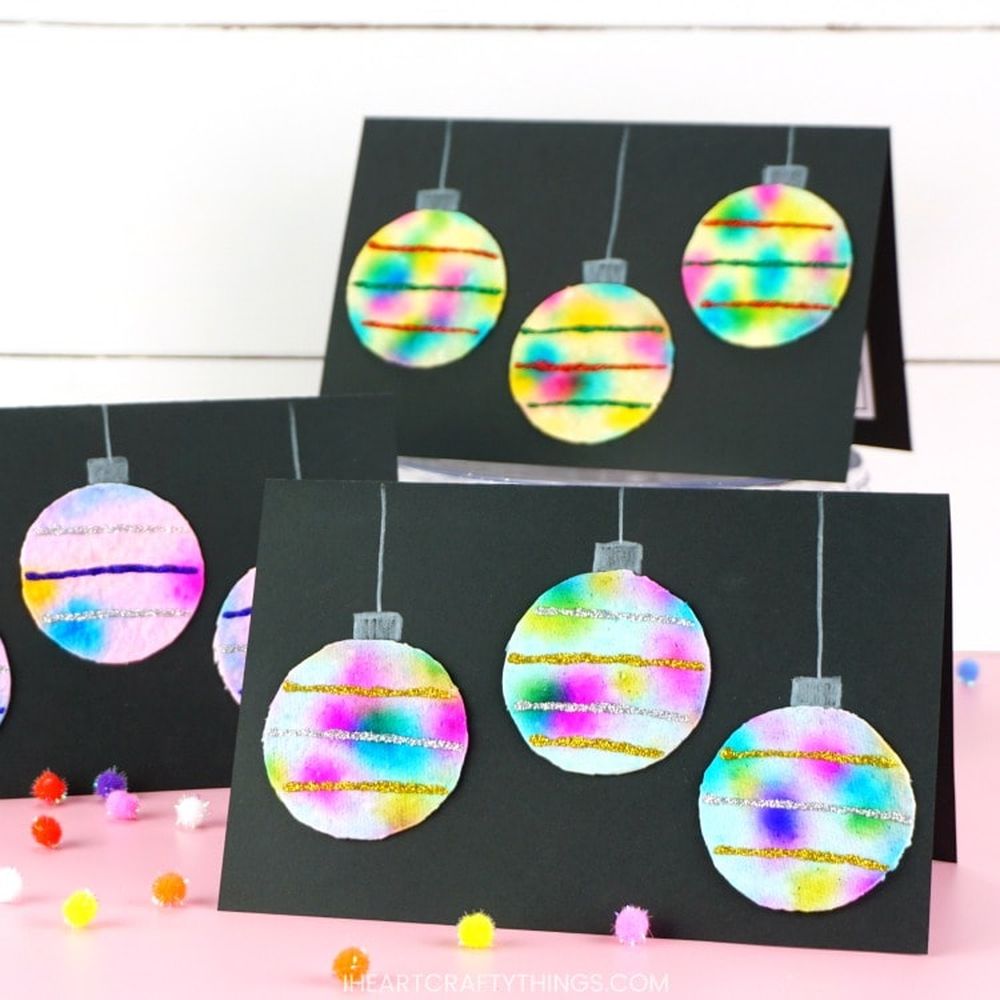
Colorful hanging ornaments are perfect for homemade Christmas cards since they will give the recipients the impression that you spent extra effort on the design. On the contrary, the designs are quick and easy to make!
We found an incredible tutorial at I Heart Crafty Things, which we think you will absolutely love!
When it comes to supplies, you need parchment paper, black cardstock paper, glue stick or school glue, scissors, Crayola Washable Glitter Glue, baking tray, greeting card printable template, printed on white paper, a Crayola white colored pencil, and Crayola Paper Maker.
25. Simple and Elegant Tree – Handmade Christmas Cards
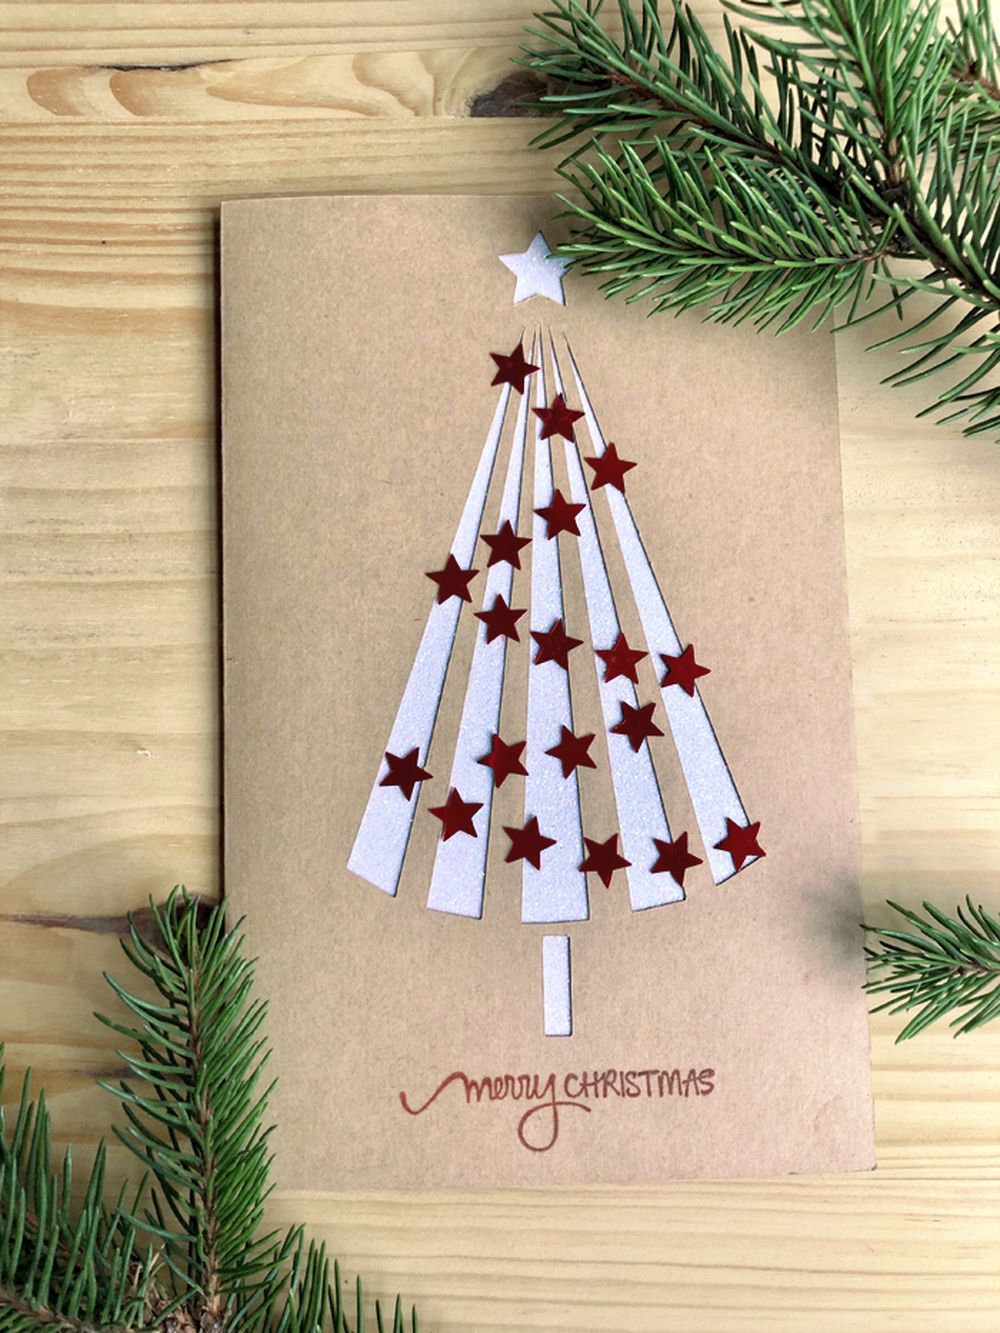
We’re going to end this list with a classic: a simple and elegant Christmas tree. It may sound boring, but it can become quite classy if you put a bit of effort into it. For example, we love this idea for handmade Christmas cards presented by Easy Paper Crafts!
The list of materials is pretty extensive, though: tacky glue, a bone folder, red stamping ink, one sheet of 8.5 x 11 white glitter paper card stock, cellophane tape, a glue runner, an X-Acto knife, a printer, red star embellishments, handwritten Merry Christmas stamp, one sheet of 8.5 x 11 brown kraft paper cardstock, a metal ruler, and one sheet of 8.5 x 11 beige linen letterhead paper. For best results, it’s best to use a digital die-cut machine.
Be sure to follow all instructions provided by Easy Paper Crafts!
More Christmas Card Ideas
We have even more cool Christmas card ideas you can take into account this year, so let’s find a favorite for you!
26. Christmas Card Ideas – Reindeer After Dark
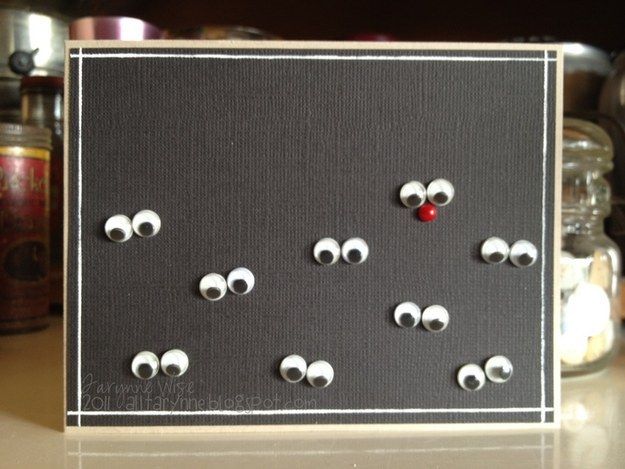
We found this adorable idea on Pinterest. How easy would this be to whip up and send off to your loved ones?
27. Washi Tape Trees – DIY Christmas Card
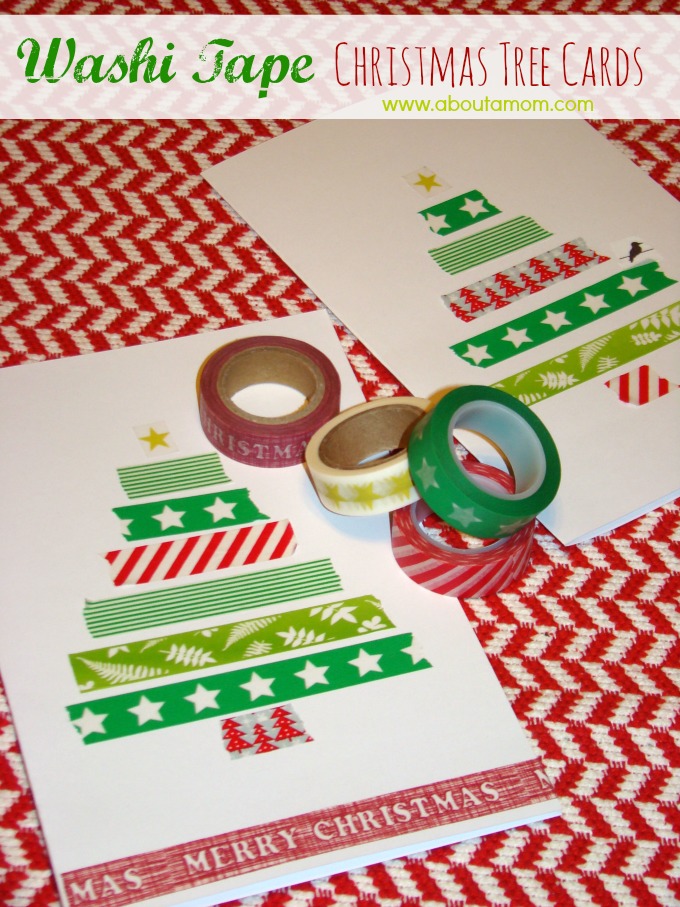
About A Mom took some washi tape and had a bit of fun. This one is so easy to whip up, even for the less artistic types.
28. Ribbon Trees – Handmade Christmas Cards
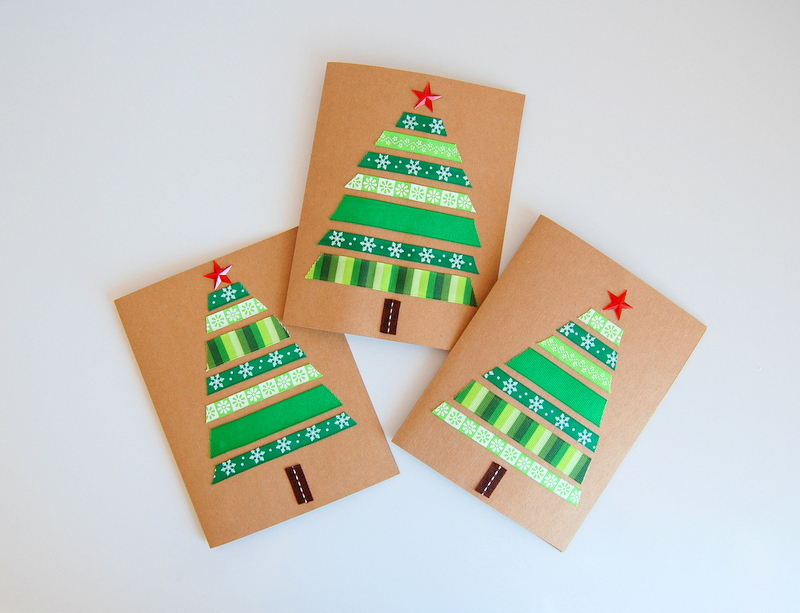
Or you could grab some ribbon and make your trees out of it. Check out North Story for all the simple details.
29. Geo Trees – Homemade Christmas Card Ideas
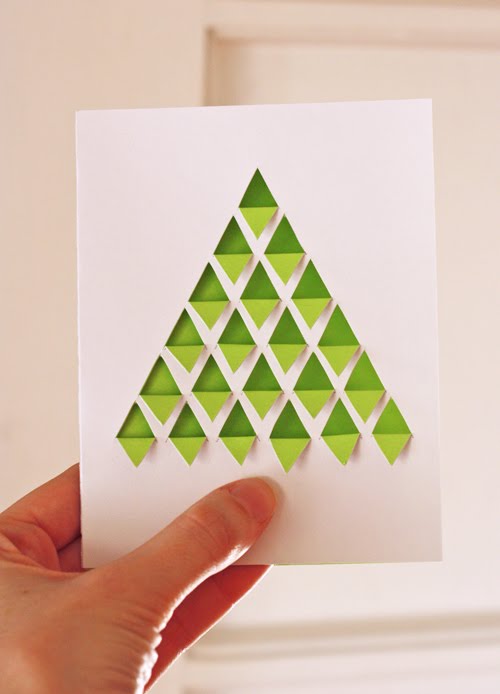
If you want something a bit more modern, then you’ll want to visit How About Orange. They’ll teach you how to make some of these geo trees!
30. Make Your Own Christmas Cards with Felt and Ribbon
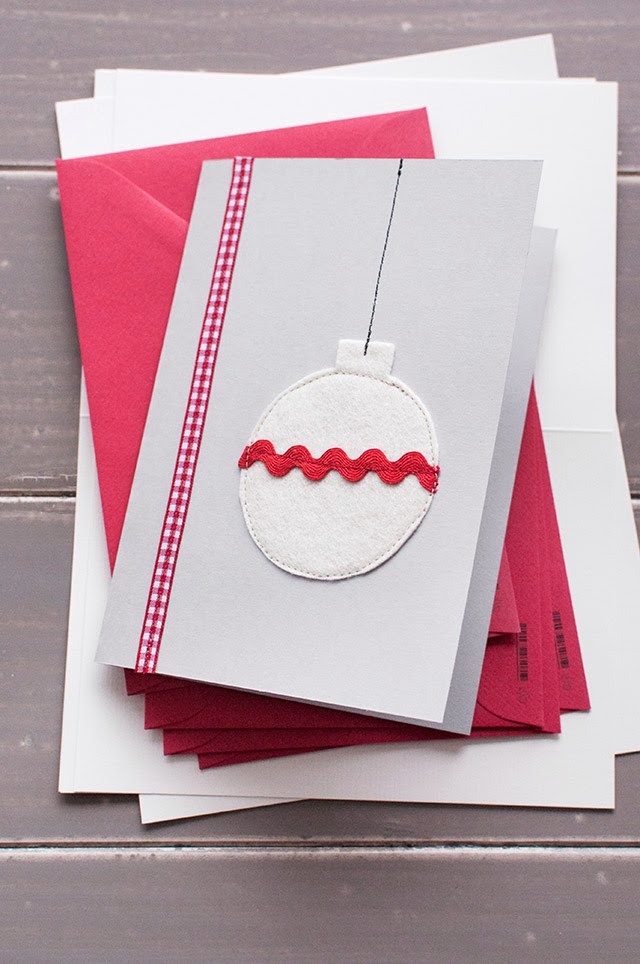
With a bit of felt and a bit of ribbon, you too can have one of these ornament cards ready and waiting for your loved ones. And you can get so creative with the colors! (via)
31. Painted Christmas Card Design – Watercolor Ornaments
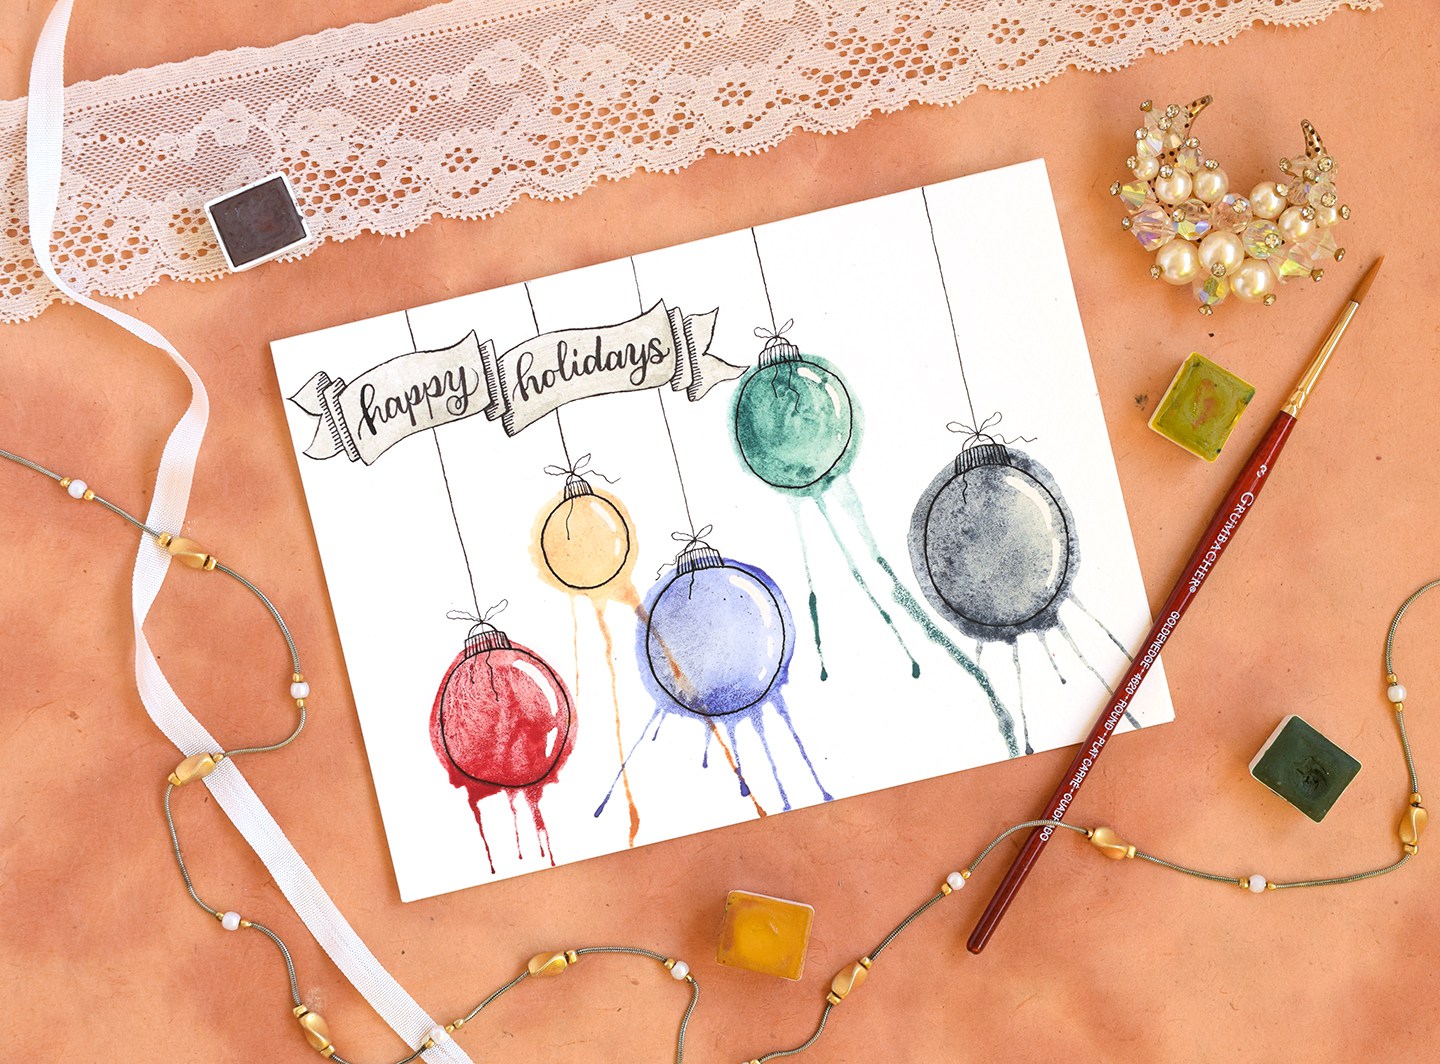
The Postman’s Knock made a beautiful ornament Christmas card that we’ve fallen in love with. Learn how to put your own artistic spin on this design now!
32. Hot Chocolate Christmas Card Idea
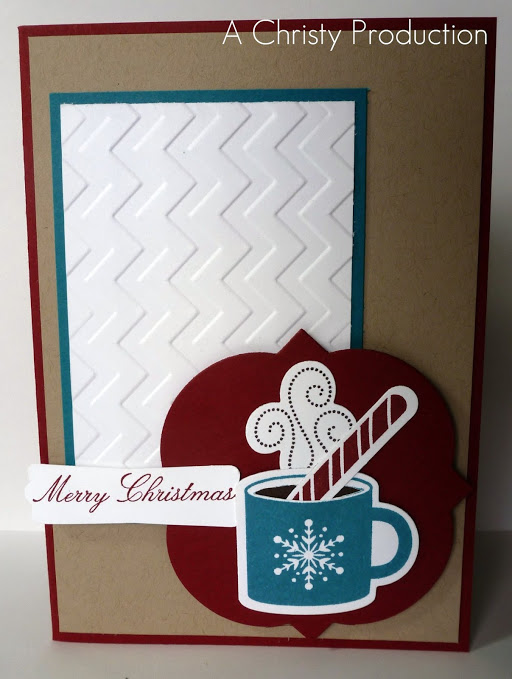
A bit of hot chocolate could greet your loved ones in all the right ways. Thanks for the inspiration A Christy Production!
33. DIY Christmas Card – Sending Joy
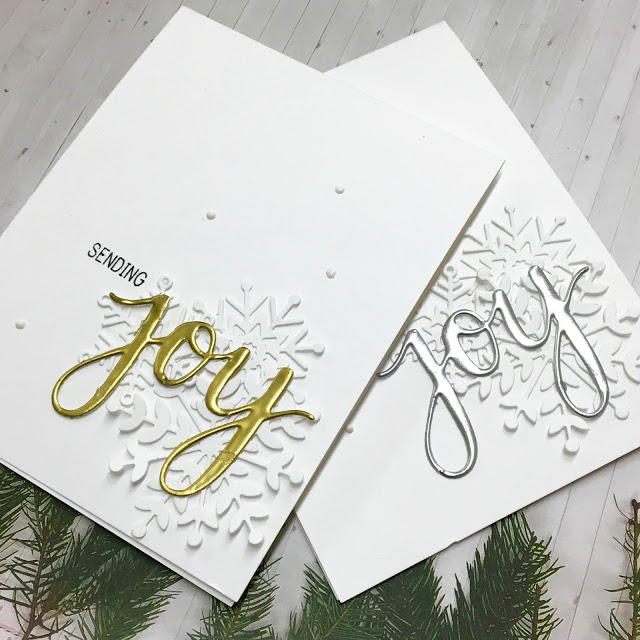
Justine Hovey sends joy with these beautiful cards. Visit and grab all the details for this creation after the jump!
34. Peanut Reindeer – Cute Christmas Card Idea
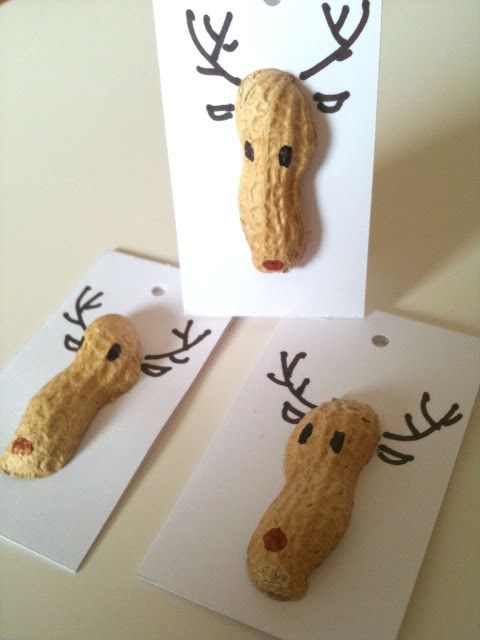
Who knew that you could turn some peanut shells into reindeer! We love this idea and so will the kids! (via)
35. Olaf Christmas Card Design
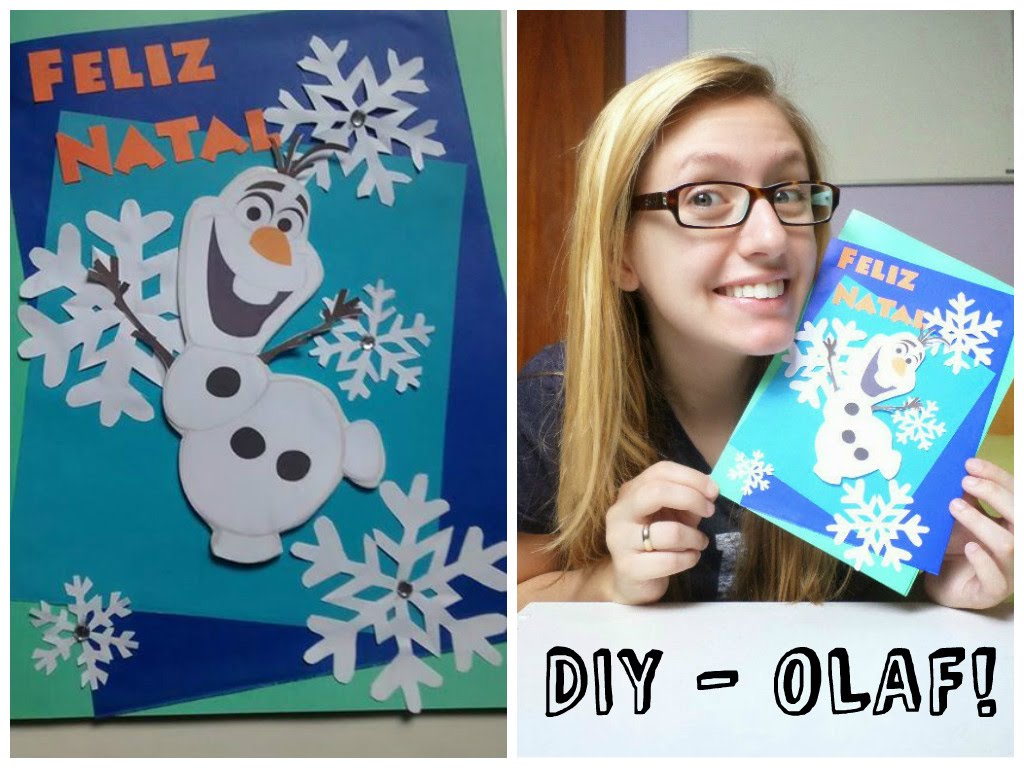
Hop on over and watch this YouTube video if you’re a fan of Olaf! Have Frozen be inspiration for all of your card designs this year.
36. Colorful Felt DIY Christmas Card
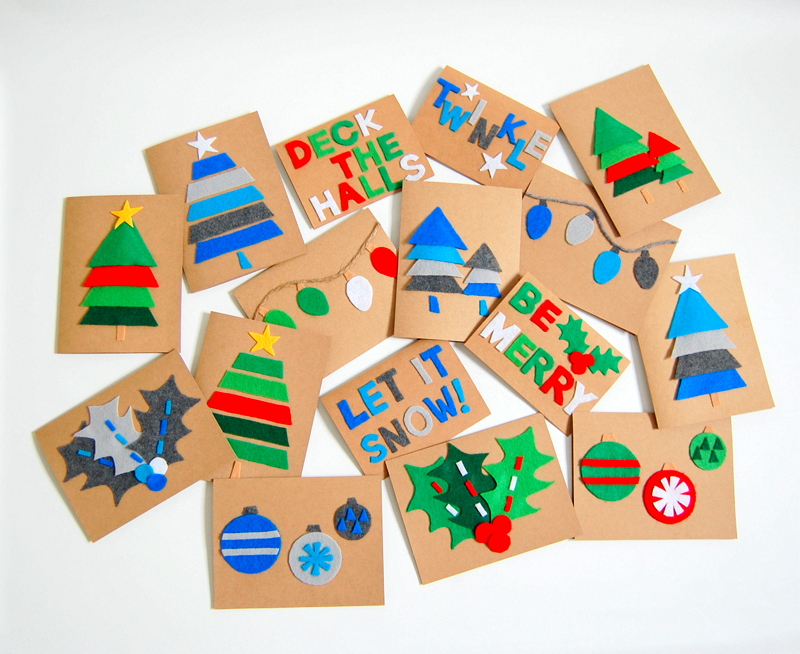
Felt is always fun to work with too. North Story shows us lots of great Christmas-inspired designs to put on our cards.
37. Printable Cards – Homemade Christmas Cards
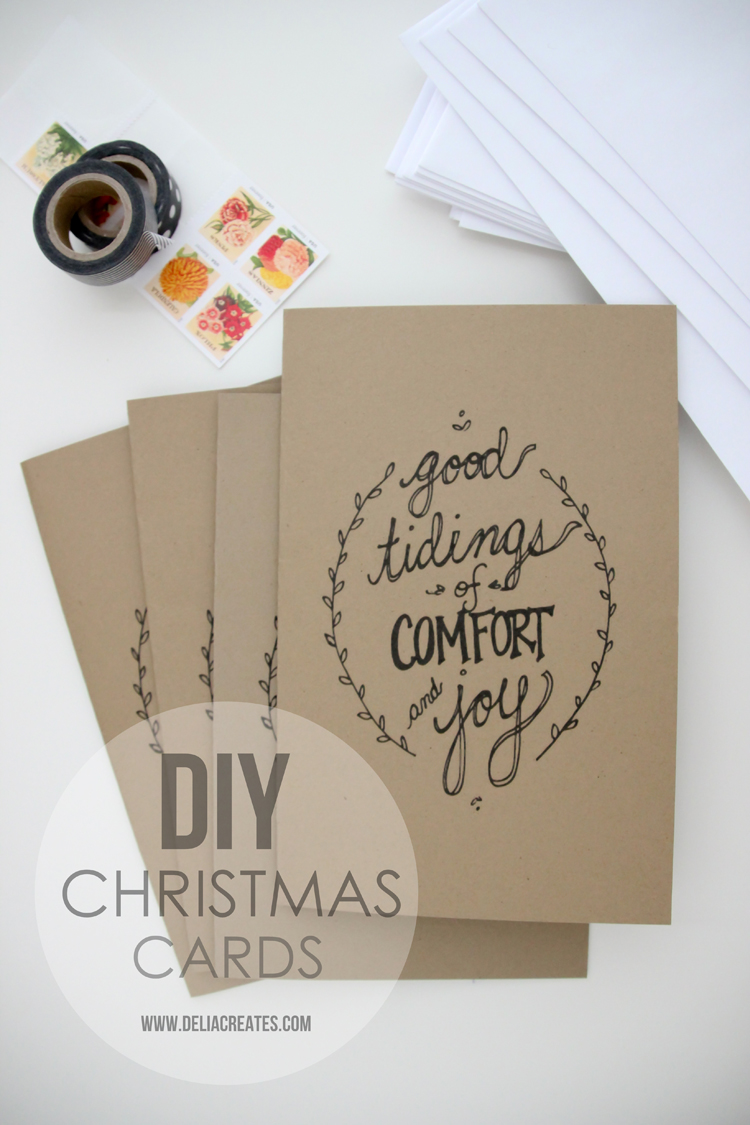
Delia Creates gives us a free and printable option as well. It’s a simple and sweet design that you’ll love sending out for the family to enjoy.
38. Glam Santa Coat – Christmas Card Idea
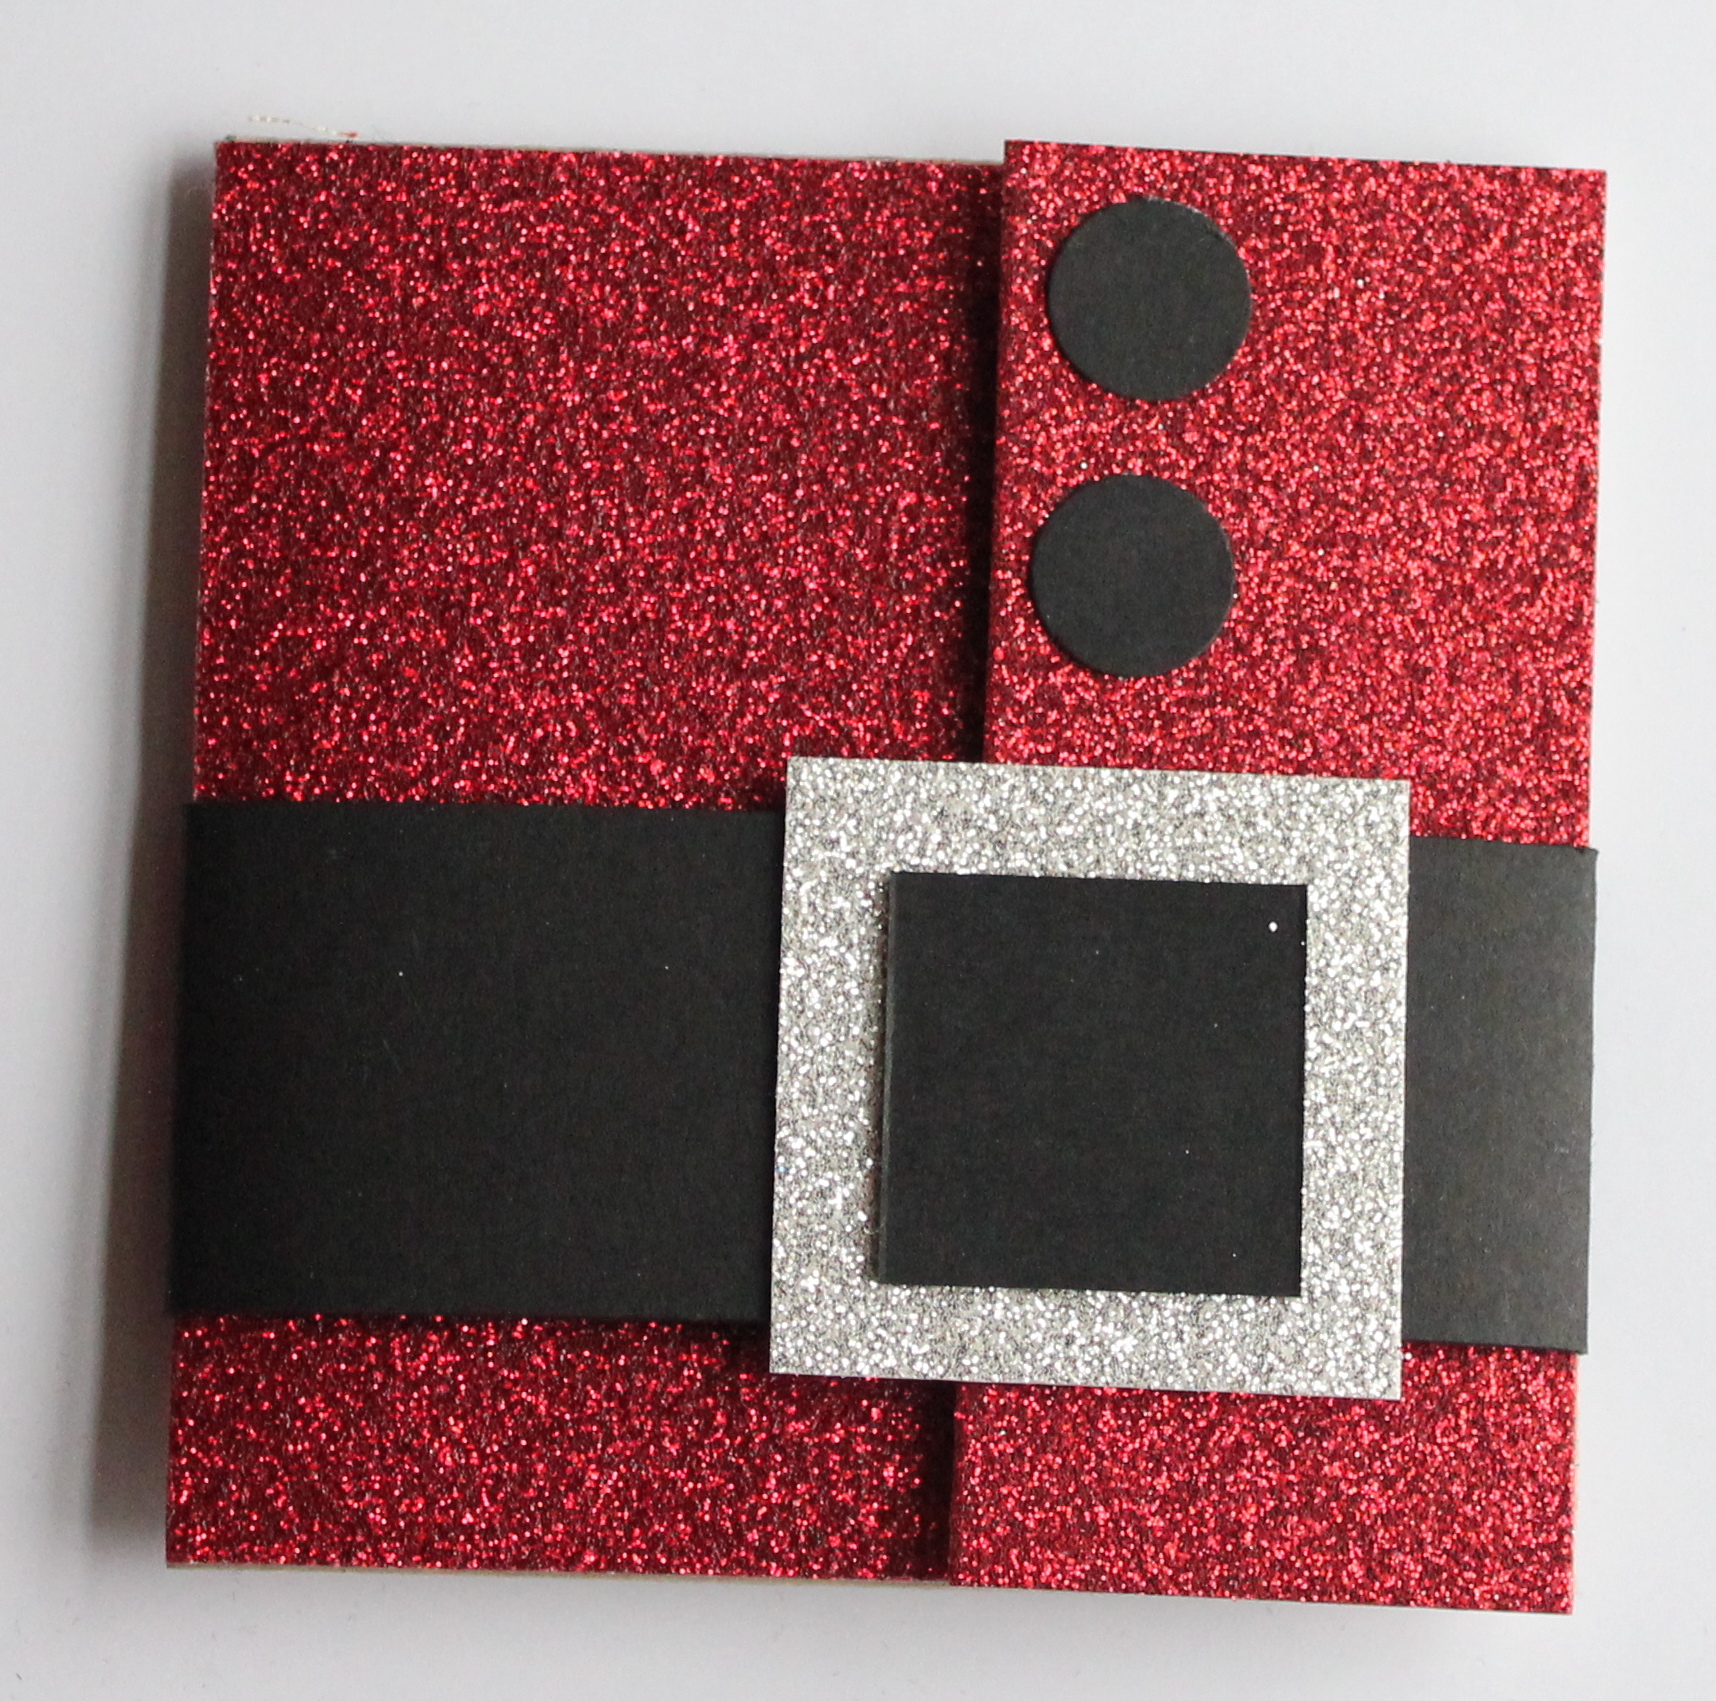
Stamp with Heather makes a card that could double as a gift card holder as well. Send a little sparkle along with your well wishes.
39. Fingerprint Christmas Lights – DIY Christmas Card
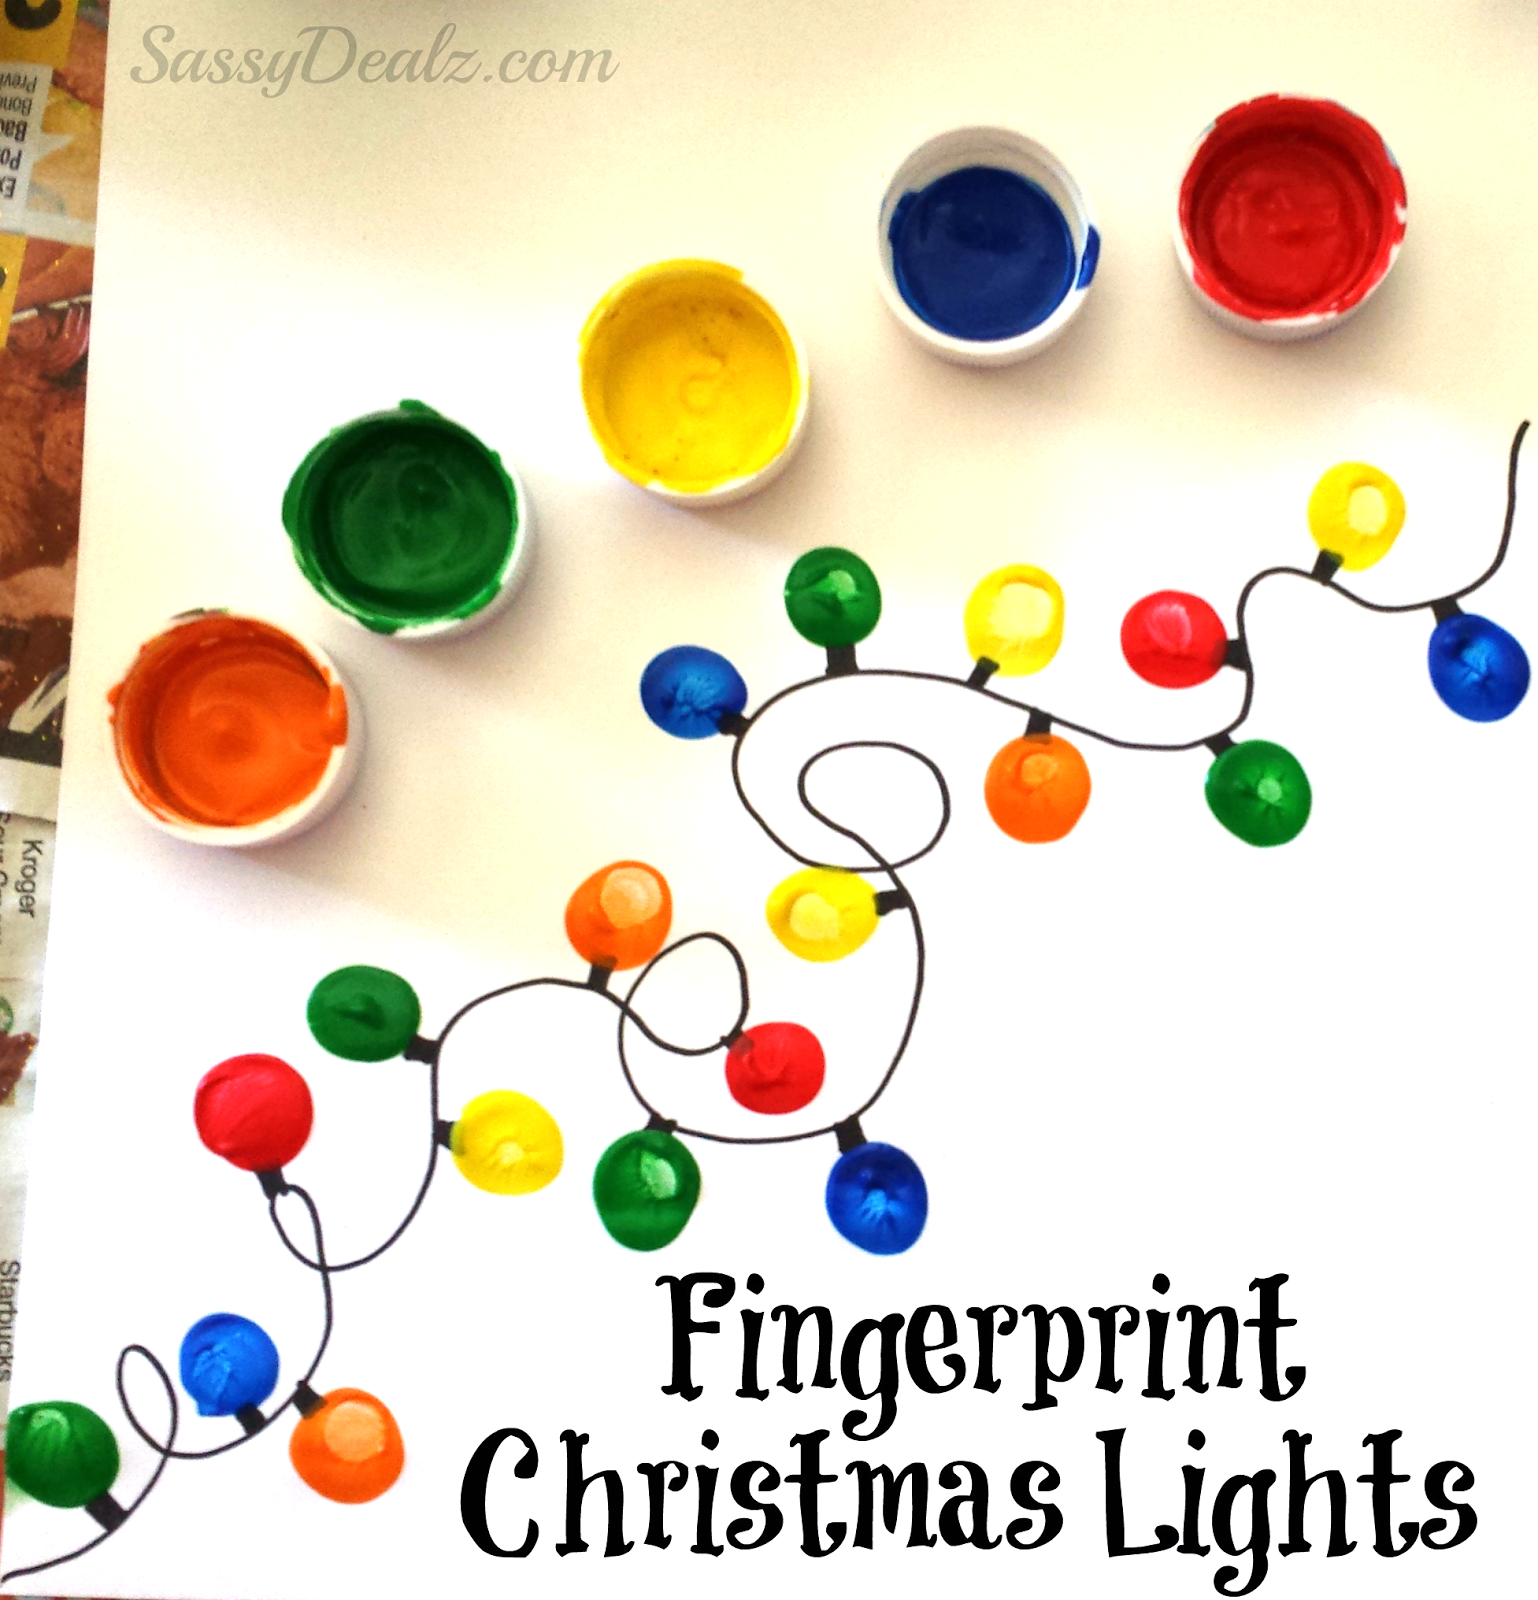
You’ll want the kids to get involved with this one. Find out how to make these finger lights happen over at Crafty Morning.
40. Potato Snowmen – Easy DIY Christmas Card
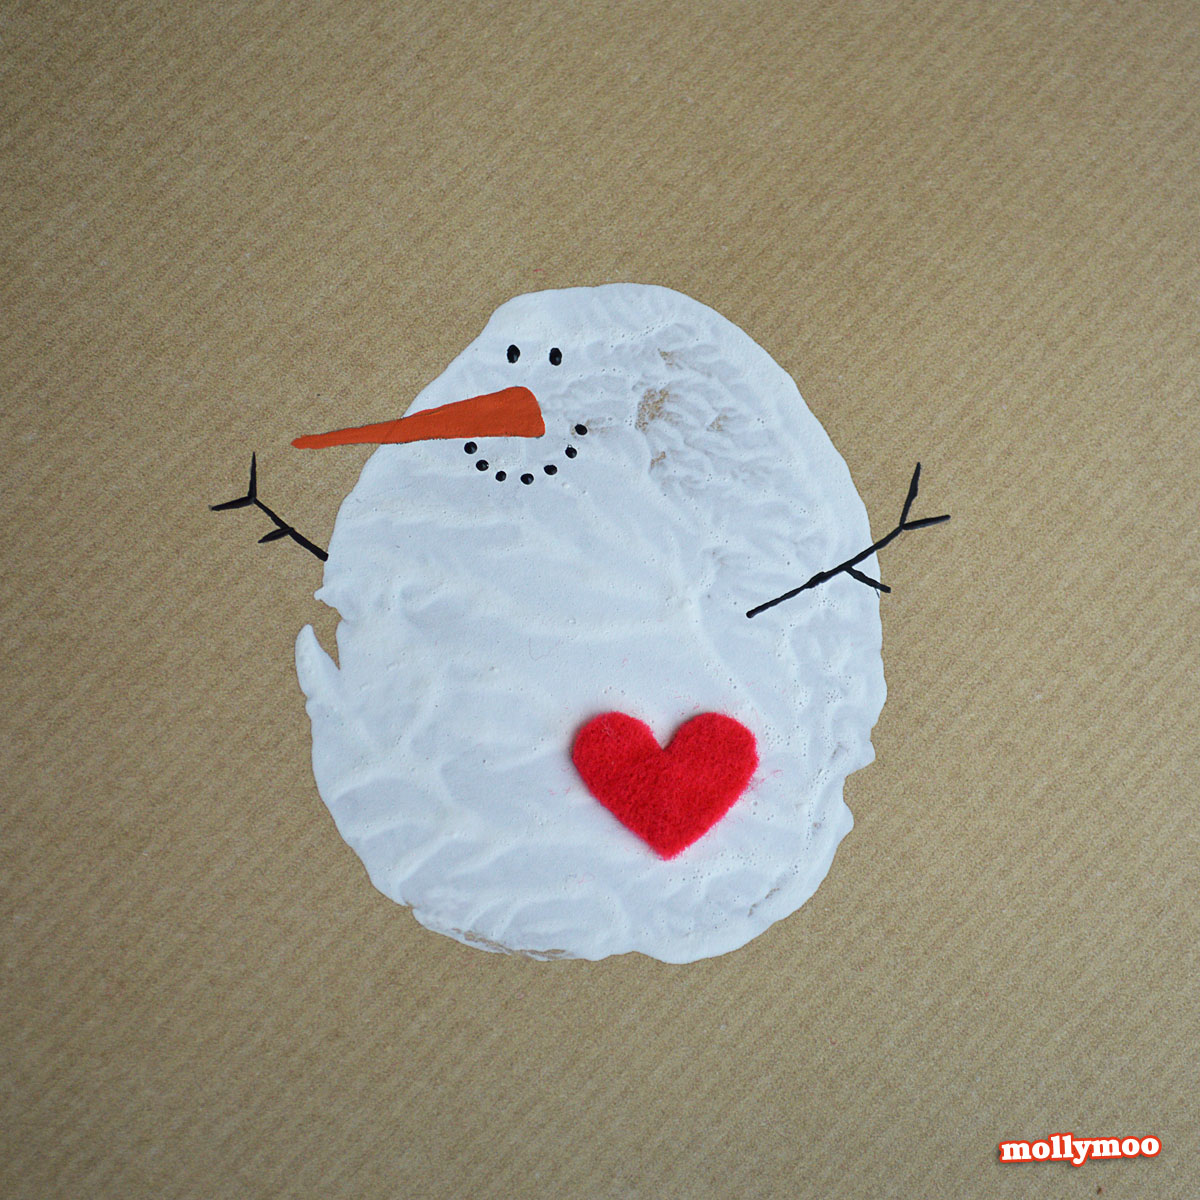
A potato is all you need to get started on this one. Molly Moo Crafts turns dinner into a fun little card design!
41. Photo Christmas Card Ideas
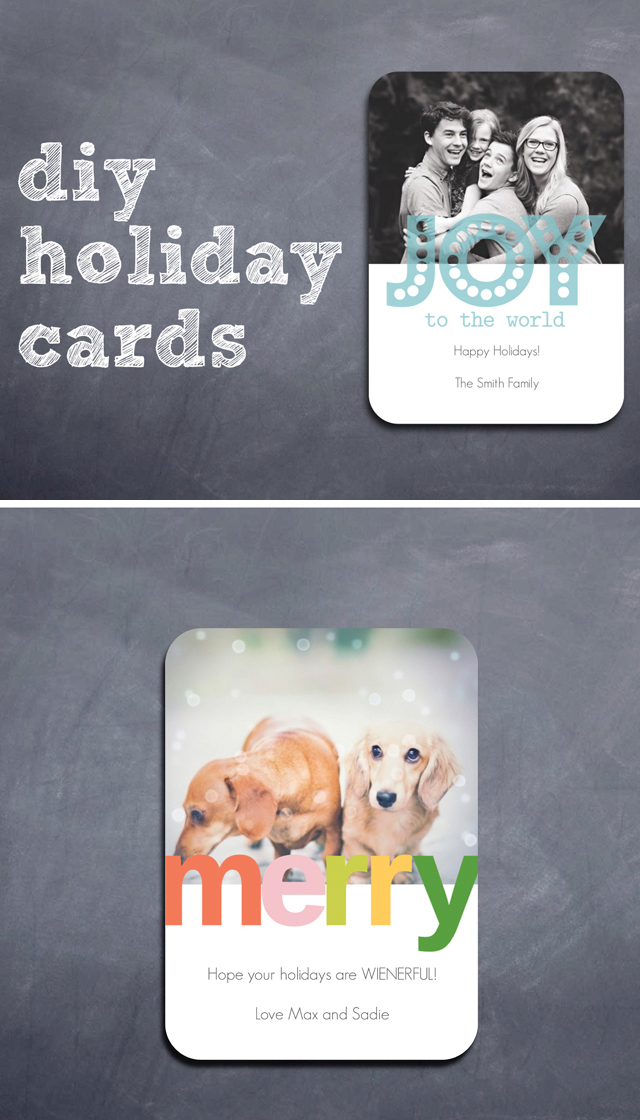
Modern Parent Messy Kid makes some chic and trendy photo cards that we love too! Find out how to whip up your own after the jump.
42. Snowglobe Shakers – Christmas Card Design
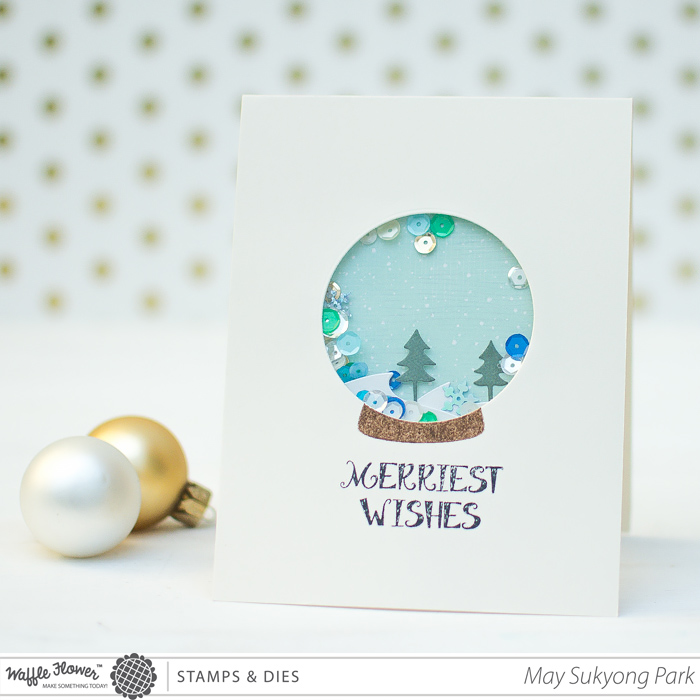
A personal favorite on the list these shaker cards are so much fun! They’re easier than you may think to make as well, just follow along at Mayholic in Crafts.
43. Yarn Ornaments – Christmas Card Design
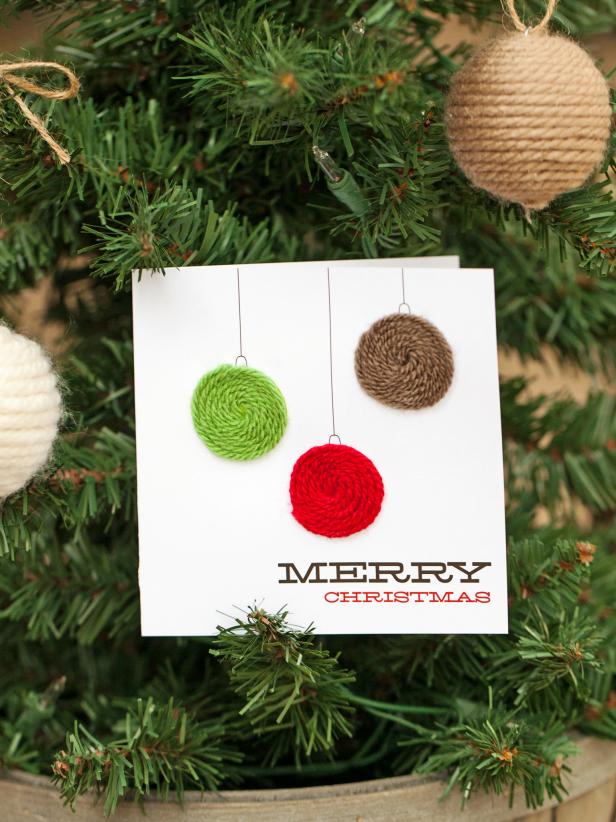
HGTV gives us yarn ornaments that are perfect for those with a more rustic and traditional style. We love the 3-D and textural effect too!
44. Modern, Trendy Ornaments – DIY Christmas Cards
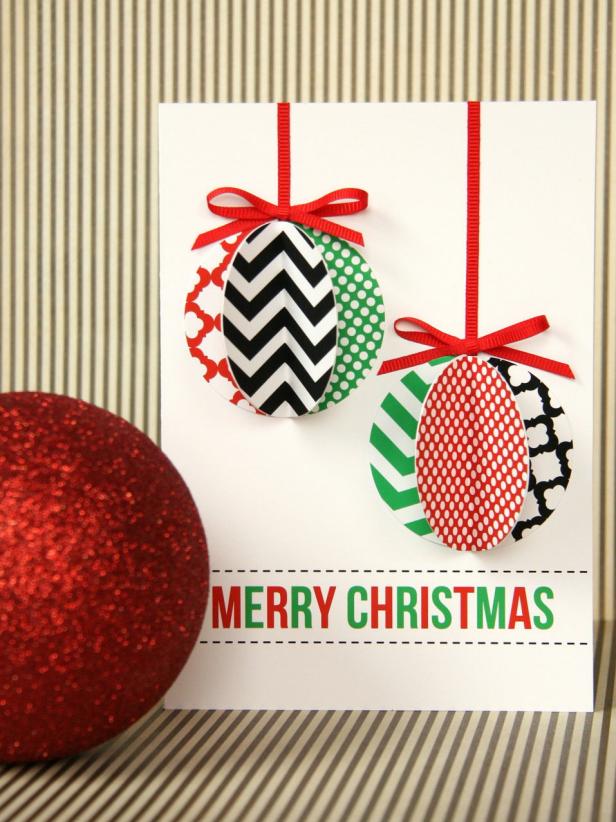
If you visit HGTV again, you’ll learn how to make some modern, 3-D ornaments as well. Grab this inspiration after the jump.
45. Vintage Sheet Music – Beautiful Christmas Cards
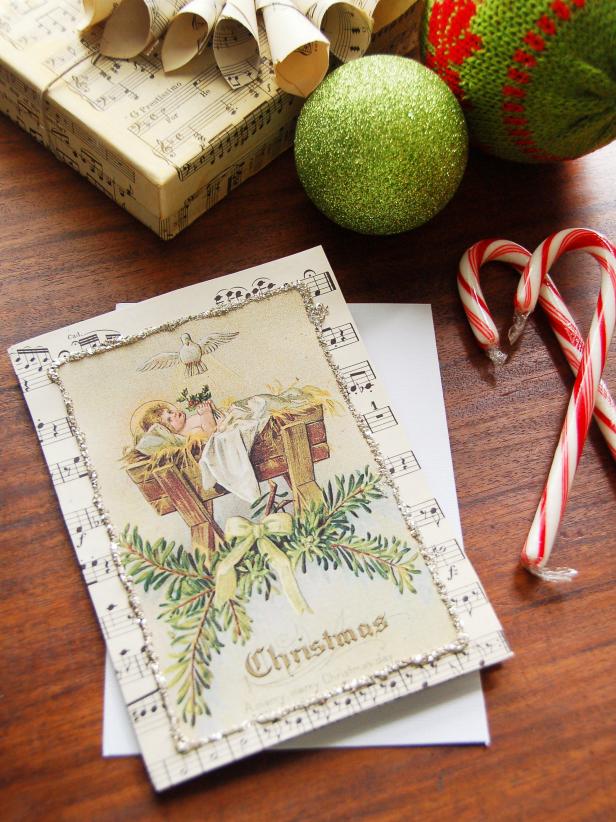
If you have some vintage sheet music hiding in the corners of a closet, then you’ll want to HGTV yet again. And learn how to turn it into a card!
46. Recycled Paper Christmas Card Ideas for Kids
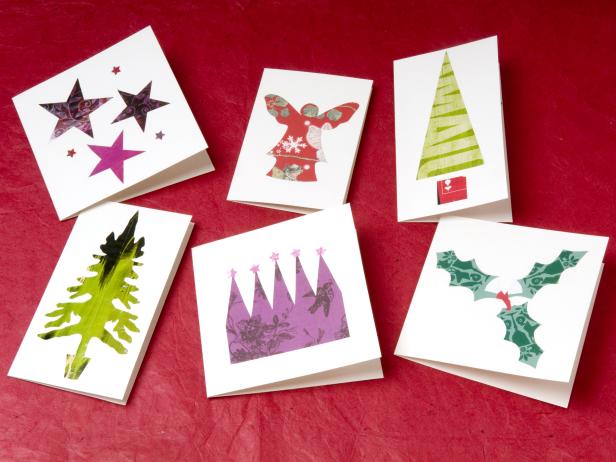
HGTV used all kinds of recycled paper for these designs. From mistletoe to trees, you can do it all.
47. Full Felt Handmade Chrsitmas Cards
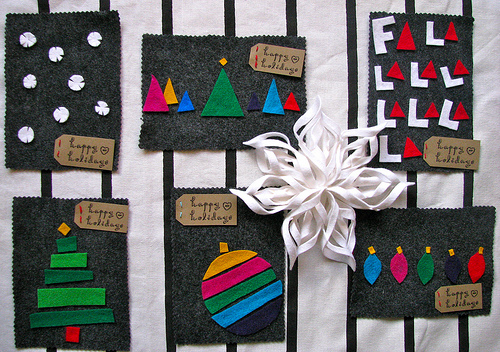
Fully felt cards could be fun too. Learn how to make a totally unique Christmas greeting over at You Are My Fave.
48. 3-D Felt Trees – Make Your Own Christmas Cards
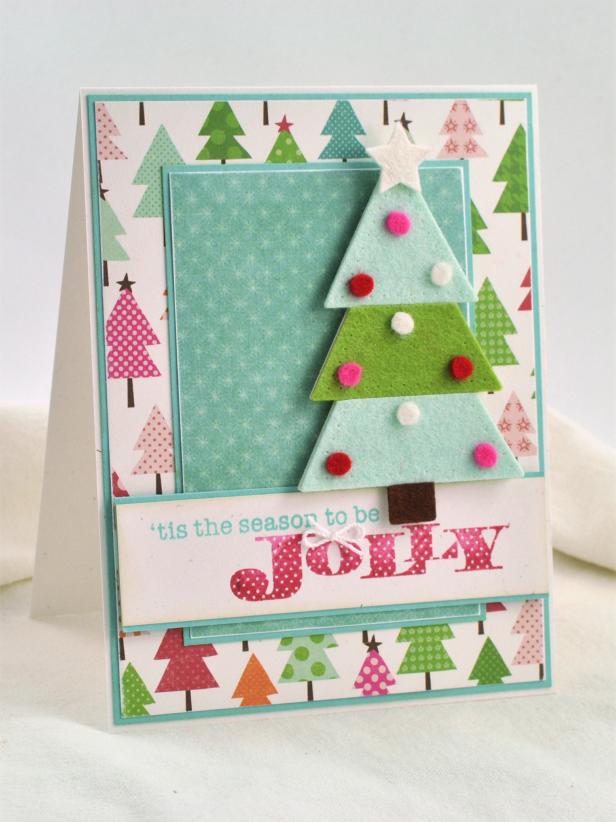
HGTV makes some more 3-D fun with this felt and paper creation. This is one the kiddos will want to help out with and get a bit imaginative.
49. Snow Shakers Cute Christmas Card
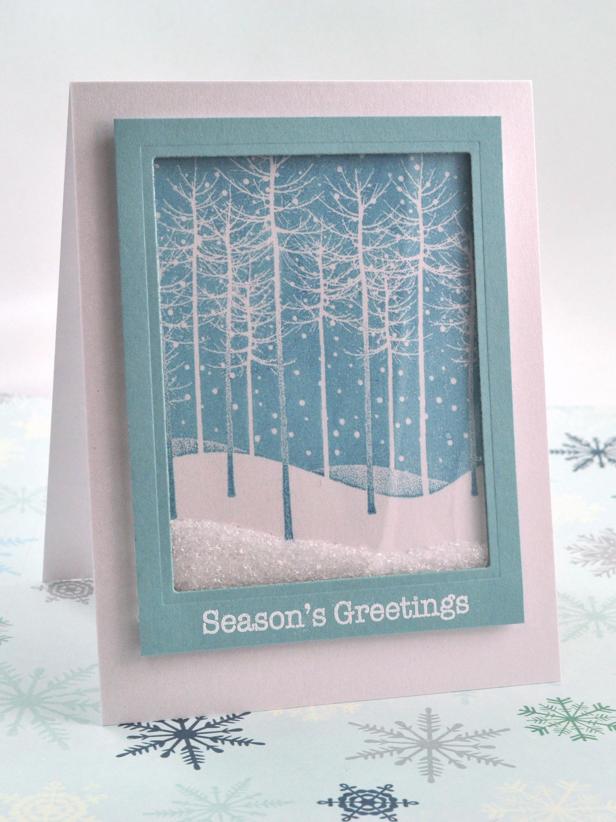
Some snow shaker cards will be fun for family and friends to receive too. Grab the instructions over at HGTV.
50. Paint Chip Trees – DIY Christmas Cards
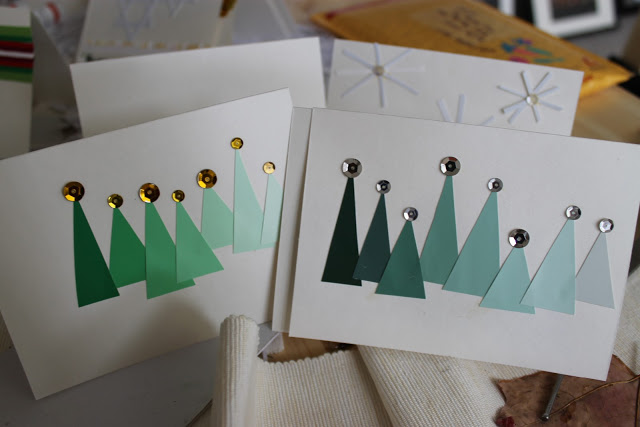
Paint chips will always come in handy when it comes to easy crafting. Check out Beauty and Beard and find out how to turn them into trees!
51. Tiny Wreaths – Handmade Christmas Card Idea
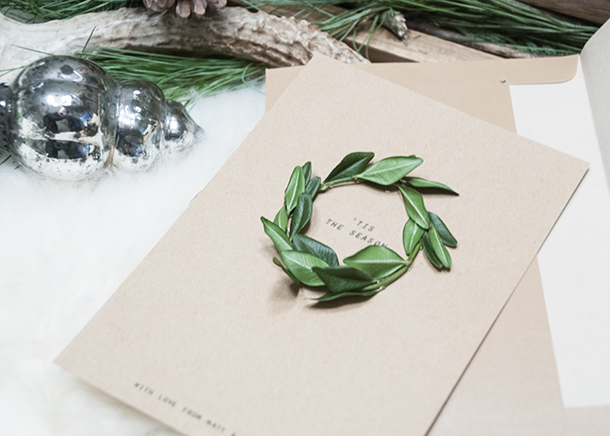
Tiny, textural wreaths are a fun way to decorate your cards as well. Visit Earnest Home Co. for the tutorial.
52. Felt Pennant Cute Christmas Card
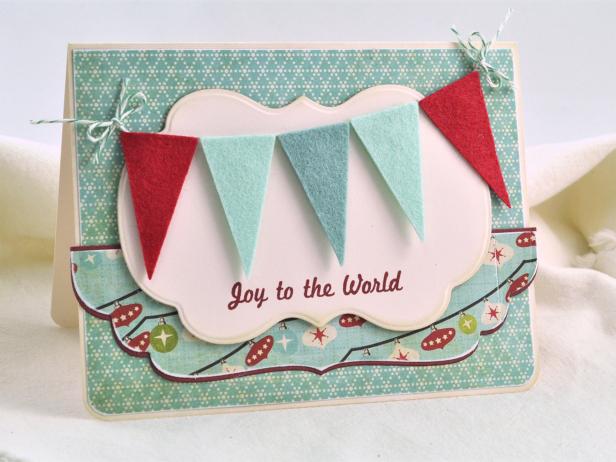
HGTV used felt too with this easy pennant design. It’s so festive and appeals to so many different people and styles.
53. Graphic Trees – Beautiful Christmas Cards
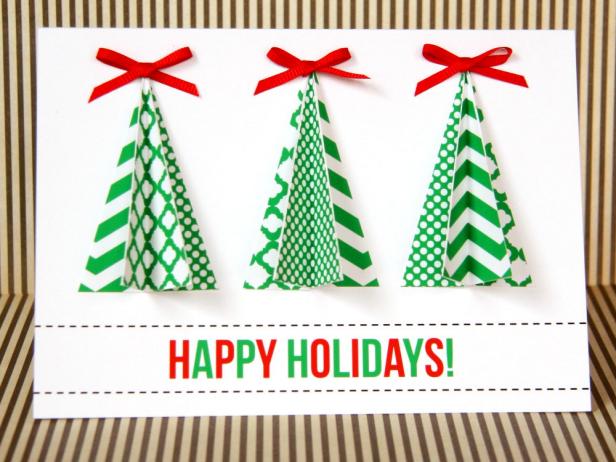
Again, if you’re more contemporary in style, you’ll want to check out these trees from HGTV. They have a 3-D effect too.
54. Torn Paper Santa Christmas Card Idea
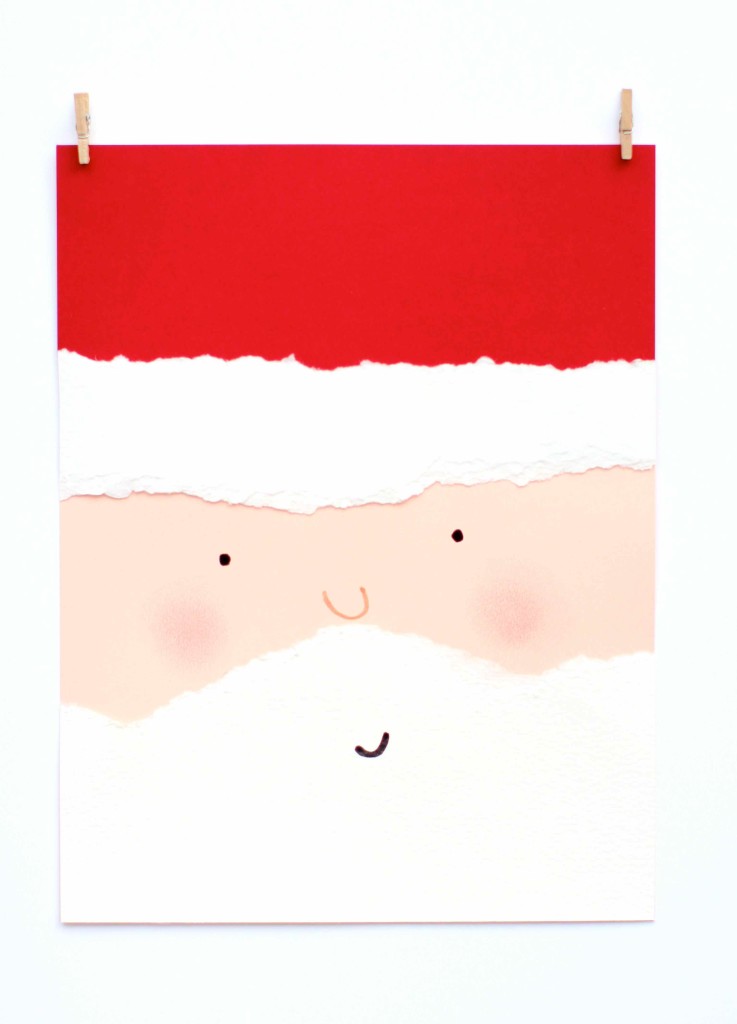
With some torn paper and help from Kate’s Creative Space, these Santas will come to life. We love his little smirk too.
55. Christmas Card Making with Q-Tips
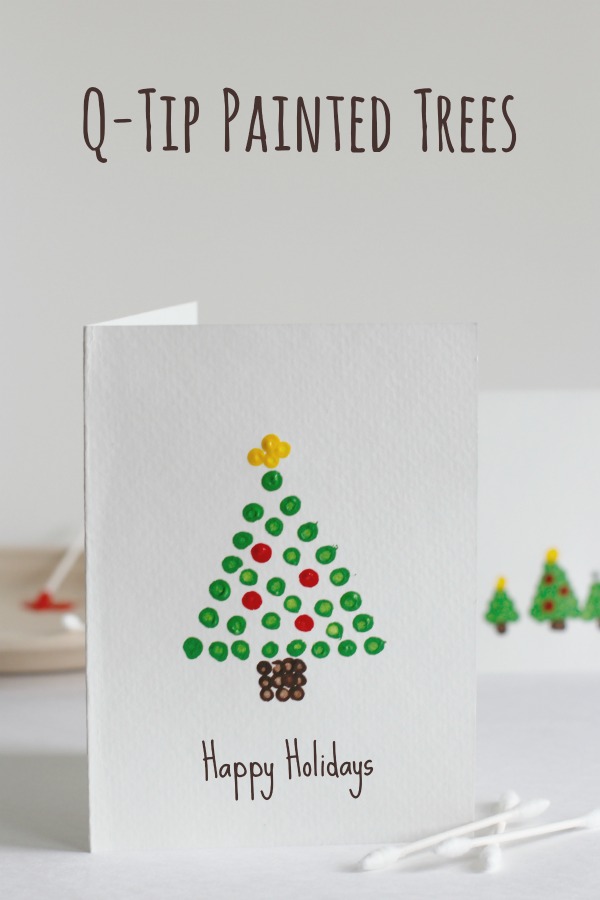
Make and Takes has one of the more kid-friendly crafts on the list. With some q-tips and paint, put the kids to work!
56. Rudolph Silhouette Christmas Card Design
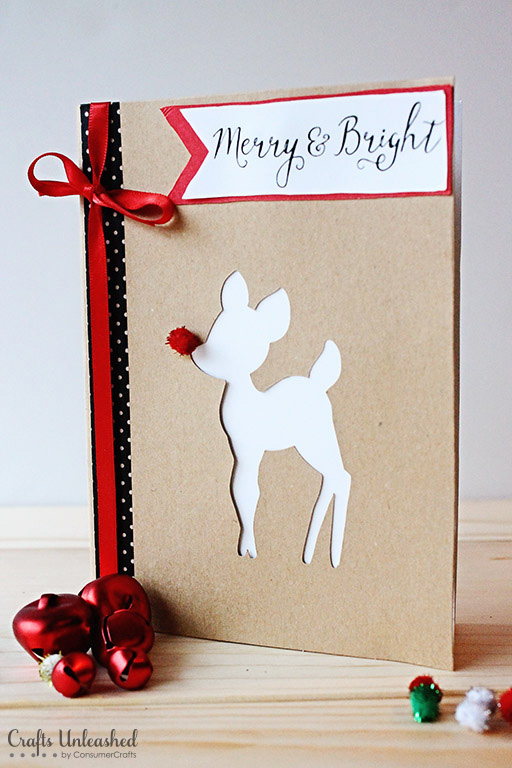
Crafts Unleashed makes a Rudolph silhouette that’s hard not to love. Grab the details and start working on this little cuties this evening.
57. Pipe Cleaner Trees – Christmas Card Idea for Kids
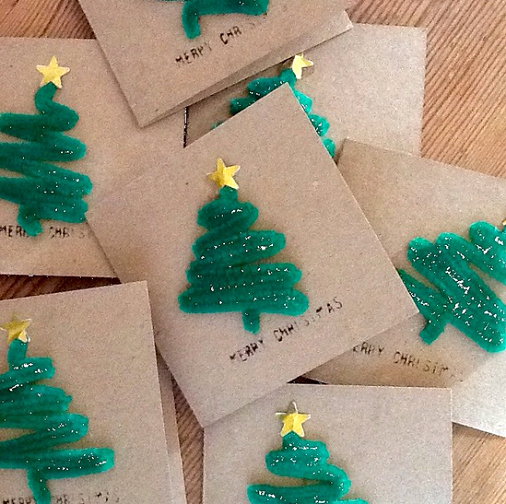
Pipe cleaner will always come in handy with it comes to crafts. And if you visit Crafty Morning you’ll learn how to turn them into fun and festive trees!
58. Button Wreath – Cute Christmas Card Ideas
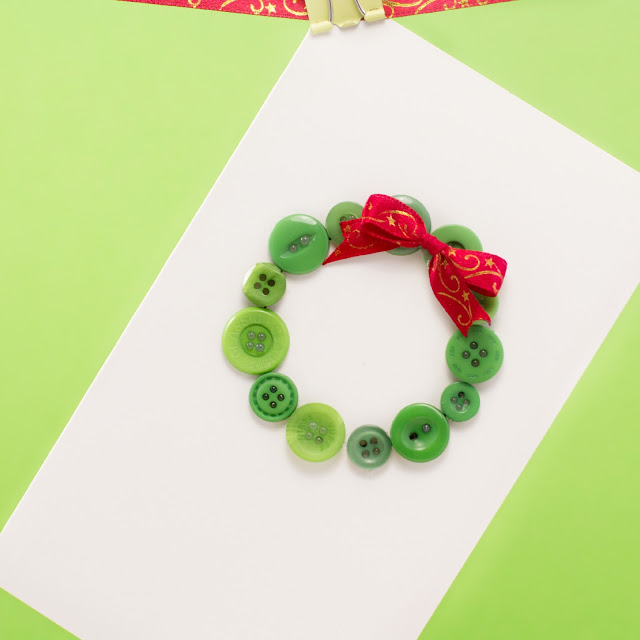
Grab some buttons and create a wreath. This too is super simple but ends up being festive and fun with help from Hopeful Honey.
59. Die Cut Trees – Christmas Card Idea
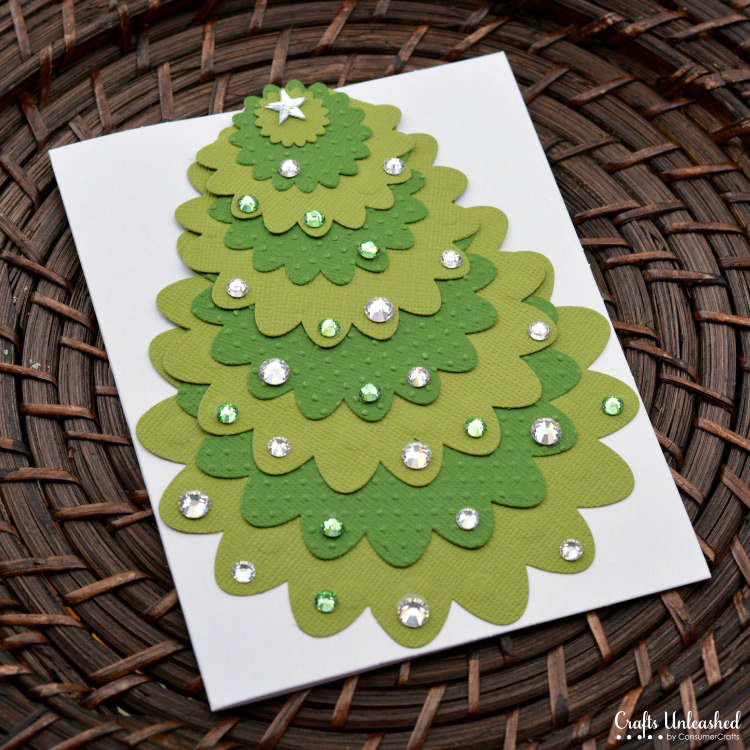
Consumer Crafts shows us how to die cut a bit. We love the layers and the detailing around this tree design, don’t you?
60. Paint Chip Wreaths – Cute Christmas Card Ideas
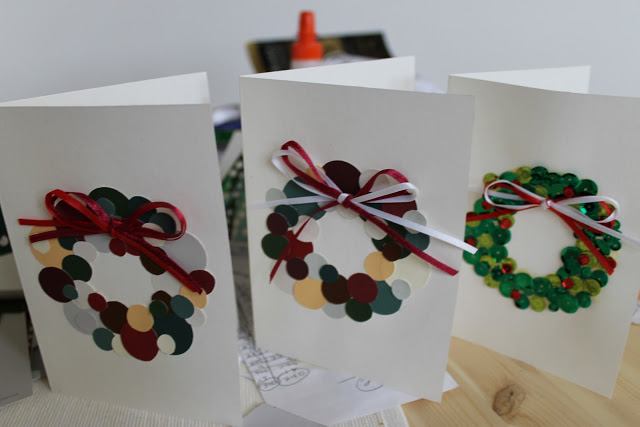
Here’s another way to make some wreaths. Visit Beauty and Beard again and get the scoop on these paint chip versions.
61. Paper Trees – Cute Christmas Cards
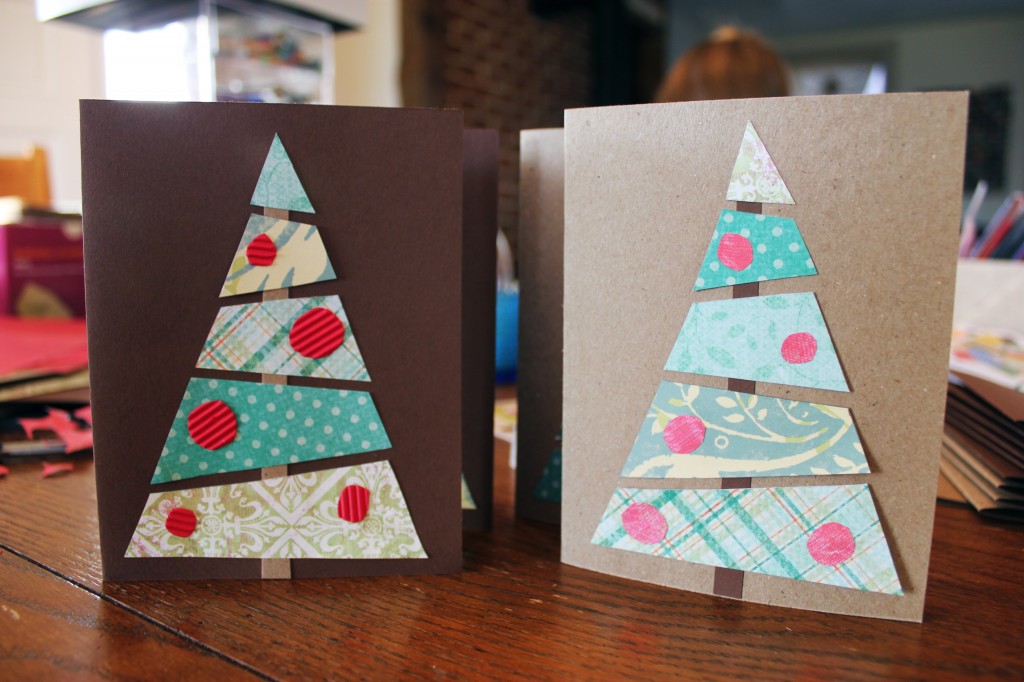
Here’s another way to decorate your card with some trees. All you need is some leftover paper to get yourself started. (via)
62. Fluffy Santa Beards – Christmas Card Design
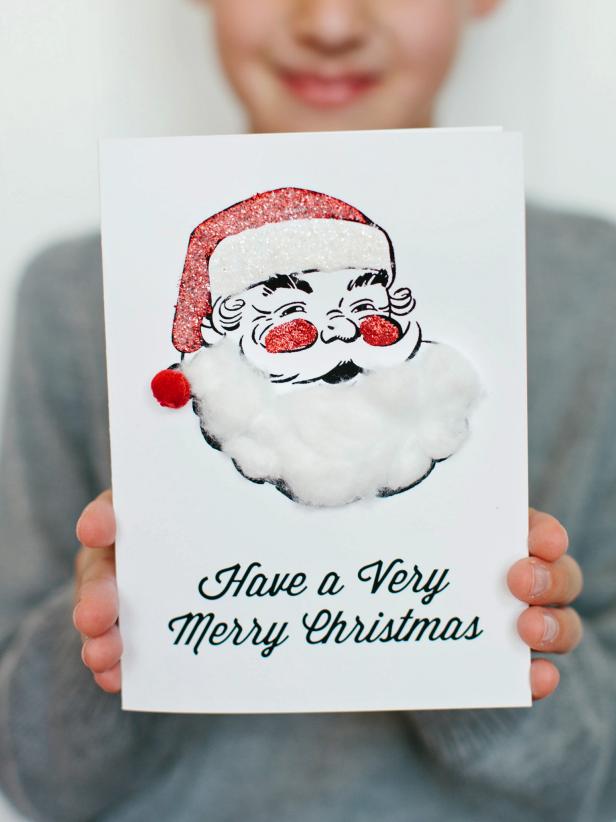
HGTV made some fluffy bearded Santas that are so charming and so sweet. We love the 3-D embellishment here too making it extra fun and family-friendly.
63. Simple Snowman Handmade Christmas Card Idea
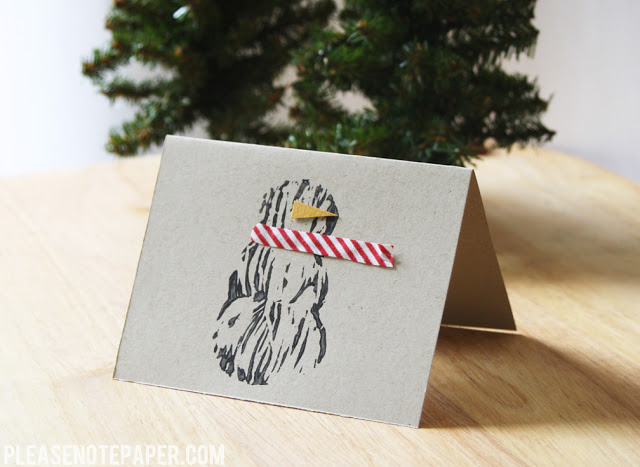
Please Note Paper teaches us how to stamp out a simple snowman as well. It’s a bit more abstract but we love the artistry.
64. Melting Snowmen Handmade Christmas Card
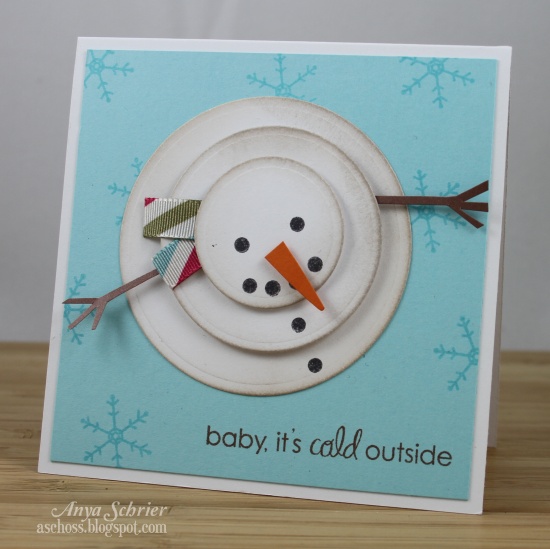
We got a little bit of a giggle from this design. Check out Anya for the details behind this melting snowman.
65. Sweater Bears – Christmas Card Idea Drawing
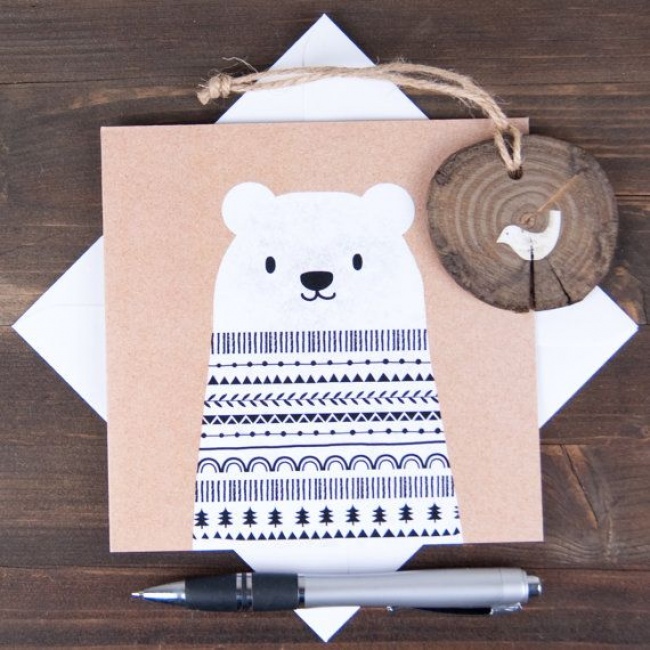
Bright Side had so much great inspiration. But our eyes focused right into this pen-embellished sweater-wearing bear!
66. Newspaper Trees – DIY Christmas Card
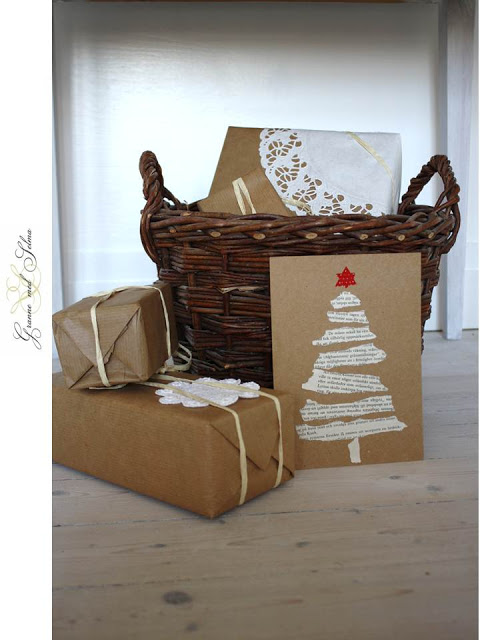
Some old newspapers could come in handy with your designs as well. Tear it up and get started with your trees! (via)
67. Glitter Tape Trees – Christmas Card Idea for Kids
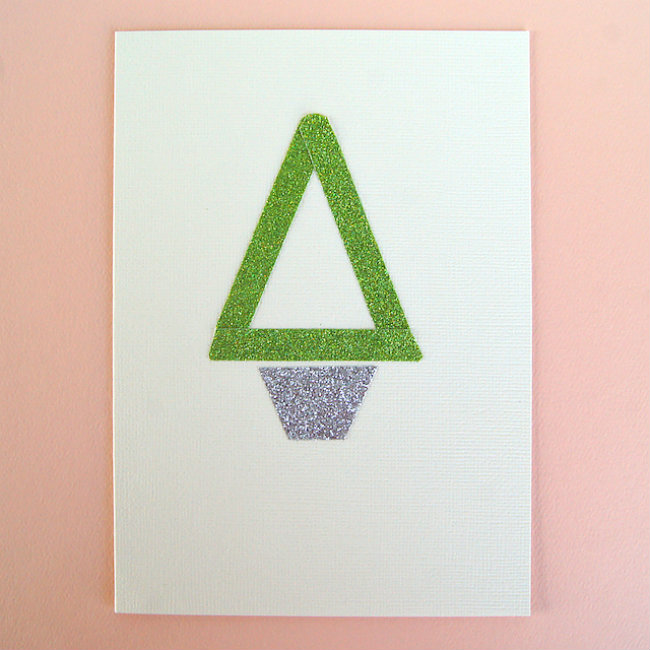
Omiyage Blogs speaks to our sparkle-loving hearts with this design. A tree, an ornament and even some mistletoe could be made with glitter tape!
68. Noel Owls – Christmas Card Idea Drawing
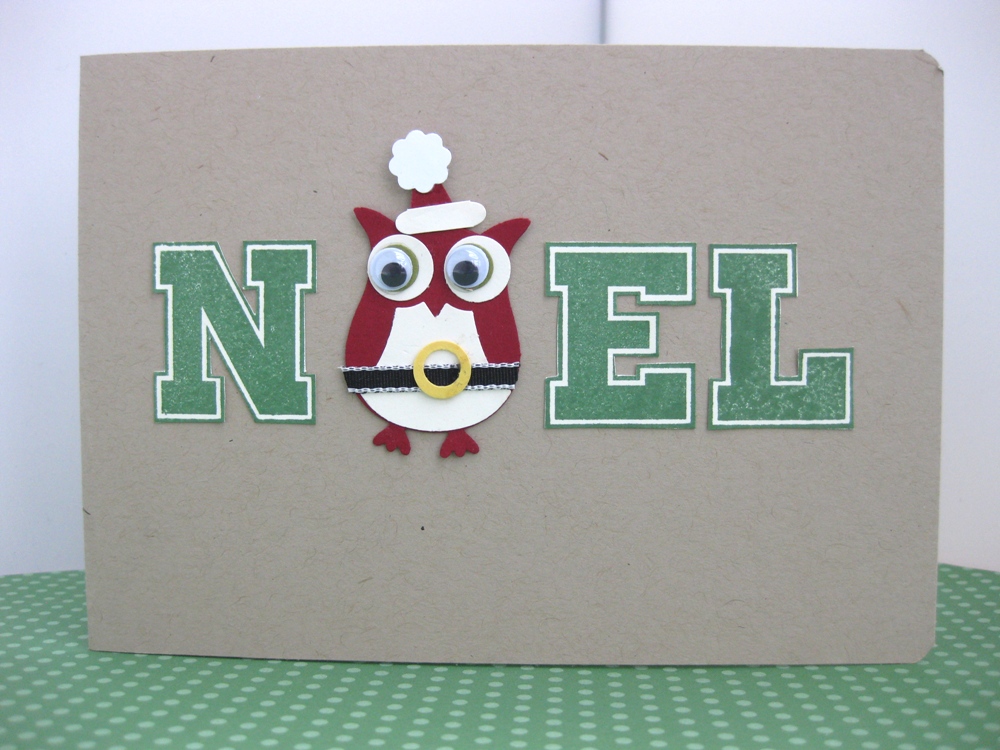
Blue Jelly Stamping made some noel owls that were too charming and adorable not to include on the list. You can get creative here with the styling as well!
69. Sponge-Stamped Tree – Christmas Card Idea for Kids
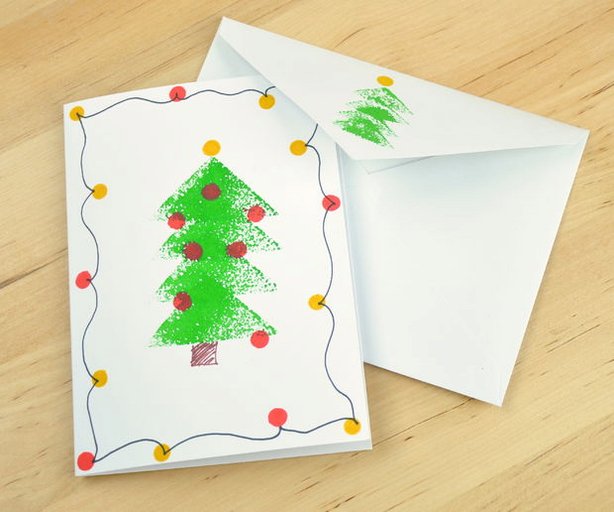
Stamp out your trees with some help from Instructables. This is another one the kiddos can easily get involved with.
70. Cute Christmas Card Idea – Penguins
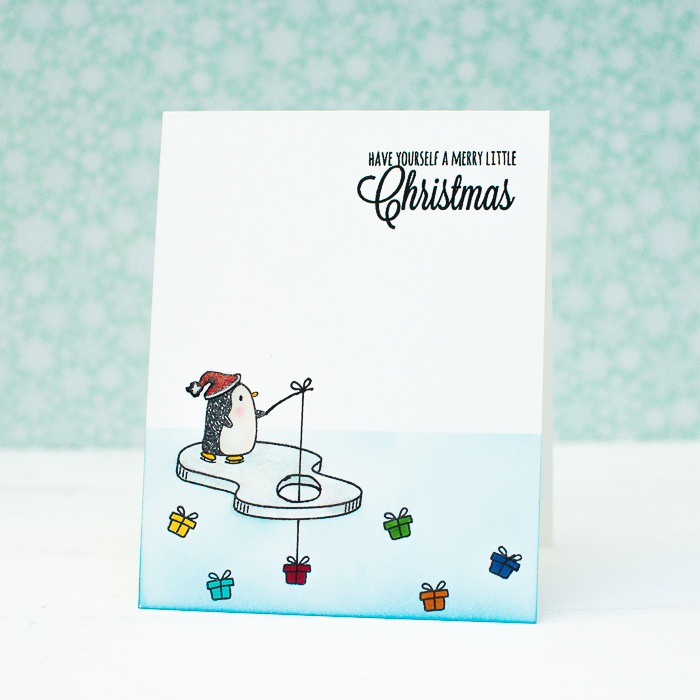
This penguin fishing for presents is just .. too .. cute, don’t you think? Learn about how to recreate the scene over at Mayholic in Crafts.
71. LED Reindeer – Christmas Card Idea
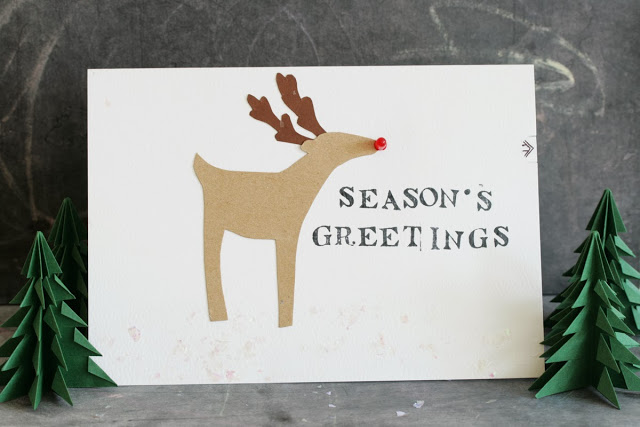
Hideous Dreadful Stinky turned their card into a tiny light show with the LED addition. Rudolph’s nose does glow, so it’s quite fitting.
72. Embossing Powders Christmas Card Idea
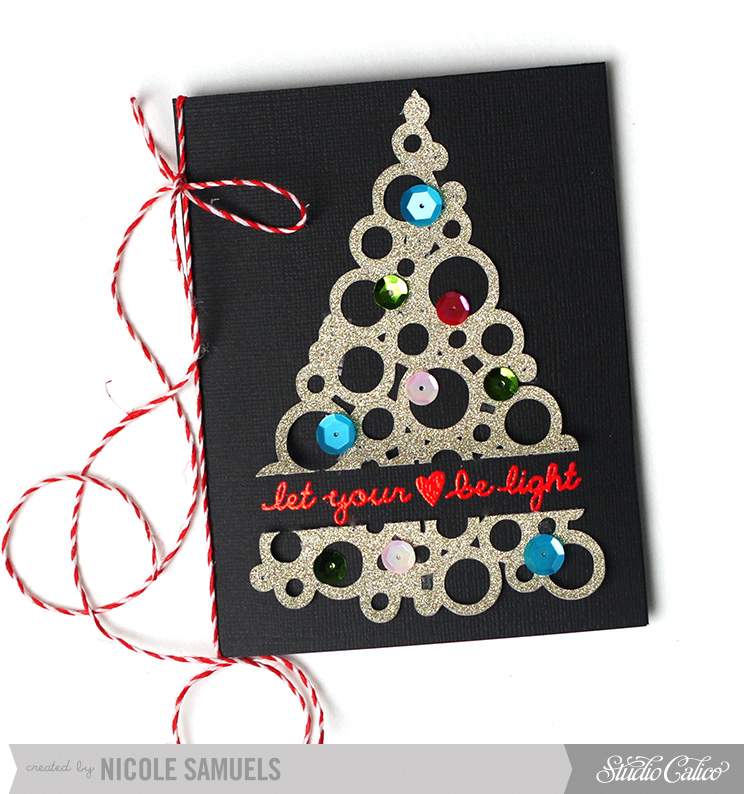
If you visit Nicole Samuels you’ll learn how to use some embossing powders! And the finished products are absolutely stunning.
73. Glitter Frame Photos – Make Your Own Christmas Card
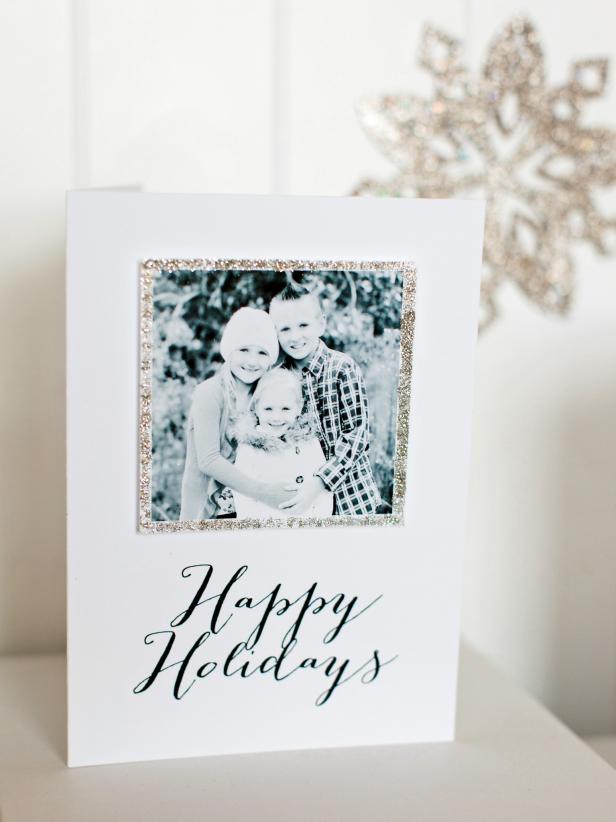
Frame out some of your family photos with some glitter. Grab the inspiration and the instruction over at HGTV.
74. Button Ornaments – Homemade Christmas Card
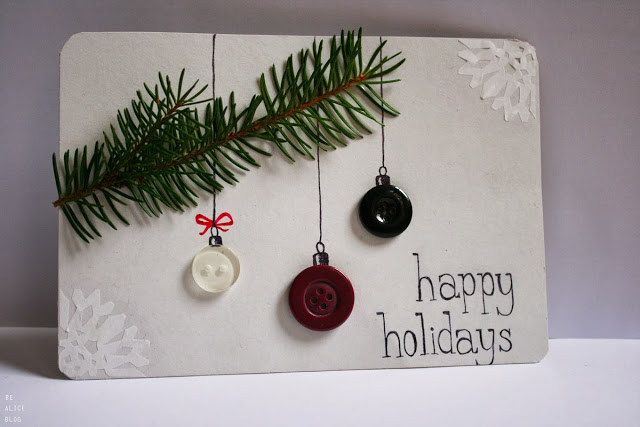
You can take some buttons and make ornaments out of them too. Visit Be Alice for inspiration behind this happy little design.
75. Embossed Letters – Cute Christmas Card
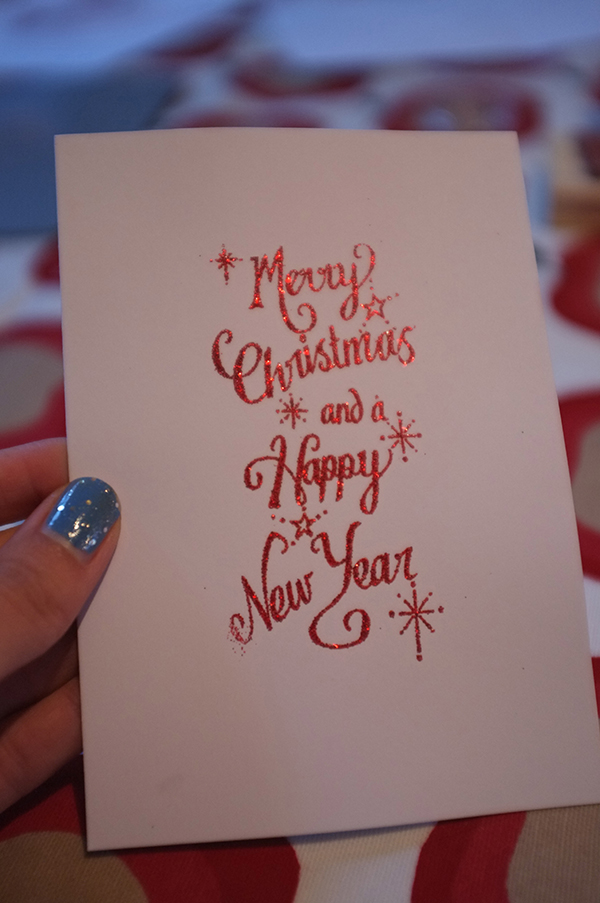
And finally, here’s more embossing inspiration and know-how. You’ll need to visit Florence Finds for this one though.
Final Thoughts on Christmas Cards
Handmade and custom Christmas cards enable you to make a personal statement about your feelings. This can be done by using an appropriate font or by choosing the materials that match the sentiments you wish to express, whether it’s paper, felt, plastic, or another kind of material.
It is also essential to know how many people will receive the card since it will give you a good idea of how much time you need to make all cards. Besides, making a Christmas card does not need to involve a lot of effort or time. The most challenging part is finding the right idea that conveys emotions related to winter, Christmas, family, or traditions.
We hope that this article has inspired you. Let us know in the comment section below about which Christmas card idea you like best! You can also share more original ideas with us that you feel deserve to be on this page.
The post DIY Christmas Cards: 75 Christmas Card Ideas to Inspire You appeared first on DIYs.com.
