
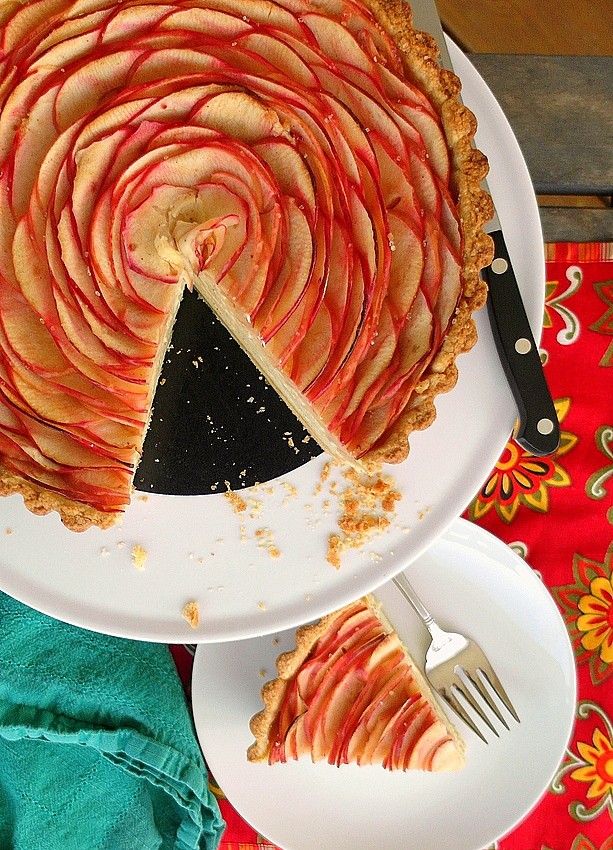
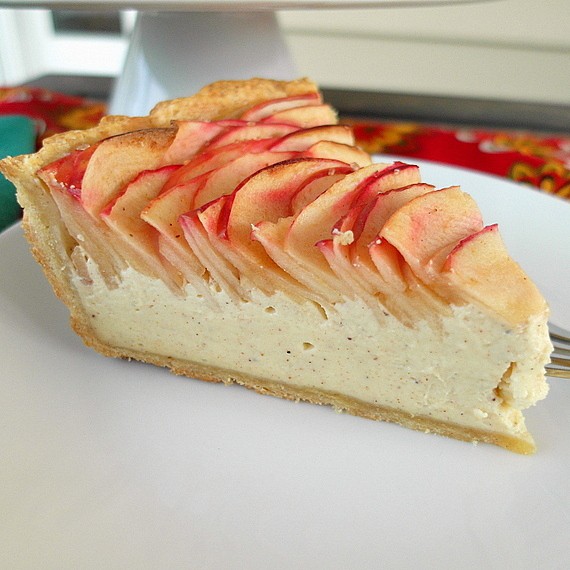
I hope you enjoy this Apple Chai Cheesecake Tart, friends! A delicious combination of chai-flavored cheesecake with a stunning rosette of apples on top.
For more cheesecake resources and recipes, please check out my Cheesecake Recipes page.
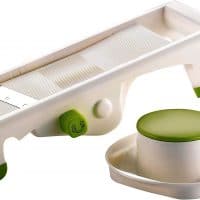
Thank you so much to the fine folks at Paderno USA for sending me the deep dish tart pan and the mandolin.
Recipe Inspiration
Yall. Would you just look at this guy?! I will give you a moment.

I mean. Right?
When I received my tart pan and mandolin from the great folks at Paderno USA, I absolutely knew I wanted to make an apple tart with wee, thin apple slices in the shape of a big old rose.
And then I thought it might be nice to have a cheesecake layer underneath.
Because fruity plus creamy equals delicious.
Also, I own this wonderful chai baking spiceyou may have seen me use it in the Vegan Vanilla Chai Pancakesand I wanted to use it again.
So I thought apples and chai spices would be a great pairing. And I was right!
The good news is this is a delicious idea. And considering how schmancy this chai cheesecake tart looks, I promise its not too hard to make.
Lets Talk Mandolins
You know what makes it easier to slice all the apples into wee thin crescents, dont you? The mandolin, for one.
I have been giving the Paderno Mandolin Vegetable Slicer a real workout since I received it, and it makes more than short work of the apples.
Thereisa bit of a learning curve with it. For example, how to cut the apples so I get the crescent slices I wanted.
When I slice by hand, I cut the apple in quarters, cut out the core on a diagonal and then make thin slices down.
I tried that with the mandolincutting in quartersand found it didnt work well. I ended up getting all sorts of odd-shaped slices.
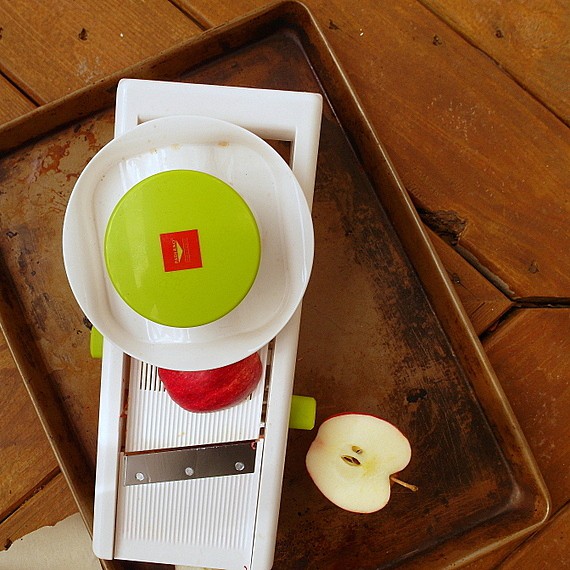
How To Slice Apples for This Tart
What did workand worked very wellwas this:
- cut the apple in half
- core it with a melon baller
- shave off thin donuts (because of the hole in the middle)
When I was done with that half, I just stacked them all up and cut them in half. Magical crescents!
The Mandolin Learning Curve
If youve been using a mandolin for a long time, you will already understand how to both keep the food on the food holder/pusher thing/guard while applyingthe right amount of pressure to slice.
This was my first time using a mandolin though, and it took me awhile to get it right. Once I got into the groove, it was all good, but if youre new to using one, understand it might take you awhile to find your rhythm.
I would call this particular mandolin a starter mandoline.
- It will cut waffle fries and regular fries.
- It will let you julienne.
- It slices apples so thinly you can roll them up like paper.
Paderno does carry another couple of mandolins for serious professionals, but they are much moreexpensive.
If you try out this one and decide that you love working with a mandolin rather than a motorized food processor, you might consider purchasing one of the more advanced models, either the Paderno Japanese Mandolineor the Mack Daddy Bron Stainless Steel Mandoline which boasts 38 blades and is truly a manual food processor in every sense of the word.
The one I have, the Mandolin Vegetable Slicer, is great because its a gateway mandolin (yeah, I just made that up) made of ABS plastic and is top-rack dishwasher safe.
Its equipped with blade guards and covers which minimize the risk of slicing off a part of yourself. Make no mistakethese blades are sharp.
I wouldnt let a child use it, even with supervision, and I certainly gave it the respect it deserved while I was using it.

Things to Love About a Deep Dish Tart Pan
And the tart pan, the Deep Non-Stick Fluted Mold, is super sturdy.
I love the high sides which allow me to make a pie-ish tart. Or a tart-ish pie rather than simply one or the other.
Its very heavy-duty and is definitely made for business.
Ill be handwashing it, and I know it will last me forever.
How to Make This Chai Apple Cheesecake Tart
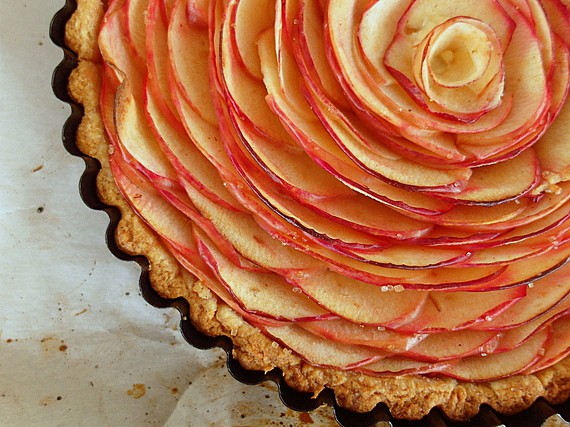
The Crust
The crust is a pte sucre, or sugar dough.
Its enriched with some egg yolk and cream, and I added chai baking spice to it as well.
It bakes up very well with beautiful color all around, thanks in part to the dark finish on the tart pan. Its also very easy to slice.
You can see from the photos that the crust bakes up crumbly and not flaky. Thats because you completely mix the butter into the flour and sugar.
When all the flour gets coated with fat, you dont get gluten formation and you end up with a very short crust. (Short here means short gluten strands and a sandy, crumbly texture. Because the tart is 2 high!)
The Filling and Apples
The cheesecake is incredibly delicious all on its own, andthe apples add their subtle perfume and texture while also giving you that wow factor.
The cheesecake batter is a pretty straightforward cheesecake batter. It is enriched with some sour cream for a bit of tang, and it is also flavored with the chai baking spice, a bit of lemon zest, and vanilla.
Since it takes awhile to slice all the apples, I recommend you add the slices to a bowl of ice water with either a little lemon juice in it or some Fruit Fresh. This will keep your apples from browning as you slice and then assemble the cheesecake tart.
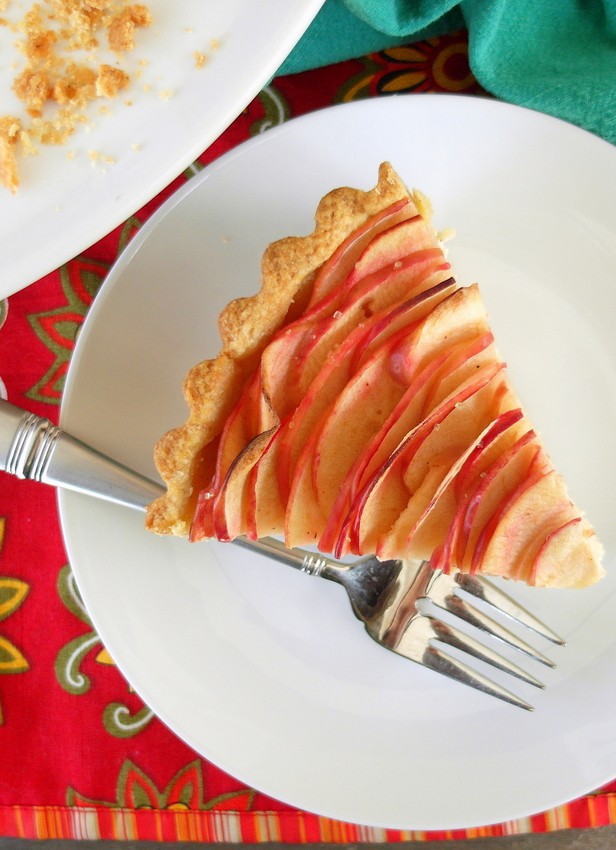
What Is the Best Way to Slice This Tart?
I have to admit to you that I was a bit concerned about slicing it. I knew the apples would be soft enough, but since I left on the peel, I thought perhaps I had made an Error.
The tart slices cleanly using a serrated blade.
Just cut in only one direction (from the inside out), and very lightly until you get through the peels.
Do not saw back and forth with your knife. Just apply light pressure and draw the knife from the inside of the pie outward.
I made multiple passes with very light pressure to make sure I didnt mess up the apples. And: success!
Do not try to cut this guy with a regular dinner knife or even a sharp straight-edged knife.
Use a serrated blade.
Other than that pretty major caveat, the tart is pretty straightforward to make.
I have to tell you guys, this tart is seriously good.
It looks very intricate, but the mandolin makes short work of the apple slices. All the placing takes is a bit of patience. Your kids can even help with this part (and everything else except for the mandolin slicing, for that matter).
This is a showstopping dessert that both looks and tastes fantastic. For real.
What To Serve with This Dessert
For me, coffee is a go to beverage with most desserts. Why not try something a little out of the norm and make some of this rich, creamy beaten coffee? Its made with instant coffee, and it is absolutely delicious. Promise.
Of course, some warming masala chai would also be a perfect accompaniment.
A Note About Measurements
NOTE: Most of my recipes are written by weight and not volume, even the liquids.
Even though I try to provide you with volume measurements as well, I encourage you to buy a kitchen scale for ease of measuring, accuracy, and consistency.
This is the scale I use, love, and recommend:
I really hope you love this apple cheesecake tart, you guys! If you make one, please share a photo with me, either in the PCO Facebook Group or on instagram by tagging @onlinepastrychef and using hashtag #pcorecipe. Thanks, and enjoy!

Apple Chai Cheesecake Tart
A crumbly pate sucre crust filled with rich, creamy chai spice flavored cheesecake and topped with a rosette of thinly sliced apples. An elegant yet easy dessert for any special occasion.
Ingredients
- Pate Sucre or your favorite pie crust recipe
For the Cheesecake Filling
- 2 8 oz blocks cream cheese, softened
- 5 oz granulated sugar (about 3/4 cup)
- 1/4 teaspoon kosher salt
- zest of 1/2 lemon
- 1 teaspoon chai baking spice
- 1/2 teaspoon vanilla extract
- 3 oz sour cream at room temperature (about 1/3 cup)
- 2 large eggs at room temperature
For the Apples
- 6-7 medium-sized baking apples, (I used Gala)
- 2 Tablespoons sugar in the raw, (regular old sugar is fine too)
- small pinch fine sea salt
- 1/4 teaspoon chai baking spice
Instructions
For the Pate Sucre
This is the pate sucre recipe I use. You will need 1/2 batch. If using your favorite pie crust recipe, remember to add the chai spice to the dry ingredients.
- Add 1/2 teaspoon chai baking spice to the flour and sugar and proceed as written
- You'll only be adding 1 tablespoon of cream (or half and half) to the dough. You may need a bit more. Just give it time to mix in on low speed before adding more. Squeeze some dough together in your hand. Even if it looks dry, if it holds together nicely when squeezed, you're done.
- Do not pre-bake/blind-bake. The original directions call for freezing before baking. That step is not necessary for this tart, but do make sure the filled tart pan is well-chilled before pouring in the cheesecake batter.
For the Cheesecake
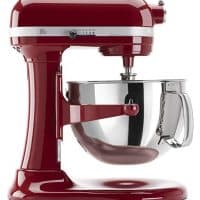
- In the bowl of your stand mixer fitted with the paddle attachment, or in a large bowl with a hand mixer, mix the cream cheese on low speed until smooth. Scrape the bowl and beater as necessary.
- Add the sugar, salt, lemon zest, chai baking spice and vanilla extract and continue to mix until well incorporated and smooth.
- Mix in the sour cream completely followed by the eggs, one at a time. Scrape the bowl and beater as necessary.
- Pour the cheesecake batter into the pan. It will only fill the crust about halfway. The rest of the room is for the apples.
- Place the filled crust in the fridge while you deal with the apples.
For the Apples
- Leave the apples unpeeled unless you can't deal with apple peel.
- Wash the apples well and then slice them very thinly into crescents using either a very sharp knife or a mandolin.
- As you slice the apples, put them in a bowl of cold water with some lemon juice added to them. This will keep them from browning.
- Once all the apples are sliced, remove them from the bowl and pat them dry. They don't have to be bone dry. You just don't want them to drip all over everything.
- Start placing the apples around the perimeter of the crust. Stand them up on their cut ends so the peel is up. You can poke them down into the cheesecake filling just a bit. It will hold them in place. The more thinly you can cut them, the easier it will be to let them curve gently to follow the curve of the crust.
- Place the apple slices one by one, each overlapping the previous one by about half. Keep placing apples in a continuous spiral in towards the center. Make sure the last few apples are very thinly sliced and flexible so you can roll the very last one up into a cylinder to act as the center of the "flower."
To Finish and Bake
- Preheat the oven to 375F.
- Mix the raw sugar (or plain sugar) together with the salt and the chai baking spice.
- Sprinkle this evenly over the apples.
- Place the tart pan on a baking sheet and bake in the center of the oven for 45 minutes to an hour until the center of the tart reads between 160-165. The filling will be slightly puffed and when you gently shake the pan, it won't "slosh" but will jiggle in the center 3-4" or so.
- Turn off the oven and open the door for a few seconds to allow some heat to escape.
- Close the door and let the tart sit in the oven for about thirty minutes.
- Prop the door open and let cool for another hour or so before removing the tart to a cooling rack to finish cooling.
- You can serve it now, but it's fairly delicate. Slice it very carefully with a serrated bladed, cutting only from the inside out (no sawing!) until you've cut through the apple peels. Then, you can saw a little and complete your cuts.
- You can also refrigerate the cake. Just allow it to sit out for about 30 minutes before slicing (again--no sawing!) and serving.
Notes
If this all seems like a daunting amount of work, you can split it up over a couple of days.
- Make the dough and line the pan. Wrap in plastic wrap and refrigerate for up to 24 hours.
- Make the cheesecake filling the next day and refrigerate it in a bowl.
- When you're ready to bake, preheat the oven, pour the cheesecake batter into the tart shell, slice up the apples and arrange them Fetchingly on top of the batter.
- Sprinkle on your spiced sugar and bake.
Recommended Products
As an Amazon Associate and member of other affiliate programs, I earn from qualifying purchases.


Nutrition Information
Yield 8 Serving Size 1 sliceAmount Per Serving Calories 510 Total Fat 29g Saturated Fat 15g Trans Fat 0g Unsaturated Fat 11g Cholesterol 118mg Sodium 397mg Carbohydrates 58g Net Carbohydrates 0g Fiber 5g Sugar 40g Sugar Alcohols 0g Protein 8g
Thanks very much for spending some time with me today.
Have a lovely day.
The post Apple Chai Cheesecake Tart | A Showstopping Dessert appeared first on Pastry Chef Online.